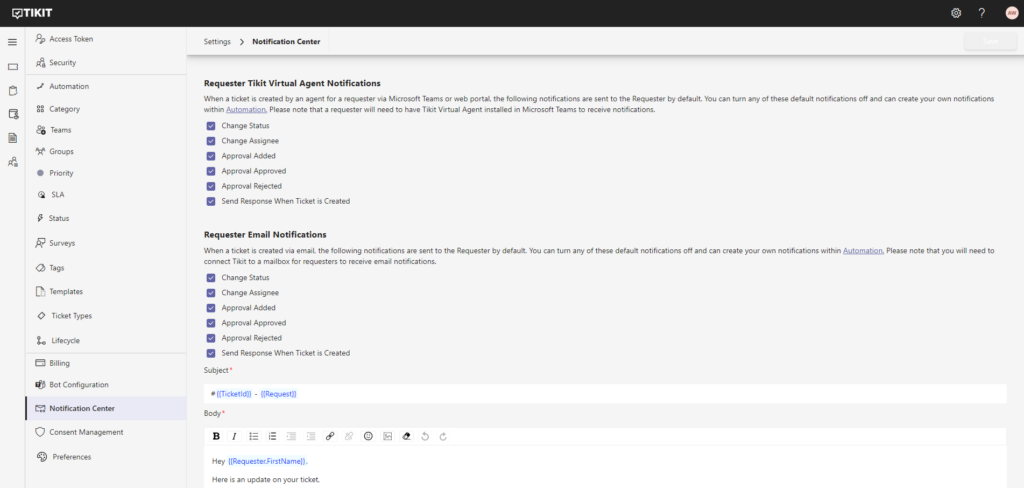
Once in the Tikit web app, select the settings gear in the header, then select Notification Center.
Below, you can find the list of all notifications that can be sent to a Requester by default when toggled on:
Change Status: Whenever the status is changed on a ticket, the requester will receive a notification via the Virtual Agent / Email
Change Assignee: Whenever the assignee is changed on a ticket, the requester will receive a notification via the Virtual Agent / Email
Approval Added: Whenever an approval is added to a ticket, the requester will receive a notification via the Virtual Agent / Email
Approval Approved: Whenever an approval is approved, the requester will receive a notification via the Virtual Agent / Email
Approval Rejected: Whenever an approval is rejected, the requester will receive a notification via the Virtual Agent / Email
Send Response When Ticket is Created: Whenever a ticket is created, the requester will receive a notification via the Virtual Agent / Email
Automations
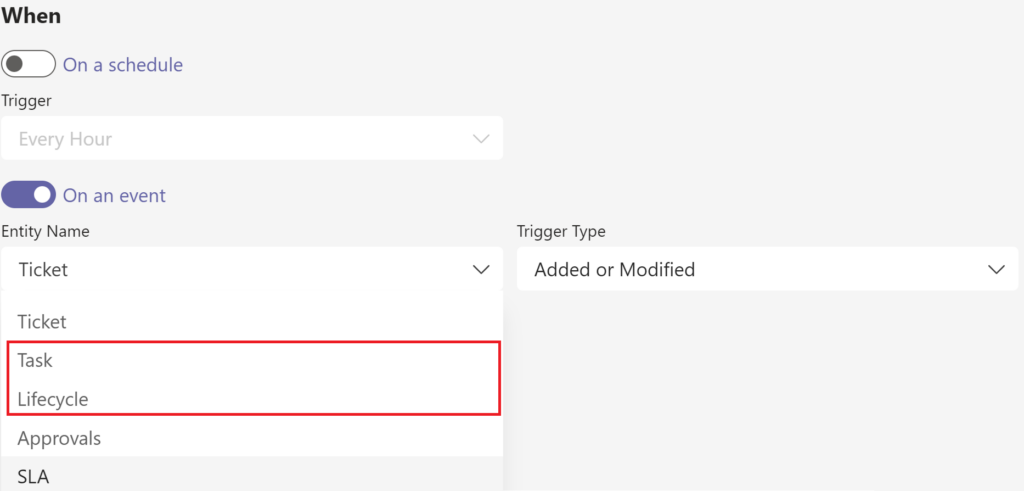
You can create Automations “On an event” for Tasks and Lifecycles. You have the option to trigger your automation when a Task or Lifecycle has been Added, Modified, or both:
Lifecycles: Trigger an Automation whenever a Lifecycle is added to a ticket using a template, when the Lifecycle is modified on the ticket, or in either scenario. You can also apply filters based on the following properties for Lifecycles:
Status: Filter on if a Lifecycle status is Equal or Not Equal to a value, or if the Lifecycle status has changed
Active Phase: Filter on the string name of the active phase, and if that value is Equal to, Contains, Starts with, or Ends with a given value
Phase Name: Filter on any Lifecycle phase name, and if that value is Equal to, Contains, Starts with, or Ends with a given value
Title: Filter on the title of a Lifecycle, and if the title is Equal to, or if the title is Null
Tasks: Instead of filtering for the entire Lifecycle, you can filter for a specific task within a Lifecycle. Specifically, you can filter based on whether a task has been:
Added: You can filter on if a task has been added to the ticket as part of a Lifecycle
Modified: You can filter on if a task has been modified in any way as part of a Lifecycle
You can also trigger an automation on the Template property, with the following evaluation types and operators:
Applied: You can filter on if a template has been applied to a ticket
Changed: You can filter on if a template has been changed on a ticket; you can also filter on if a template was changed from one template to another, or changed to another template
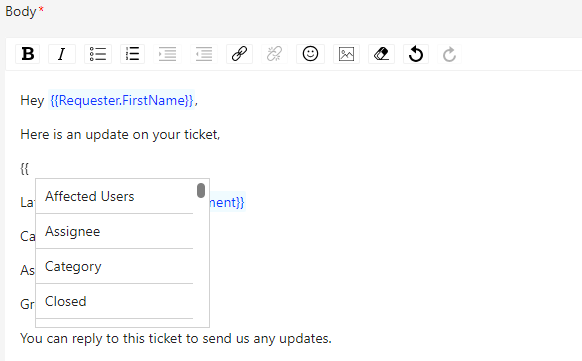
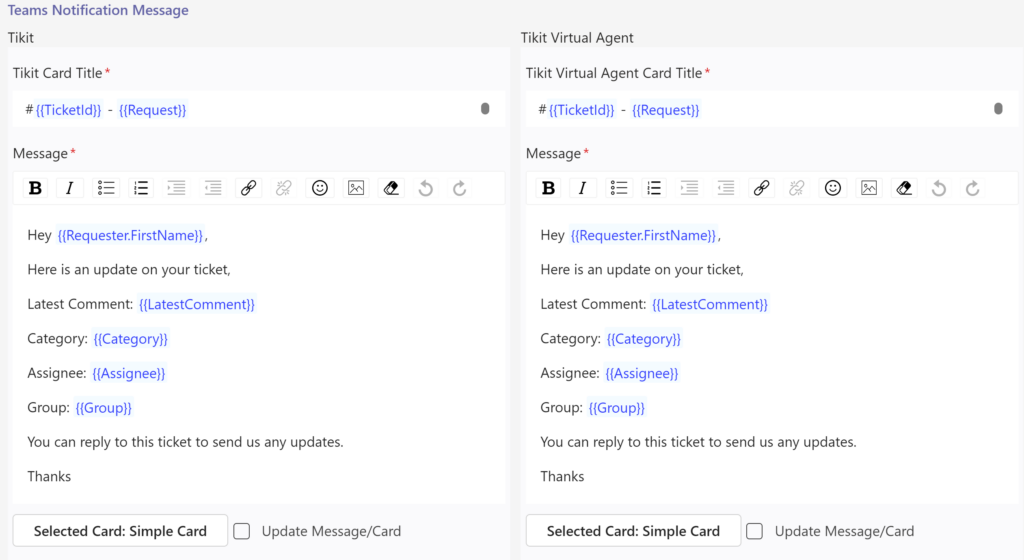
Notification Variables
Variables are represented by a friendly name that differs slightly from the name presented in the dropdown menu. After typing “{{“, you’ll be able to scroll through that menu to select variables rather than having to type them all individually. Below you can find a list of all the variables included in the dropdown:
AffectedUsers: The affected user(s) on a ticket
Assignee: The assignee(s) on a ticket
Category: The category a ticket belongs to
Closed: A true or false value for the closed status of a ticket
Collaborators: The collaborator(s) on a ticket
CreatedDate: The date the ticket was created
DueDate: The date (if assigned) the ticket is due to be completed
IsMerged: A true or false value if the ticket has been merged with another ticket
ModifiedDate: The date the ticket was last modified
Priority: The numerical priority value of the ticket
RelatedTickets: A list of the ticket numbers (if applicable) to the current ticket
Requester: The requester(s) on a ticket
ResolutionDate: The date the ticket is resolved
Source: The source the ticket originated from
Status: The status of the ticket
Tags: The tags applied to the ticket
Team: The team the ticket is assigned to
TicketType: The type the ticket belongs to
AgentURL: Returns the URL path to the ticket for agents (web.tikit.ai/tickets/###)
Group: The group of the assignee on the ticket
LatestComment: Returns the most recent comment on the ticket
Request: Returns the request (title) of the ticket
Requester.FirstName: Returns the first name of the requester
Requester.LastName: Returns the last name of the requester
RequesterURL: Returns the URL path to the request for end users (web.tikit.ai/requests/###)
TemplateName: The name of the template applied to the ticket
TicketID: The ticket number
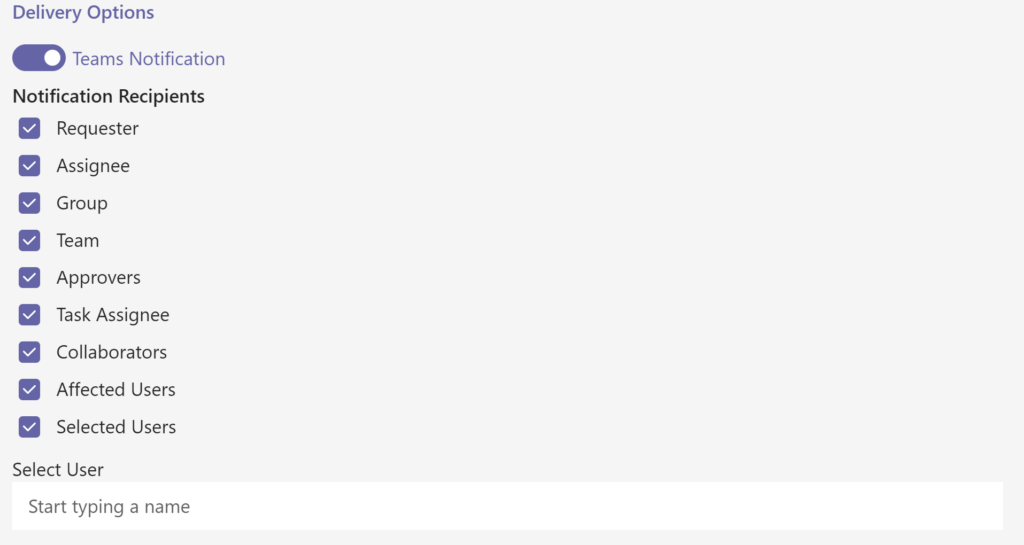
Teams Notification Delivery Options
Requesters: The Virtual Agent will notify the requester(s) on a ticket when the automation is triggered
Assignee: The Tikit app will notify the assignee(s) on a ticket when the automation is triggered
Group: The Tikit app will notify the group a ticket is a part of when the automation triggers
Team: The Tikit app will notify the team a ticket is a part of when the automation triggers
Approvers: The Virtual Agent will notify the approver(s) on a ticket when the automation triggers
Task Assignee: The Tikit app will notify the task assignee(s) on a ticket when the automation triggers
Collaborators: The Tikit app will notify the collaborator(s) on a ticket when the automation triggers
Affected Users: The Virtual Agent will notify the affected user(s) on a ticket when the automation triggers
Selected Users: The Virtual Agent will notify the specified user(s) on a ticket when the automation triggers
You can modify how the Tikit app and the Virtual Agent send notifications. As shown below, you can adjust these notifications individually:
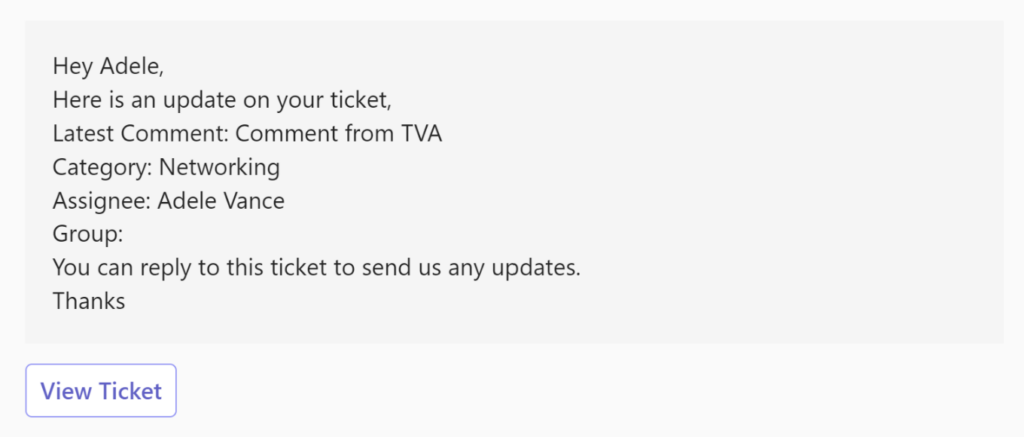
Below is an example of what the Teams notifications look like, including how variables with no value appear:
How to view Email Connector setting
Connect Tikit to an M365 mailbox. All emails sent to the connected mailbox will automatically open new tickets in Tikit. Note that connecting a shared mailbox is supported to avoid having to use an additional M365 license.
Connect each Team to a mailbox within the Teams section of Tikit. All emails sent to the connected mailbox will automatically open new tickets in Tikit. Note that connecting a shared mailbox is supported to avoid having to use an additional M365 license.
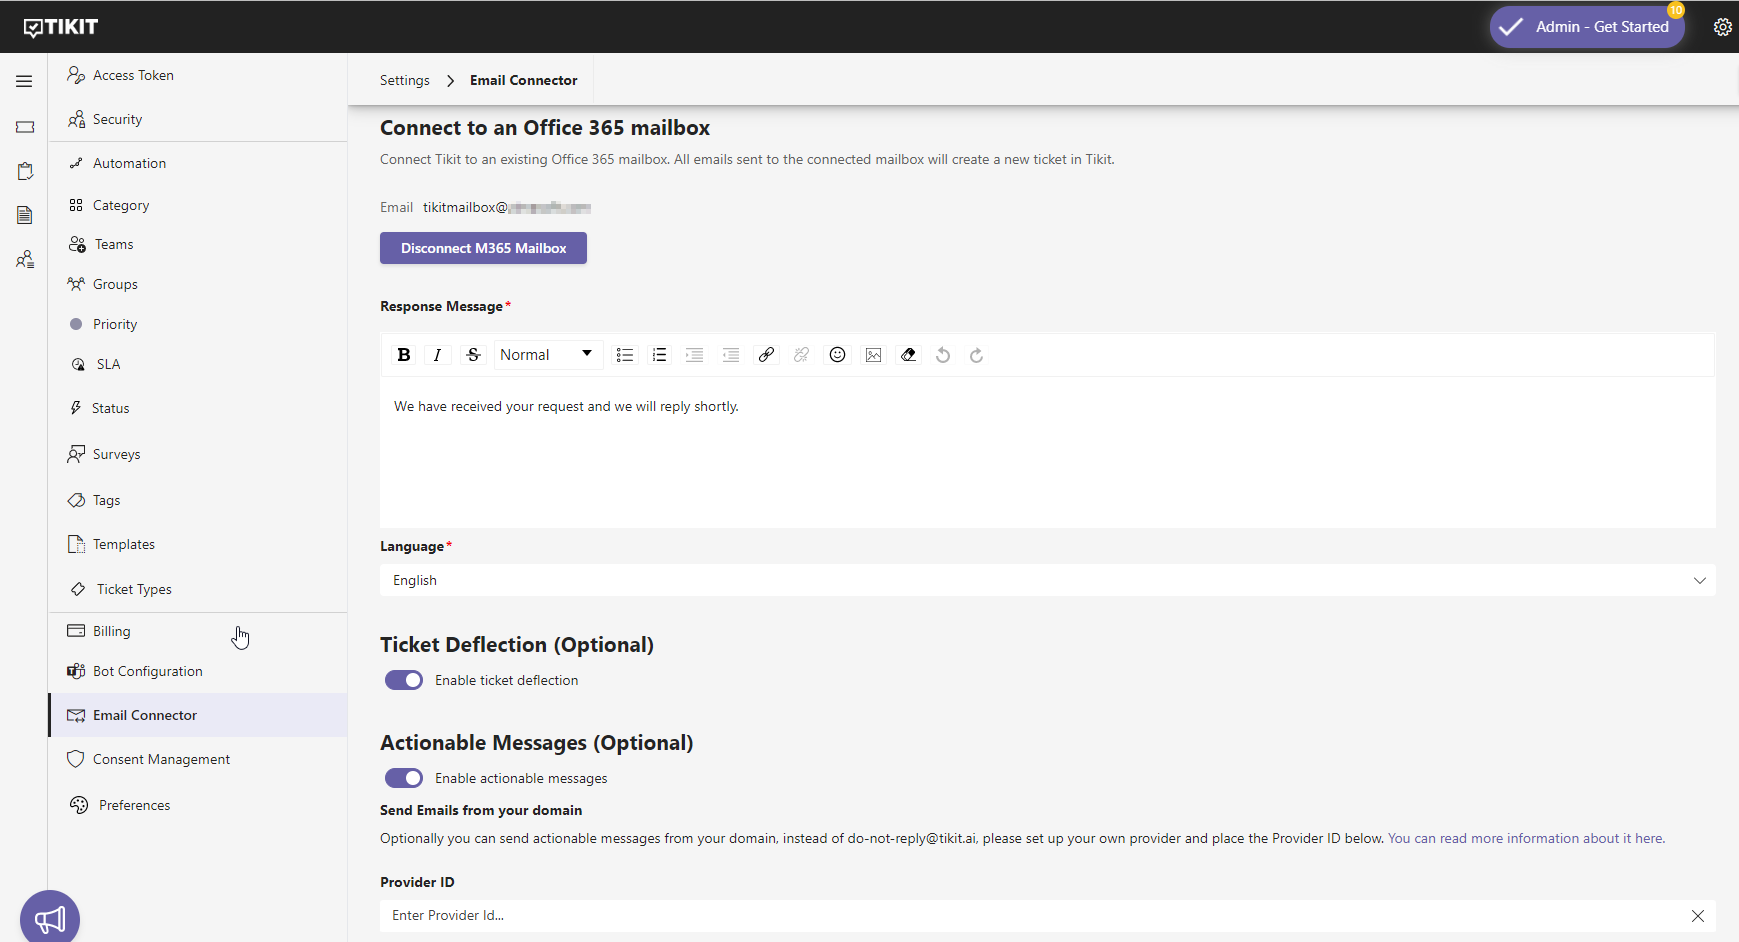
To view and update email connector settings in the Tikit web app:
Once in the Tikit web app, select the settings gear in the header, then select Teams.
The email connector will attempt to determine the sender’s language preferences based on the internet header of the message. If the connector cannot determine the language, the language specified in the Language option will be used as the default. This affects basic message properties including buttons, and actionable message cards.
Note: The email connector sends notifications with a ticket number in the message subject using the format: #123. To reply to a ticket and create a comment on the ticket, the number must be included in the subject line of the email being sent.
Exclude Footer
Removes the link to the ticket in the portal from the bottom of the email message.
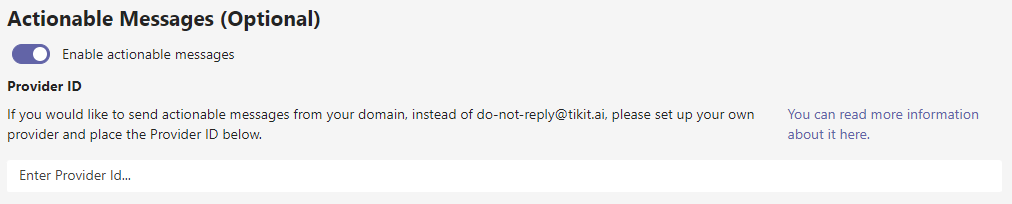
Deprecated: Actionable Messages has been deprecated in Tikit and will be removed in a future release of the application.
When a user submits a request via the email connector, Tikit responds with a customizable response message. Actionable messages takes this one step further by providing an immediate view of the user’s request to see ticket details, replies, and even add new replies without leaving Outlook.
To enable actionable messages:
In Settings > Email Connector, select Enable actionable messages to enable the feature.
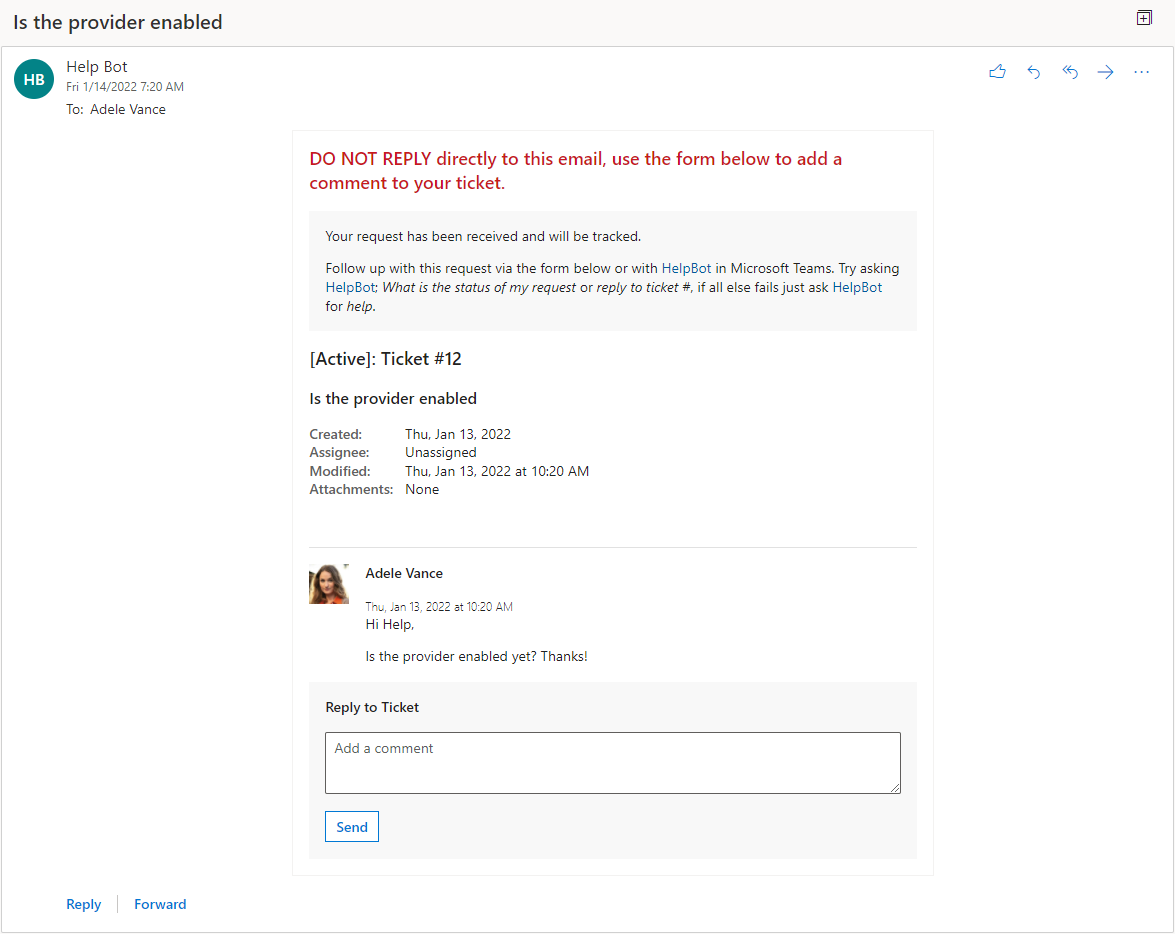
Here’s an example of the response message with actionable messages enabled. Enter a comment in the Reply to Ticket field and select Send to add it.
Notice that the sender is Do Not Reply <do-not-reply@tikit.ai>. By default, actionable messages will be sent by do-not-reply@tikit.ai. If you’d like to change the sender email to one from your domain then you will need to create a Service Provider and enter the Id in the Provider ID field. Check out How do I send actionable messages from my domain instead of do-not-reply@tikit.ai? for more details.
Here’s an example of the response message with actionable messages enabled and a custom provider.
As a fallback if the user’s client doesn’t support actionable messages or they are not in the scope of your custom provider, they will see just the see response message.
To add a reply to a ticket with the email connector:
A note on adding replies and actionable messagesIf actionable messages are enabled, use the Reply to Ticket field to add a reply instead of replying via email.
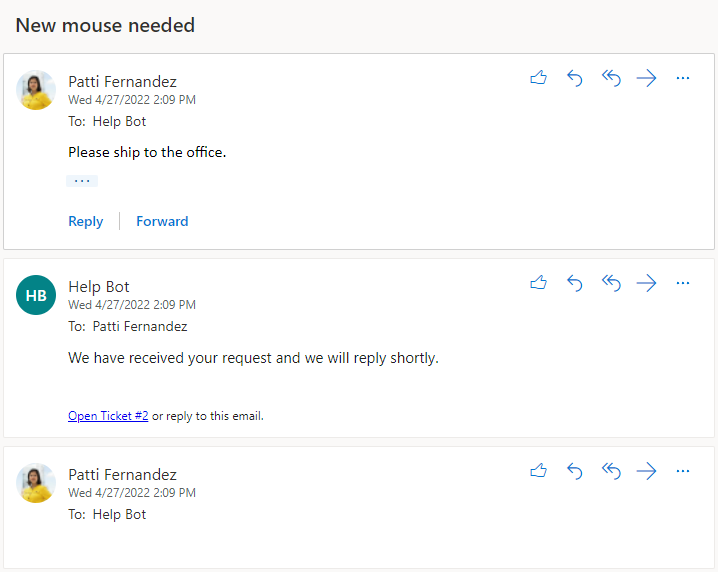
Requesters can add replies to their requests by simply replying to Tikit emails. In this example, Patti wants to add a quick reply to their ticket so they reply to the email notification from the connected mailbox.
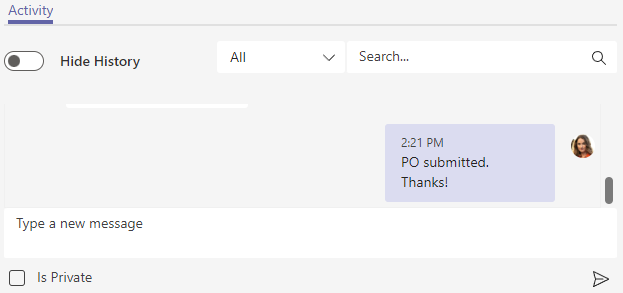
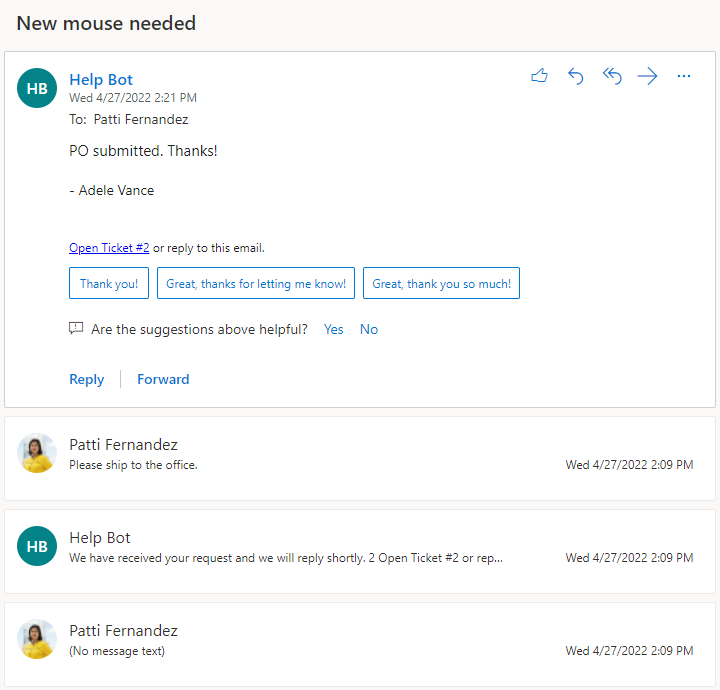
Once on the edit ticket page, Patti’s reply can be seen in the activity feed. For more on details on using the ticket dashboard to view ticket activity, check out How to view ticket activity.