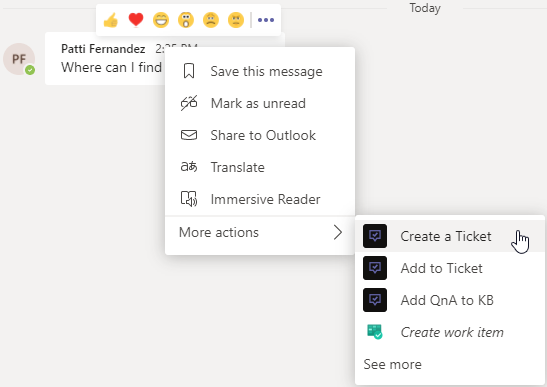
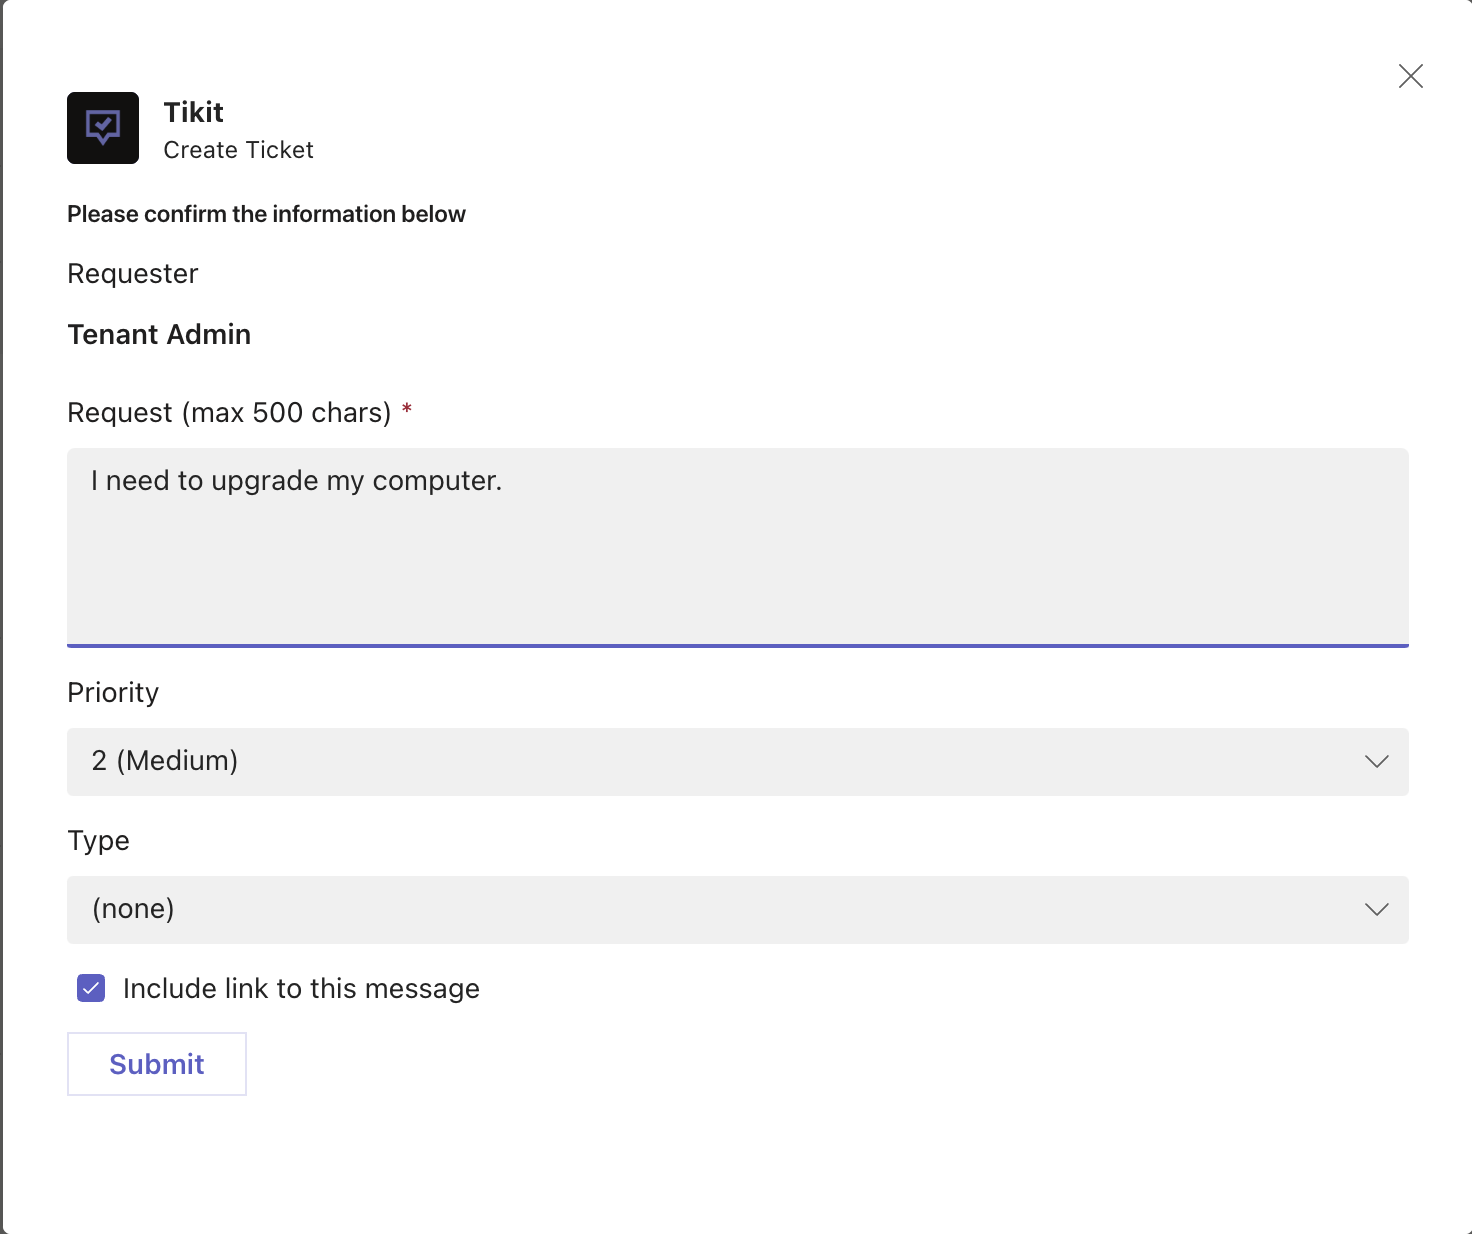
In this article we will run through the steps to quickly get Tikit up and running.
Allow Tikit in Microsoft 365
Looking for more details on setting up and configuring Tikit? Check out the Complete Setup Guide.
By default, the Tikit app is set to “Allowed” within Microsoft 365 however some organizations may set all apps to “Blocked” based upon internal policies. In order to proceed with the Tikit install, you will need to verify that Tikit is allowed within the Microsoft 365 Teams Admin Center.
You can follow the steps to below to verify and set Tikit to “Allowed” if necessary.
Allow Tikit within Manage Apps
You will first need to verify if Tikit is “Allowed” within Teams Admin Center – Teams apps – Manage apps:
- Open Microsoft Teams Admin Center
- Navigate to Teams apps –> Manage apps
- Search for Tikit and verify it the Status is Allowed
Allow Tikit within Permission Policies
- Open Microsoft Teams Admin Center
- Navigate to Teams Apps –> Permission policies
- Verify that Third-party apps is set to Allow all apps
- If Allow all apps is not selected, please make sure either Allow specific apps and block all others is selected and add Tikit, or Block specific apps and allow all others is selected and Tikit is not blocked.
How to install and configure Tikit
To configure install and configure Tikit:
- Once the Tikit Teams app is installed, open the Tikit app chat and select I am a M365 Admin in the Let’s Setup Tikit message.
- Select Authorize & Setup Tikit in the Authorize Tikit message.
Not a Microsoft Administrator? Share the link https://signup.tikit.ai/ with your admin to continue setup.
- Choose a company point of contact that can receive and respond to email. We’ll use this to keep you updated on your Tikit deployment.

- Select where you want your analysts to Work Tickets. Select New Team to create a new Team in Teams or Existing Team to select an existing Team in Teams, then select Next.
- If you selected New Team, you will be prompted to name the team. Then, choose who you want to be on the new team. You can select either:
– Just Me and then click Next
– I Need to Add More Agents and then choose additional agent(s) by typing their name.Then click Next.

- Choose if you will be the only Administrator of Tikit in your environment or if you need to add others to help you setup and configure.
Click the checkbox to agree to the Terms and Conditions, then click Finish. You’re done! Head over to Step 12.

Now that you have Tikit installed, you can immediately start creating and working tickets directly from Teams or the Tikit web app.
The Create a Ticket action can quickly create a new request from a message to start capturing a shoulder tap in a private chat or a post in a shared channel. For more details on message actions, check out Message Actions.
Need to create a ticket on the spot for a user rather than directing them to the Ticket Virtual Agent? Quickly create a new ticket from scratch with the Tikit compose extension. For more details on searching and creating tickets with the compose extension, check out Tikit Compose Extension.
Need to find an existing ticket? Find and work tickets from Teams or Tikit web apps.
Find tickets directly in Teams while chatting with Tikit, searching with the compose extension, and exploring tickets in the triage and support group channels.
Send “Tickets” to Tikit to explore tickets. For more details on Tikit commands and talking to Tikit, check out Tikit Commands.
Know the specific ticket id number? Send “Ticket #” to view a specific ticket.
You can create, view and manage tickets in the Tikit Web app: https://web.tikit.ai. You can read all about our different web portals in the Agent, Admin & User Portals article.
Tikit Virtual Agent is your end users “portal” to getting problems solved. Once you deploy Tikit Virtual Agent to all your end users they will be able to quickly submit request and get answers. You can read more about how to setup and install the Tikit Virtual Agent here.