


1
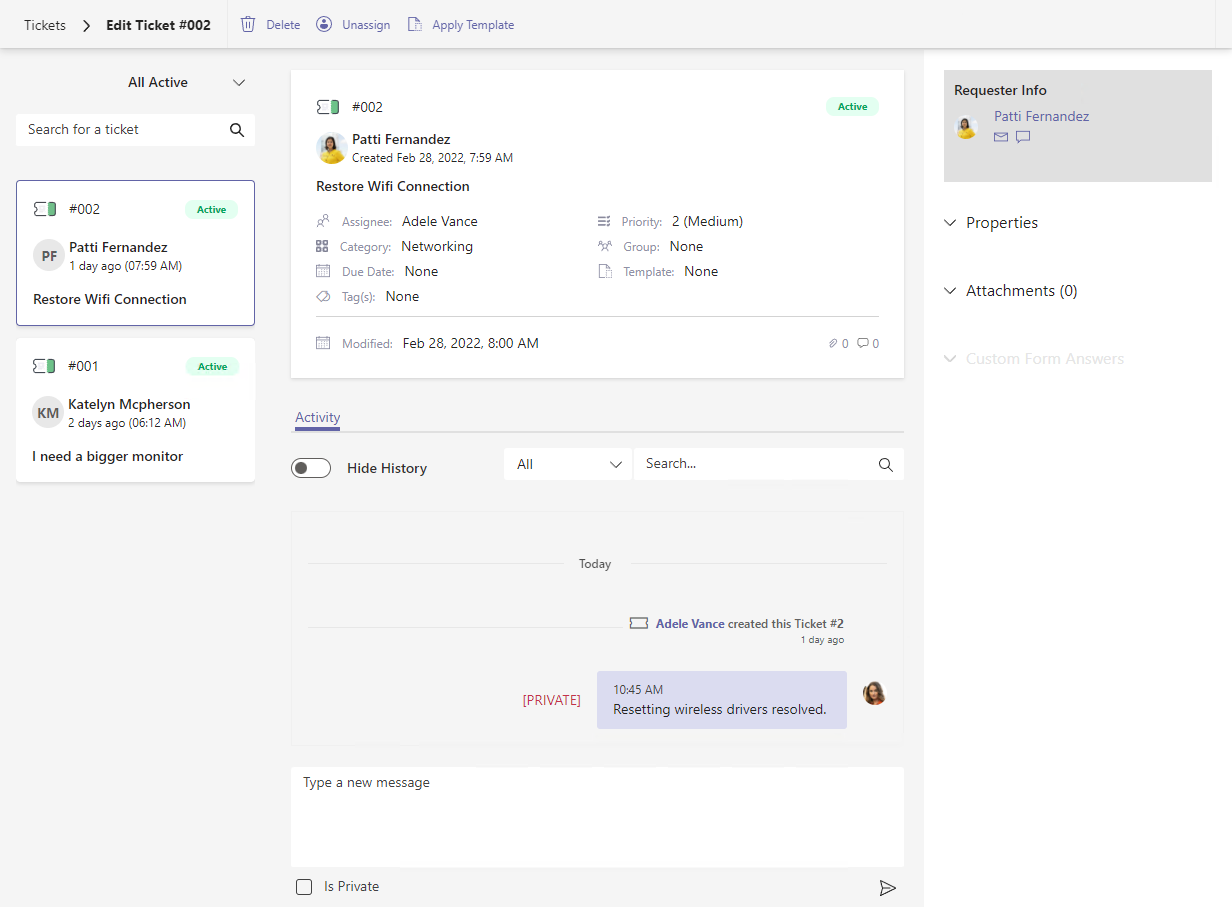
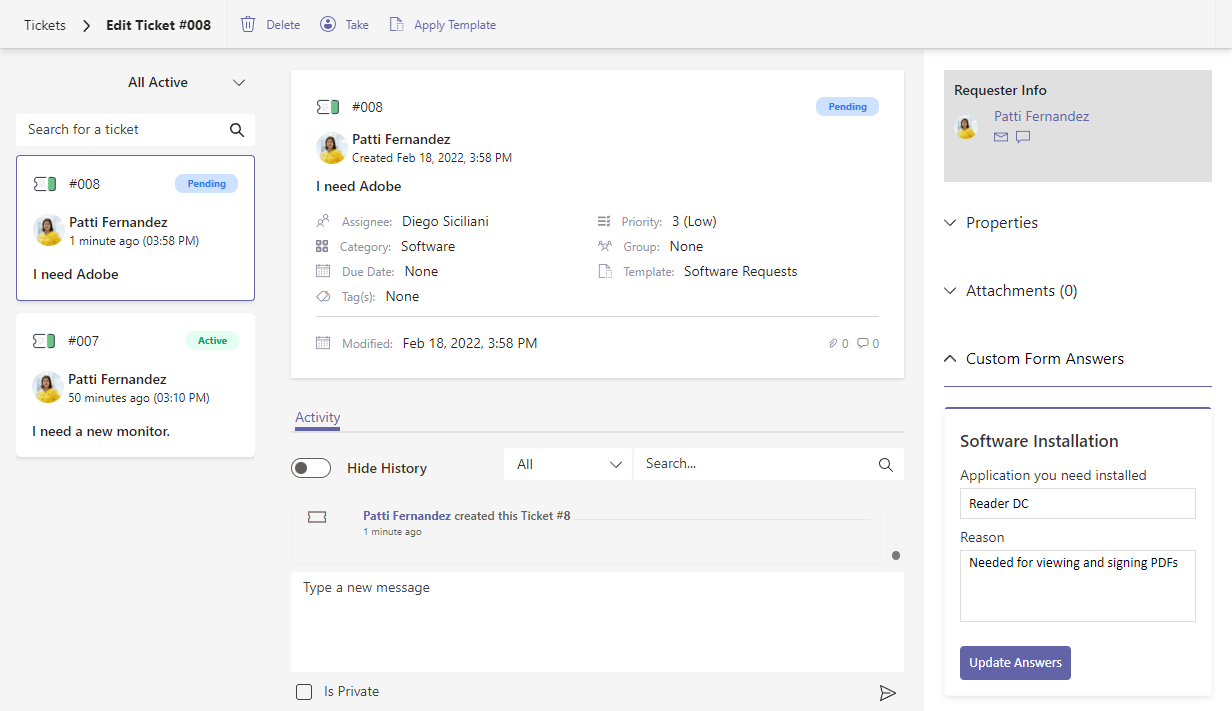
Delete the ticket. Warning that once deleted a ticket cannot be restored. We recommend Closing a ticket instead to remove it from Active views. 1 of 10
2
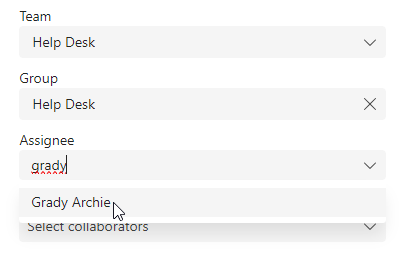
Assign the ticket to the currently logged in analyst. 2 of 10
3
Apply a ticket template to this ticket. To learn more, check out Manage Templates. 3 of 10
4
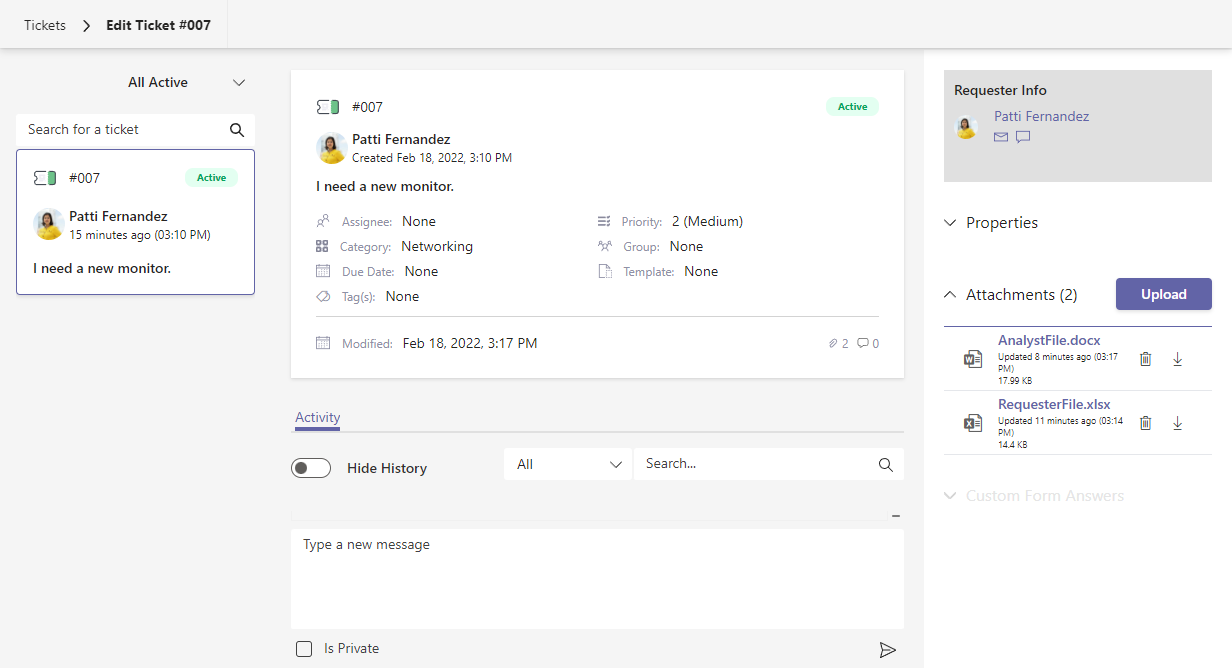
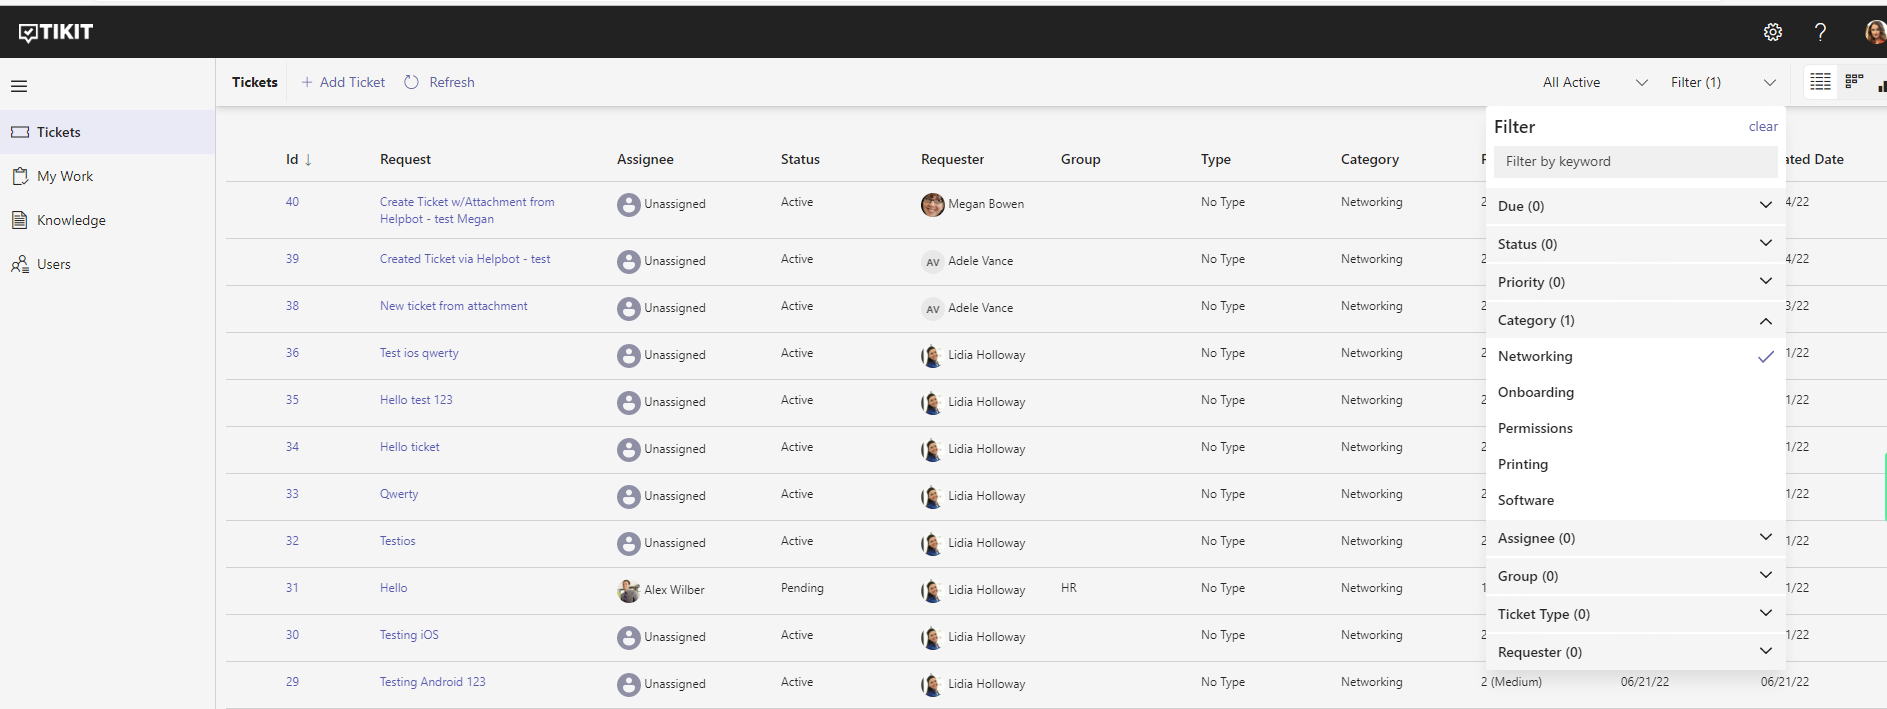
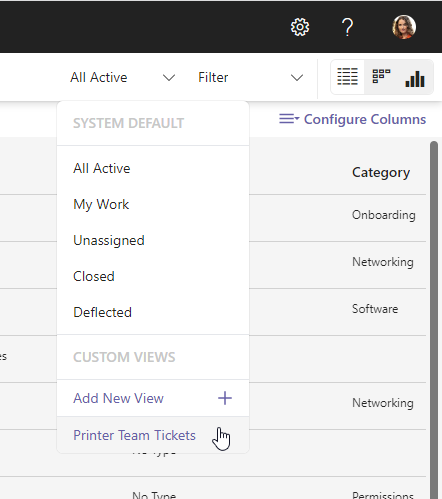
Select a view for the tickets list:
- All Active
- My Work
- Unassigned
- Closed
- Deflected