Tikit provides the ability for customers to create Templates with Custom Forms to add additional information to a Ticket. In some scenarios, you may want to map certain Custom Form properties to a Ticket property such as Category or Due Date. With Tikit’s native integration into M365, you are able to easily leverage Microsoft Power Automate (PA) to map any Custom Form property you create in your environment.
In this help article, we will walk you through the steps to map a Custom Form Categories drop down and Date picker to the Ticket properties Category and Due Date using PA. You can use this example to map other Custom Form properties in your environment.
Create Template and KB
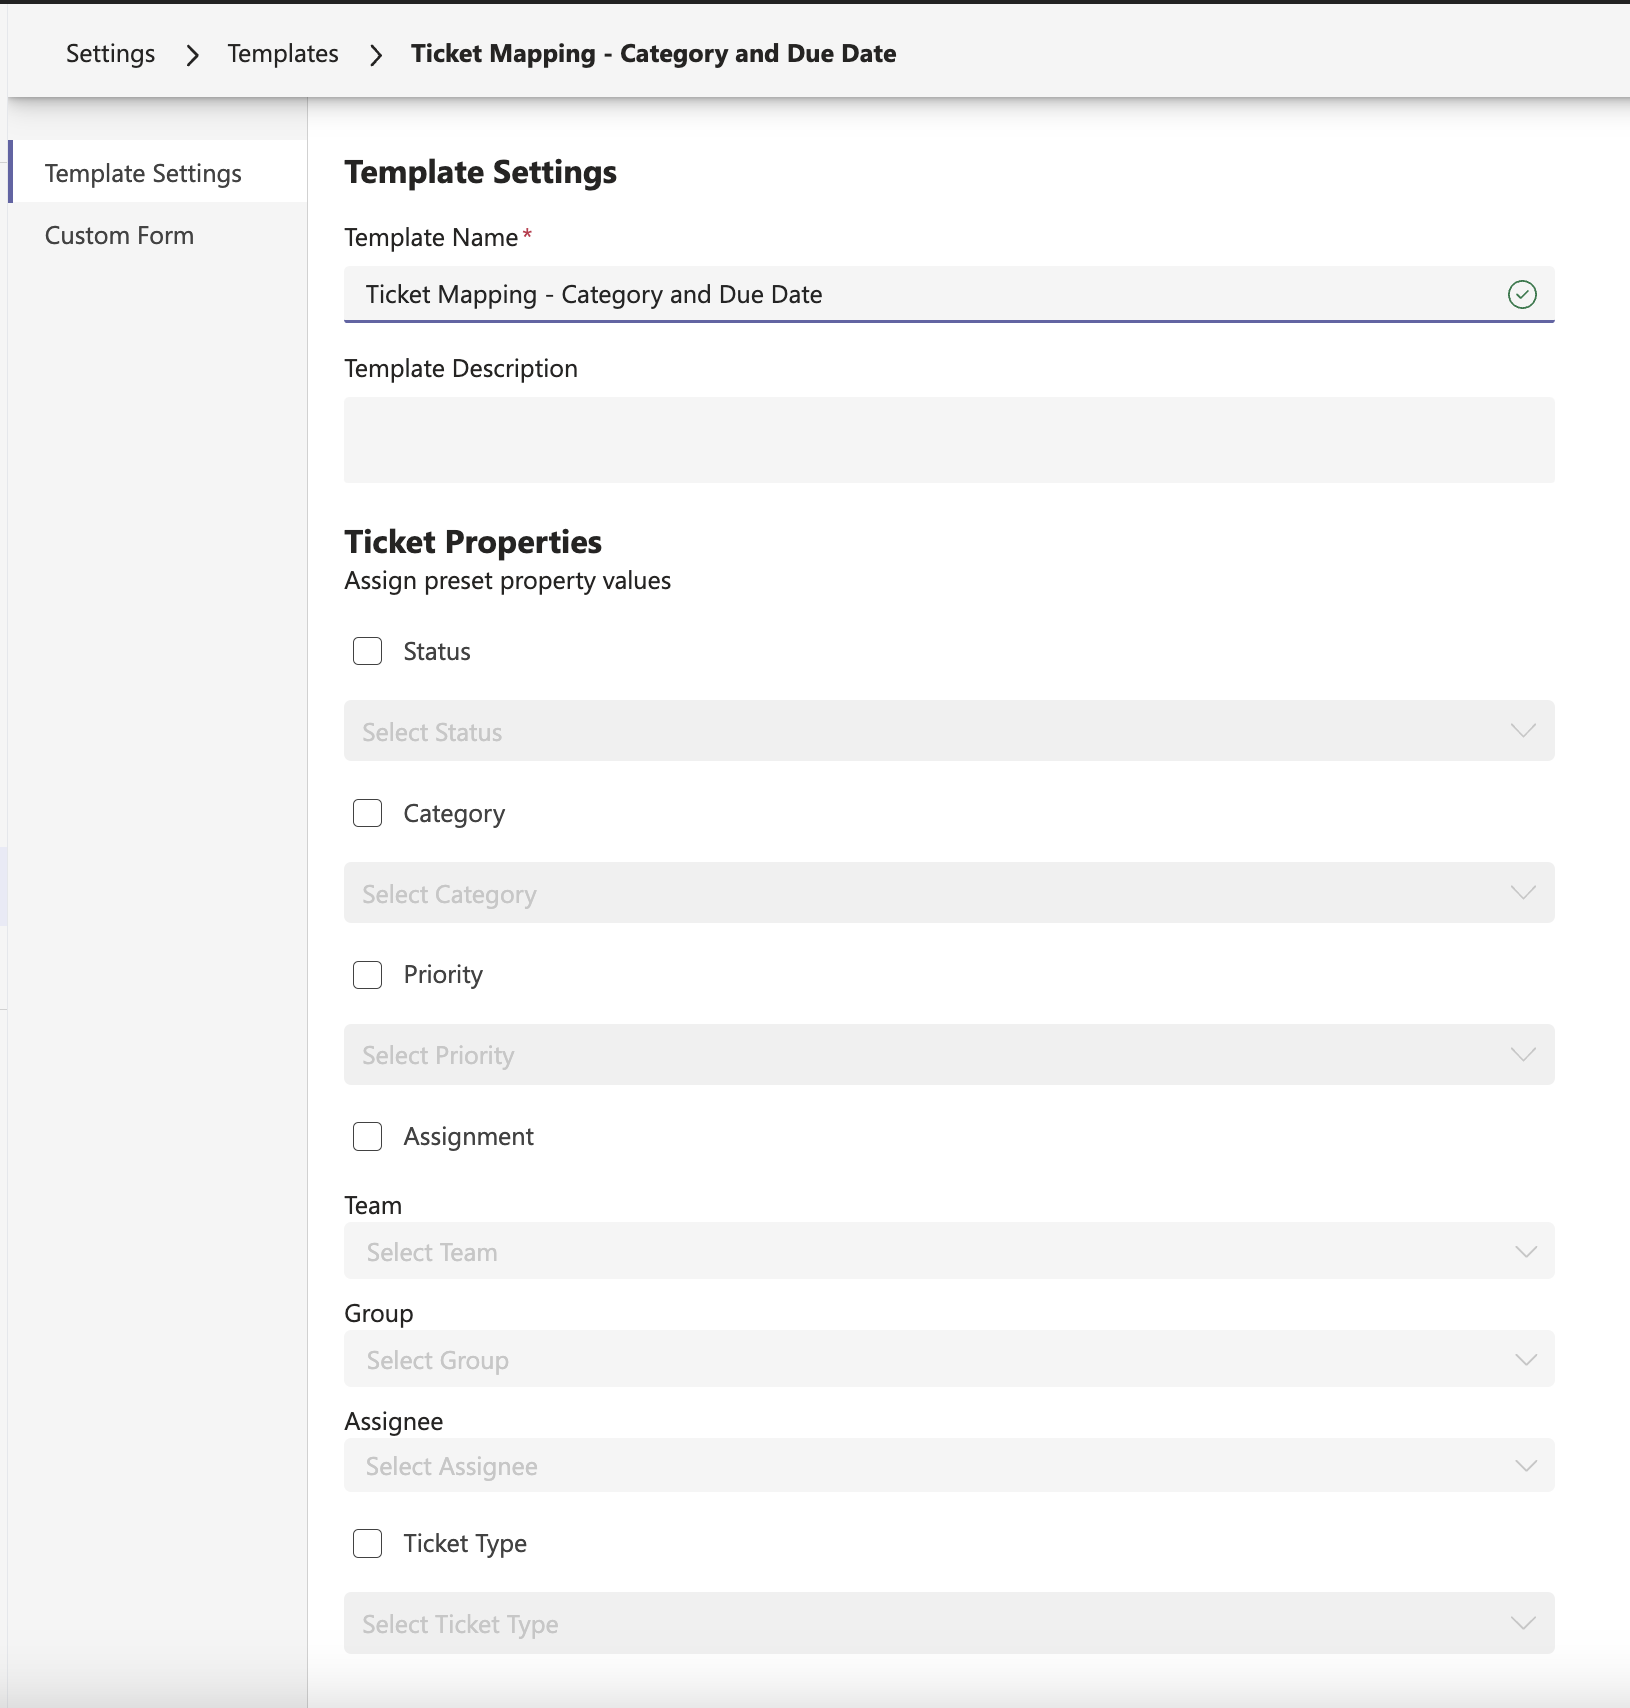
Within web.tikit.ai – Templates we have created a simple Template named Ticket Mapping – Category and Due Date and the Template Settings properties are left as default.
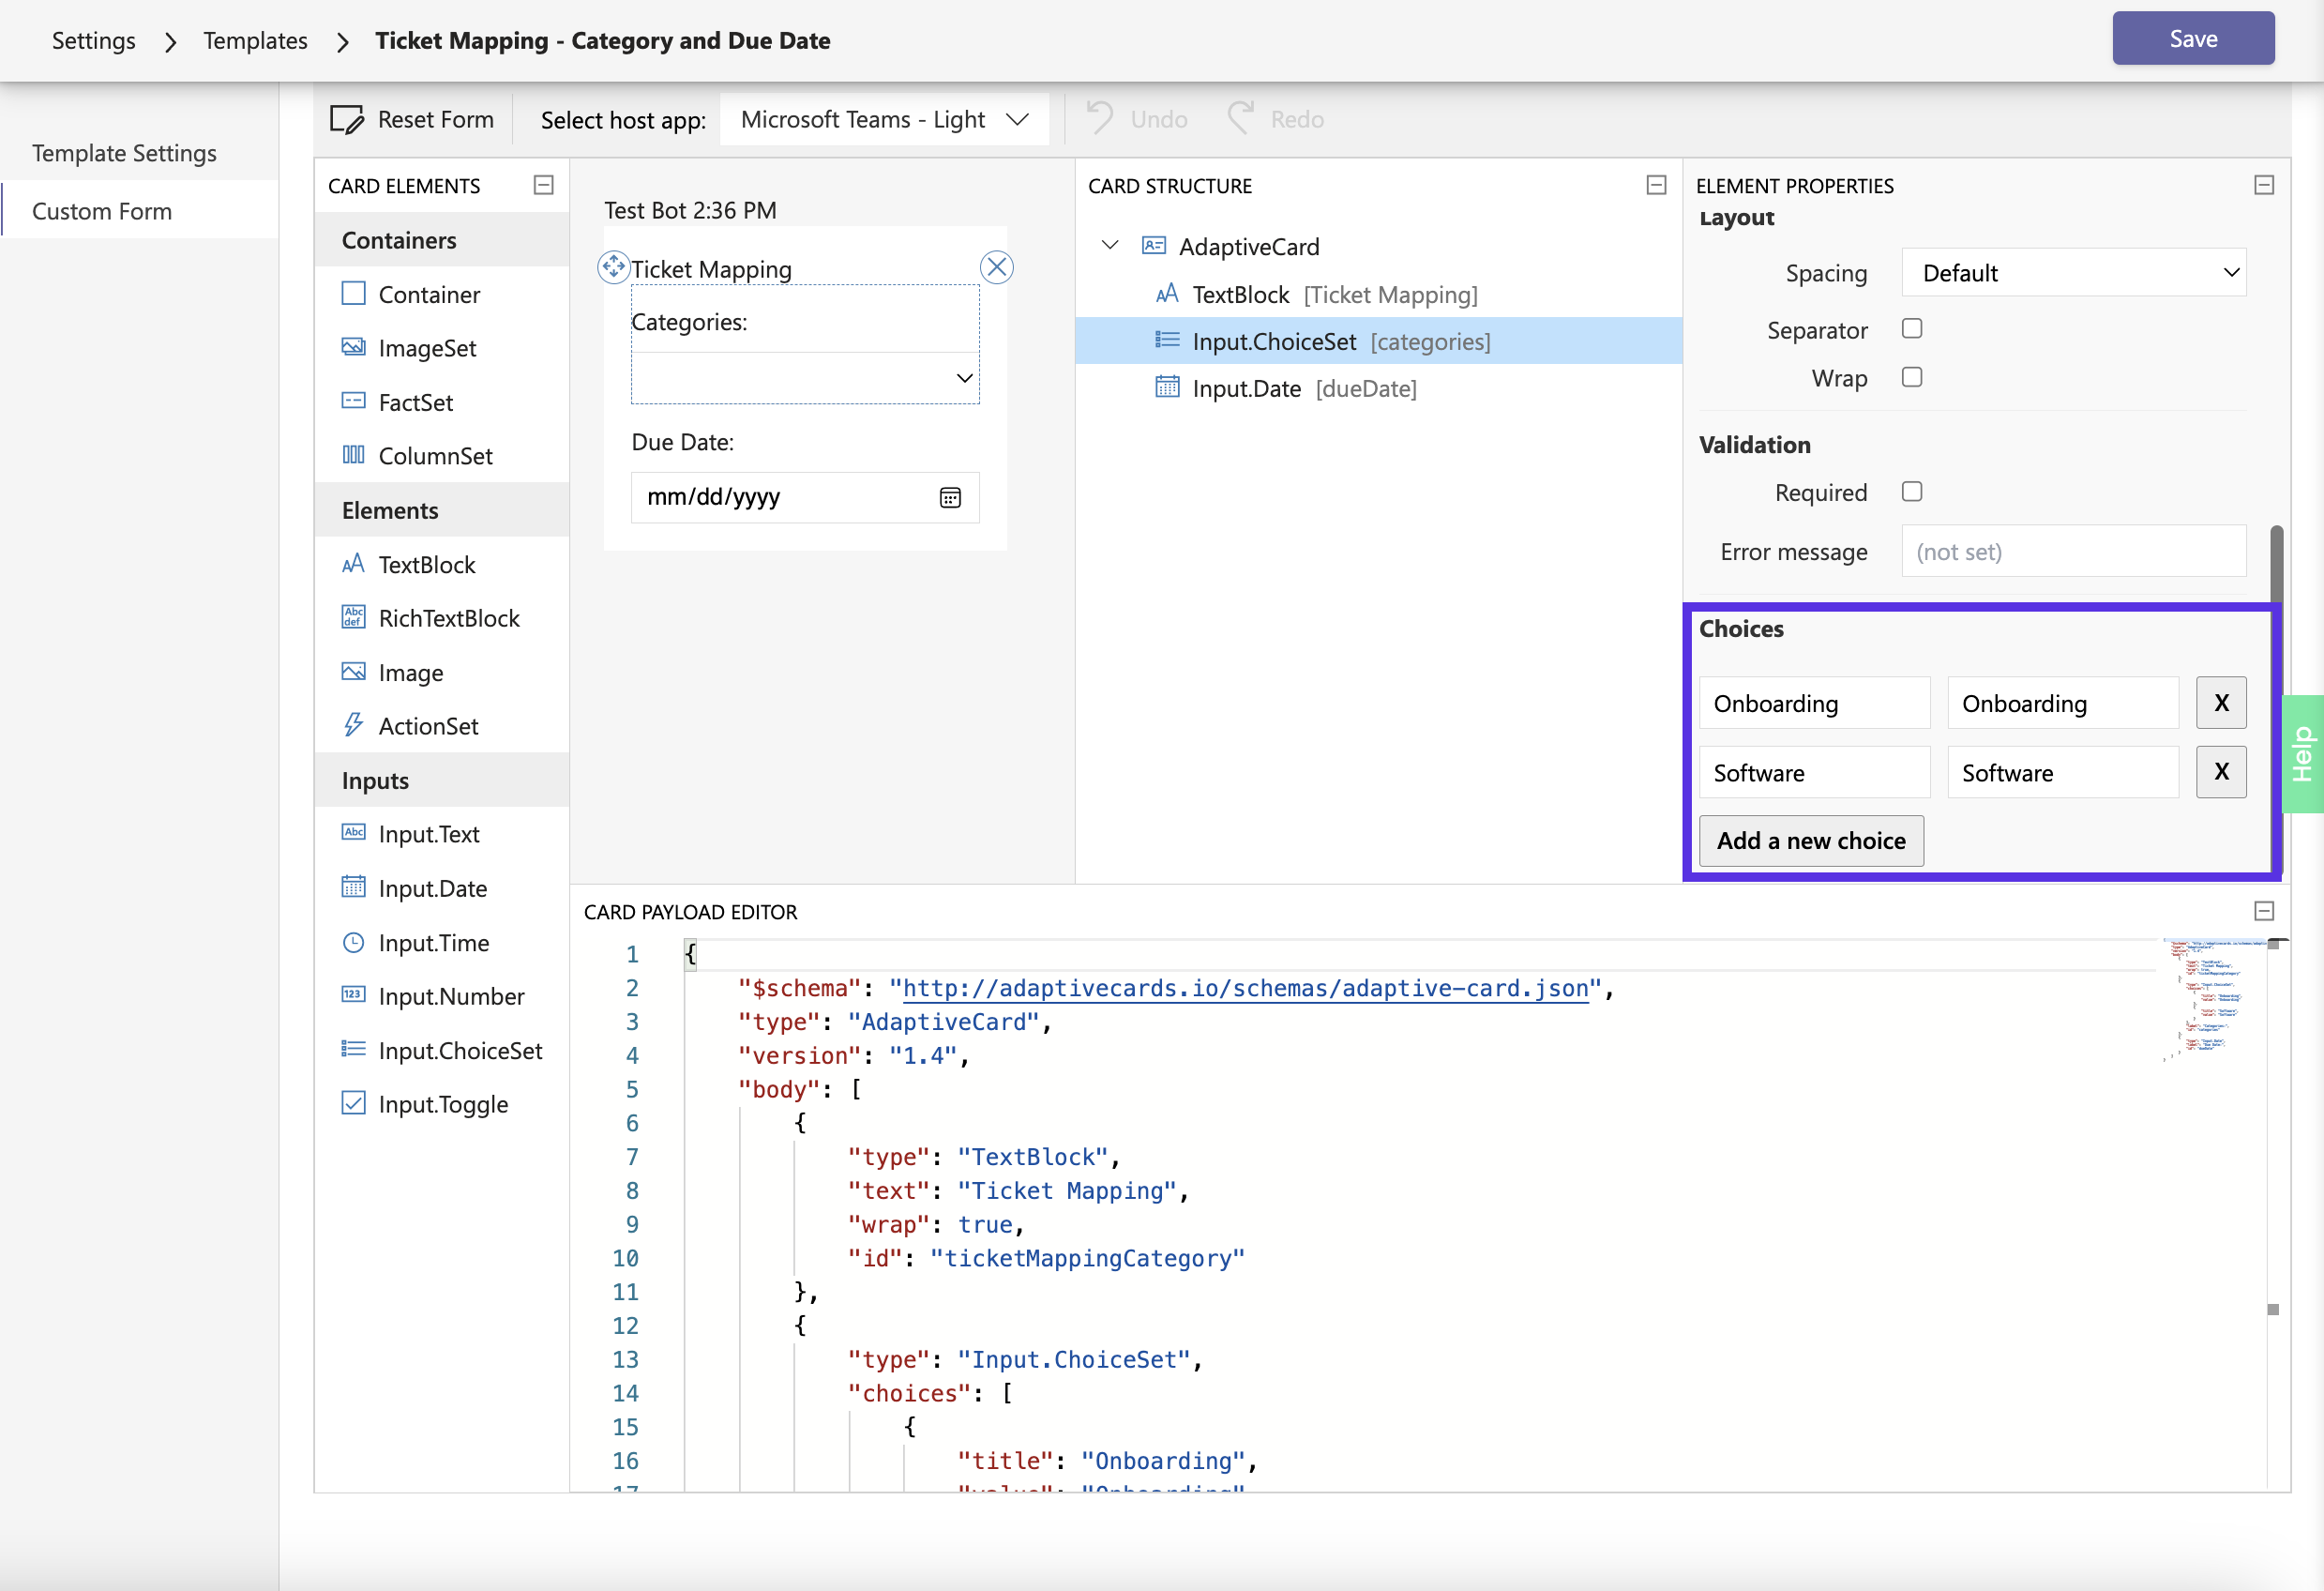
The Custom Form is using:
Input.ChoiceSet to specify the Categories we want to map, with the Name and Value being friendly names for the Agent or End User to select from
Input.Date to specify the Due Date we want to map
In Microsoft Power Automate we will be able to interpret the options selected and then map those respective options to Ticket properties.
Custom Form - Categories
Custom Form - Due Date
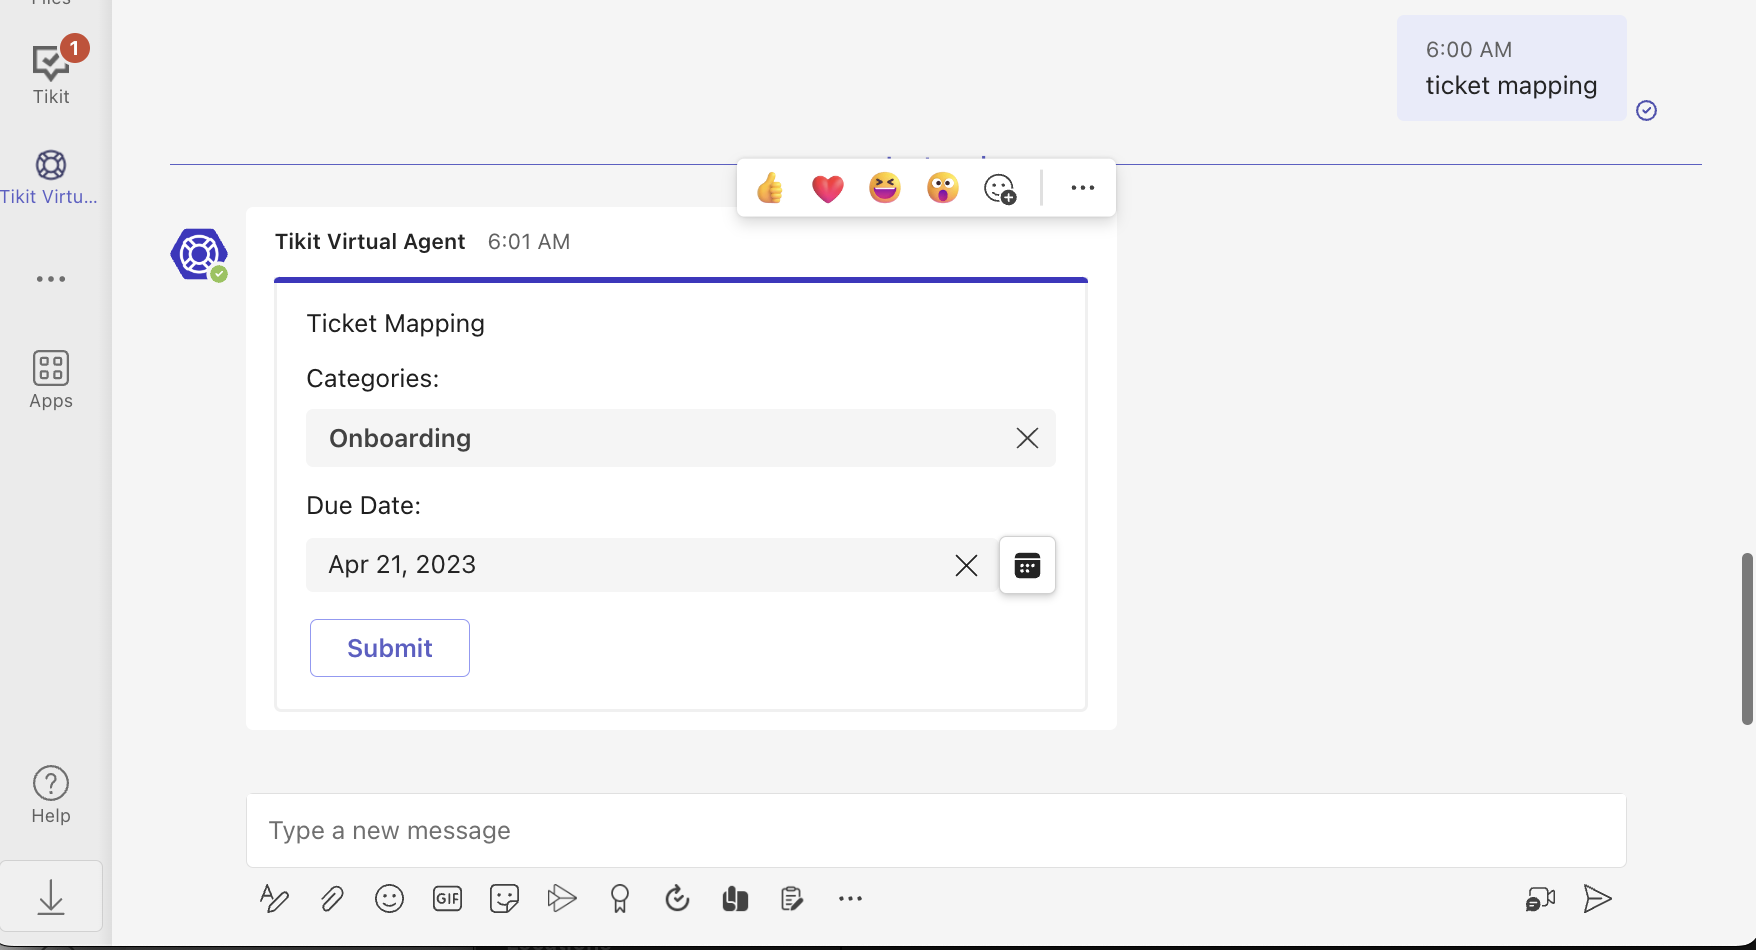
We have then associated this new Template to a Knowledge Base (KB) article, and given it some simple phrases for the Tikit Virtual Agent (TVA) to bring back the Custom Form.
We can now bring back the Custom Form within TVA to allow the End User to select the Category and Due Date we want to map back to the Ticket Category and Due Date.
Create Power Automate Flow
Process Custom Form
We will now create a Power Automate flow to evaluate the creation of Tickets when the Ticket Mapping – Category and Due Date templateis used and then map the Custom Form properties to the created Ticket.
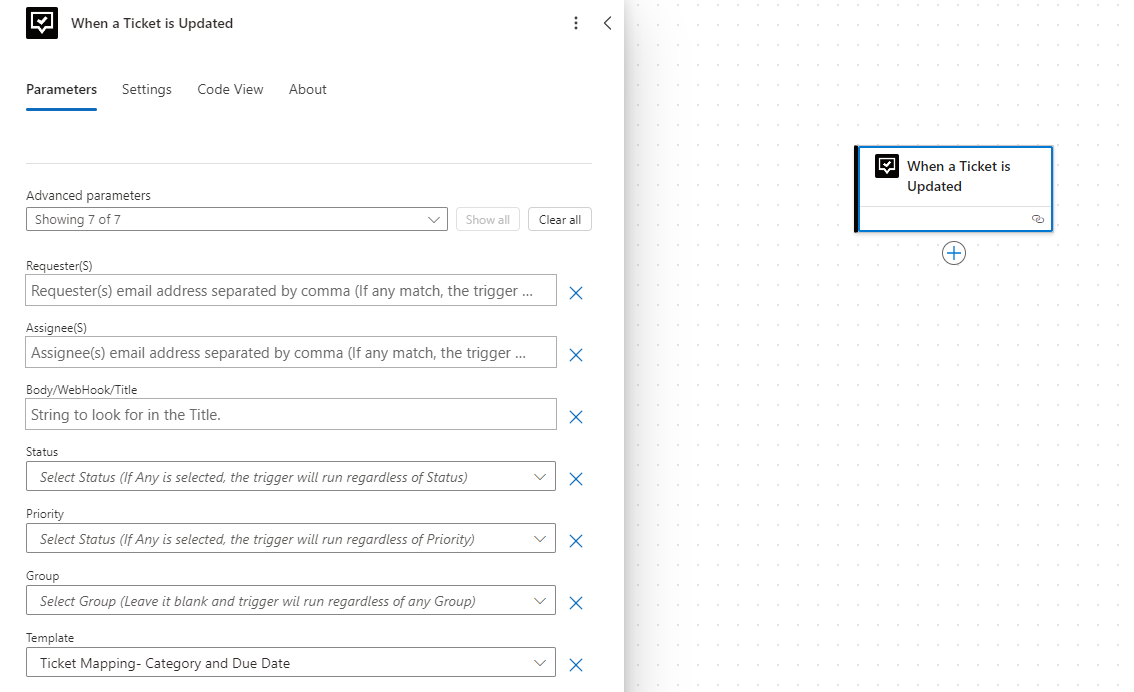
In the Trigger – When a Ticket is Created, we will select the template we created in the previous section named Ticket Mapping – Category and Due Date.
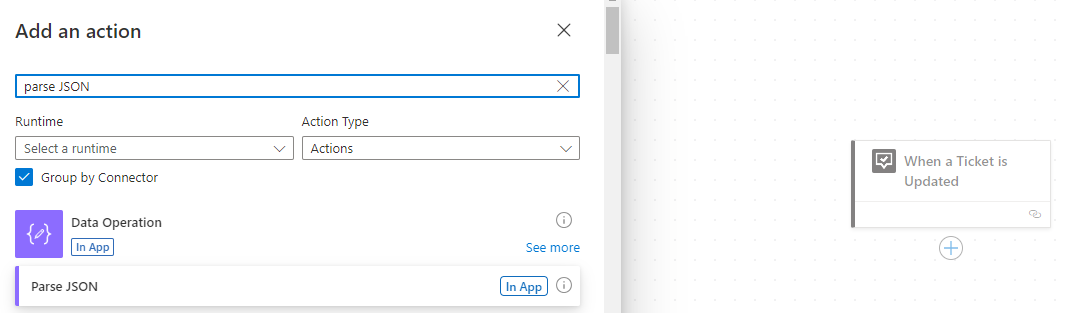
Select + Add an action, and then search for Parse JSON and select the Action – Parse JSON.
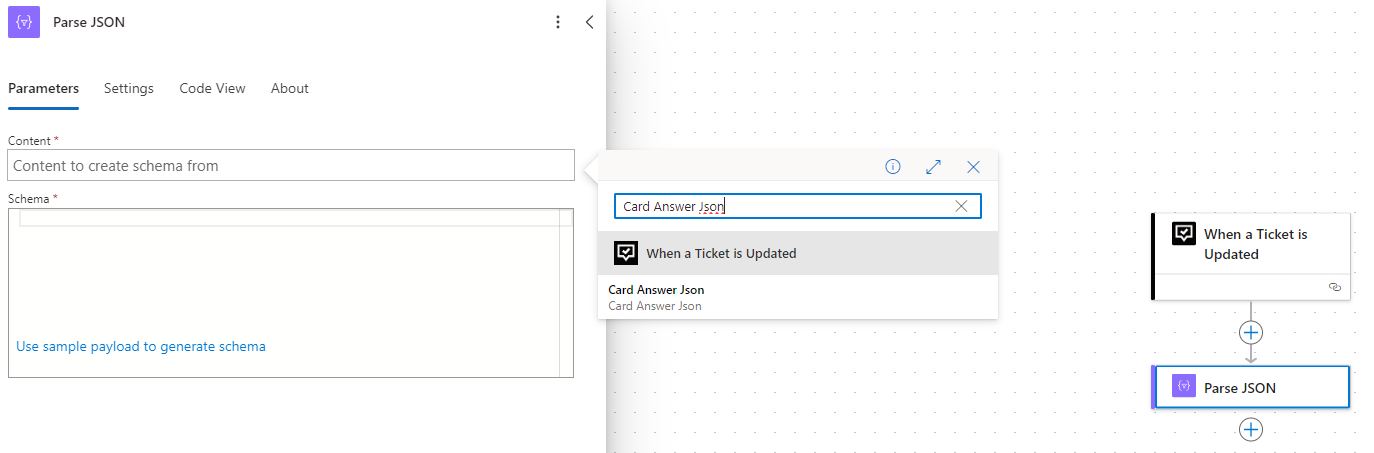
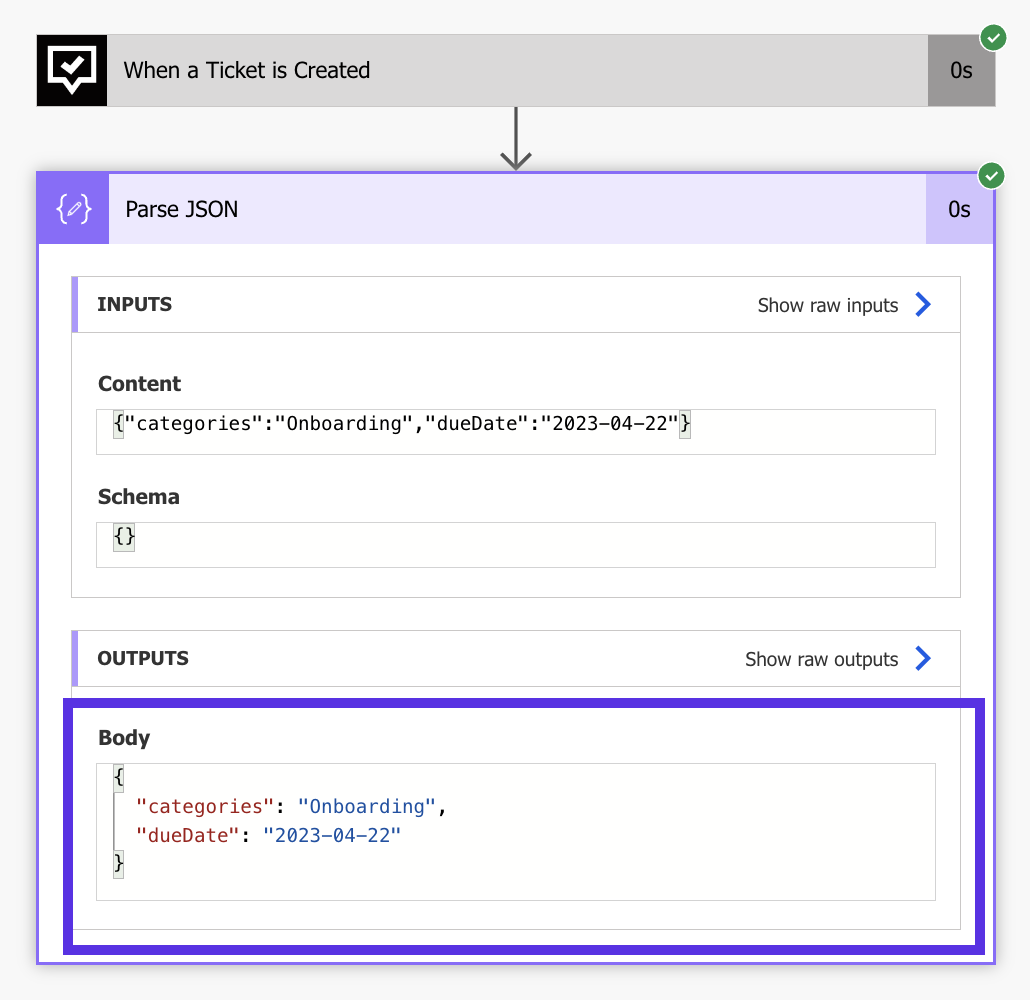
On the Parse JSON action for Content, we will need to search for the Card Answer Json ticket property and select it to populate it in the Parse JSON Action – Content property.
The Card Answer Json property is where the Custom Form answers are stored, and will need these answers to capture what Category and Due Date were selected.
Search for Card Answer Json
Card Answer Json Selected
On the Parse JSON action for Schema, specify {} for now. We will need to run the PA flow once to capture the schema from the Ticket / Template creation and then we can populate this with the correct information.
After you have populated the Schema, select Save.
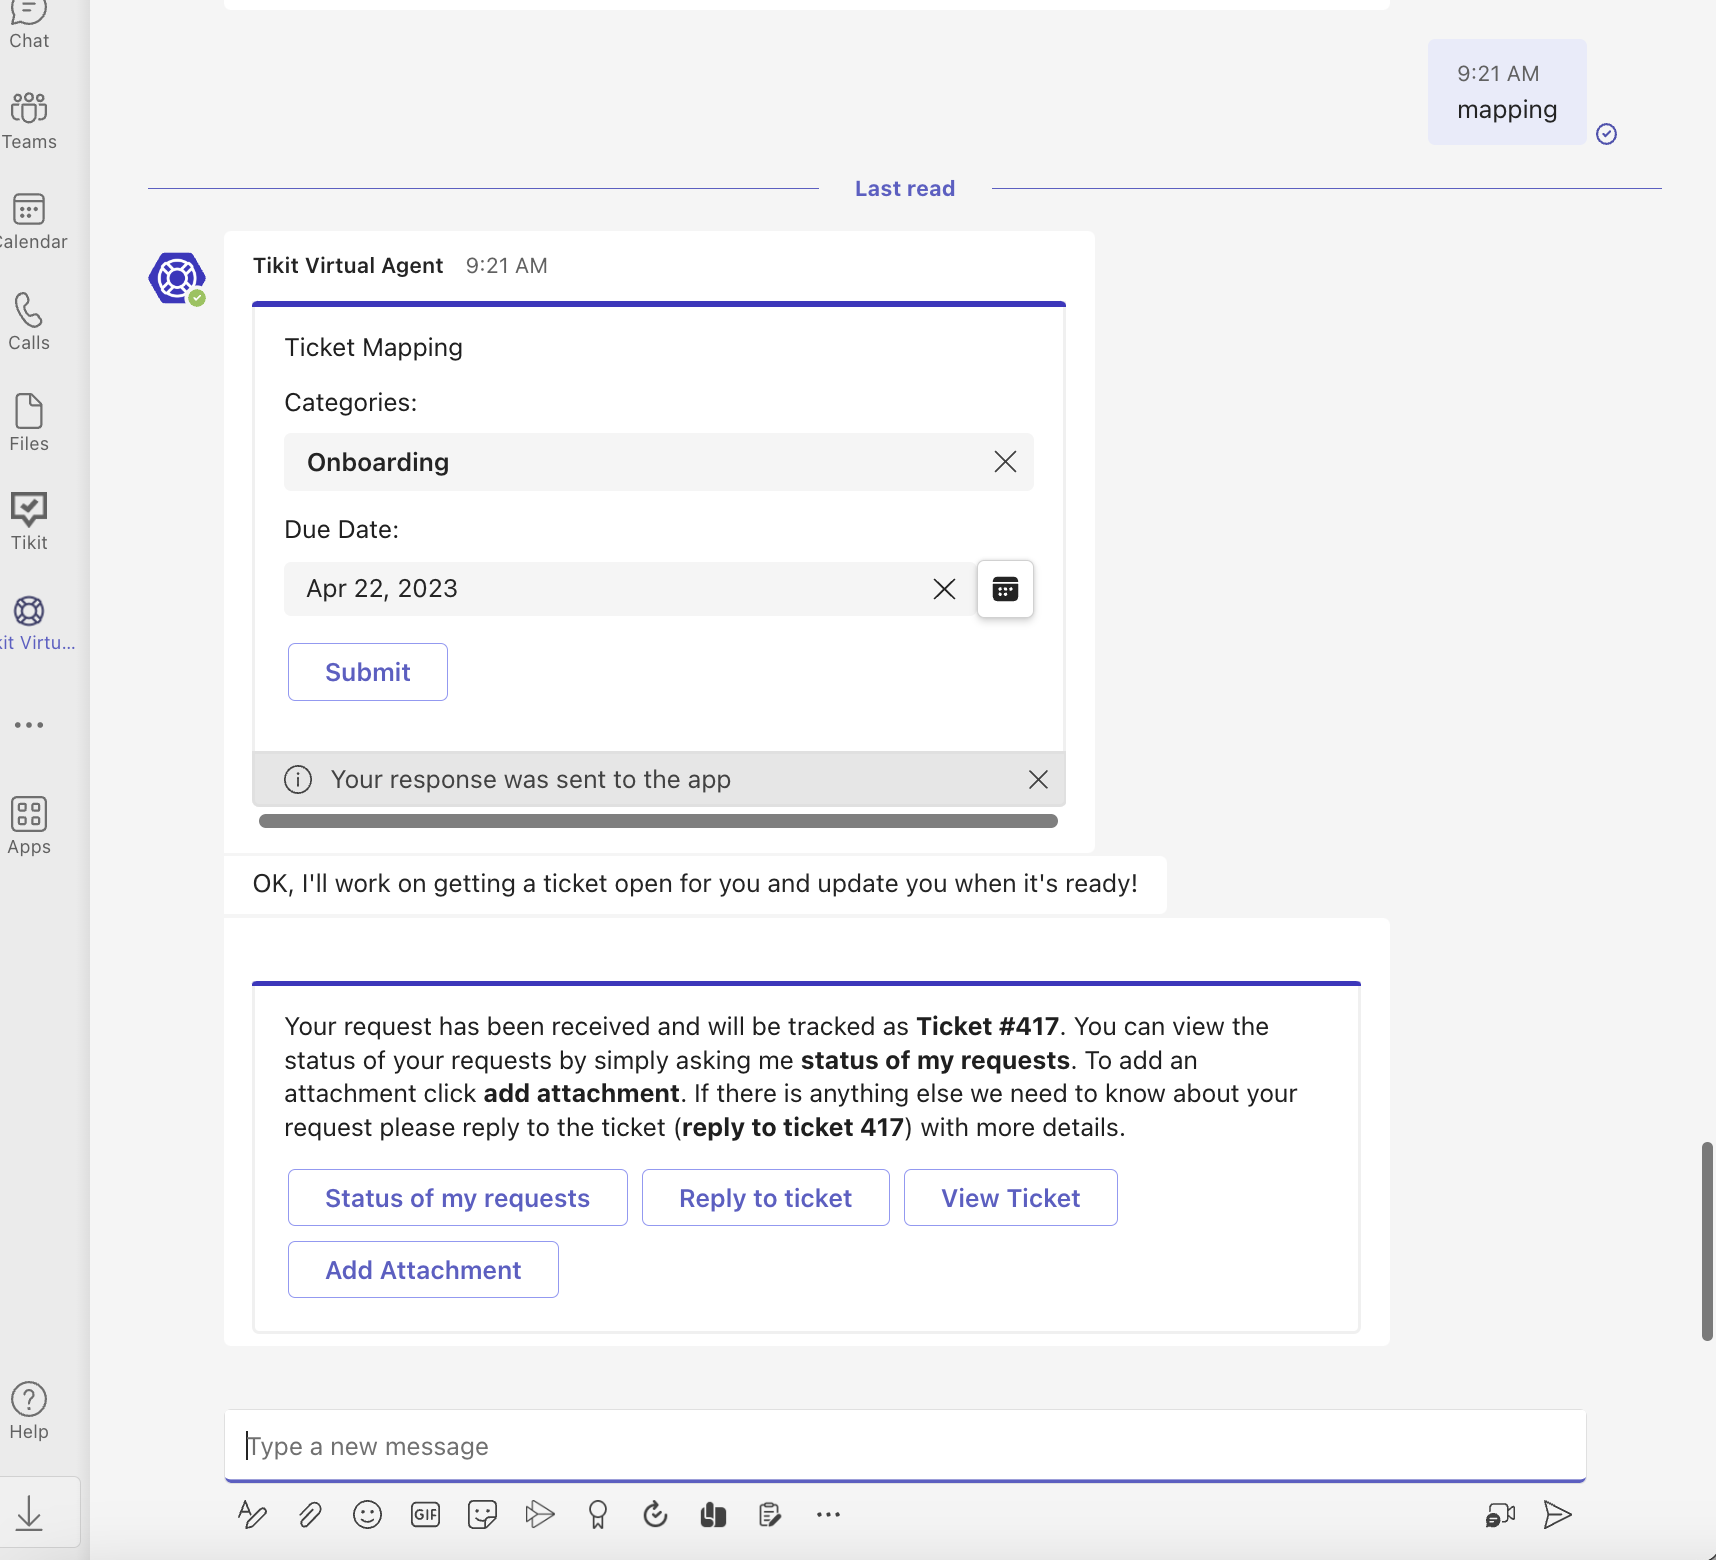
We will now need to create a ticket within TVA so that this Power Automate flow can capture the Schema and be able to interpret the templates’ Custom Form properties allowing for us to continue creating the PA flow.
We will go to TVA in Microsoft Teams, and initiate the ticket creation process by typing the phrase mapping and retrieving our Custom Form to create a new ticket.
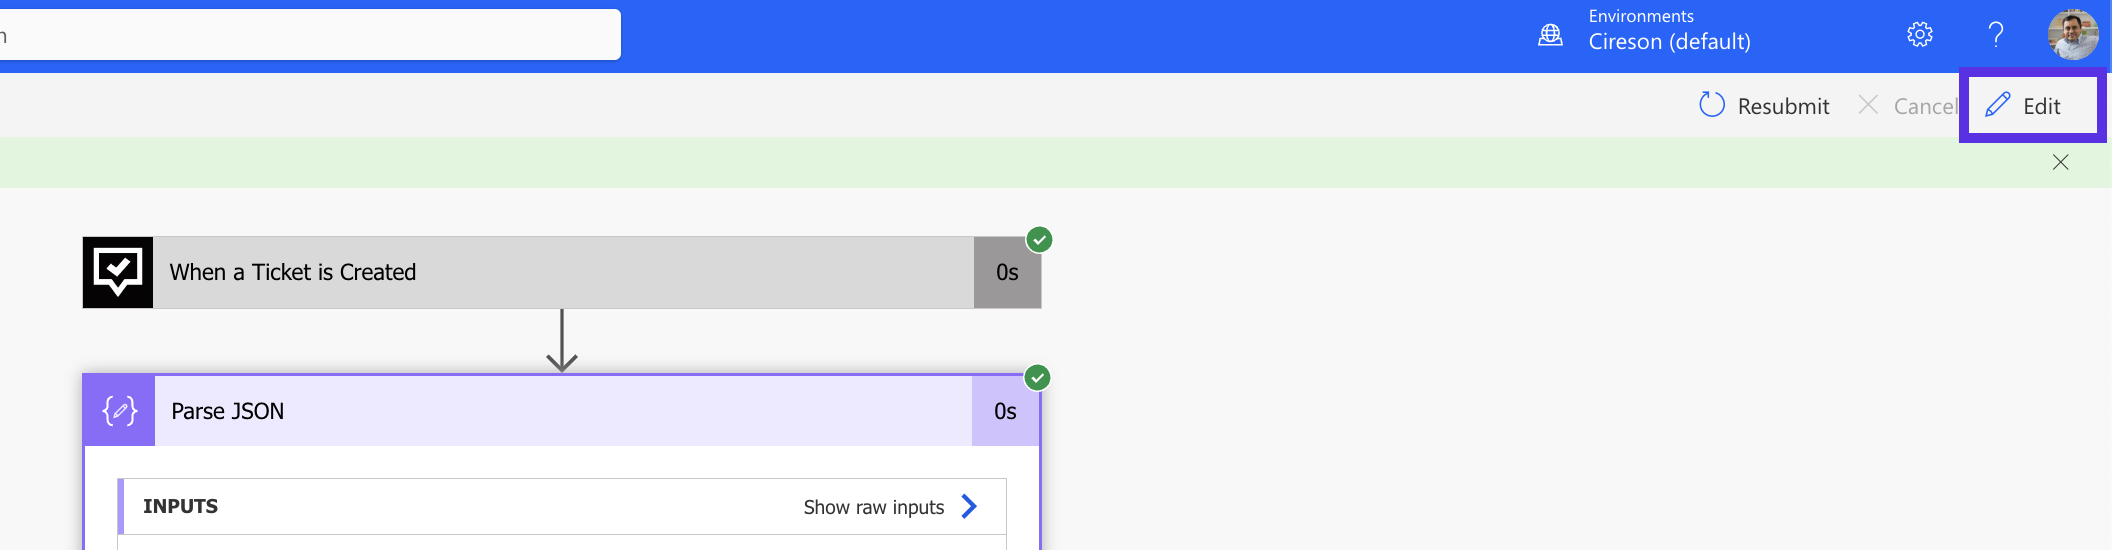
Now that the ticket has been created, we will head back over to PA and evaluate the Run of that ticket creation. Under 28-day run history, select the latest Start flow in the list.
We will now open the Parse JSON action, and copy the Outputs – Body content. We will use the Body to generate the necessary Custom Form schema in our PA flow.
After we have copied the Outputs – Body, we will select Edit to populate this data into the PA Flow.
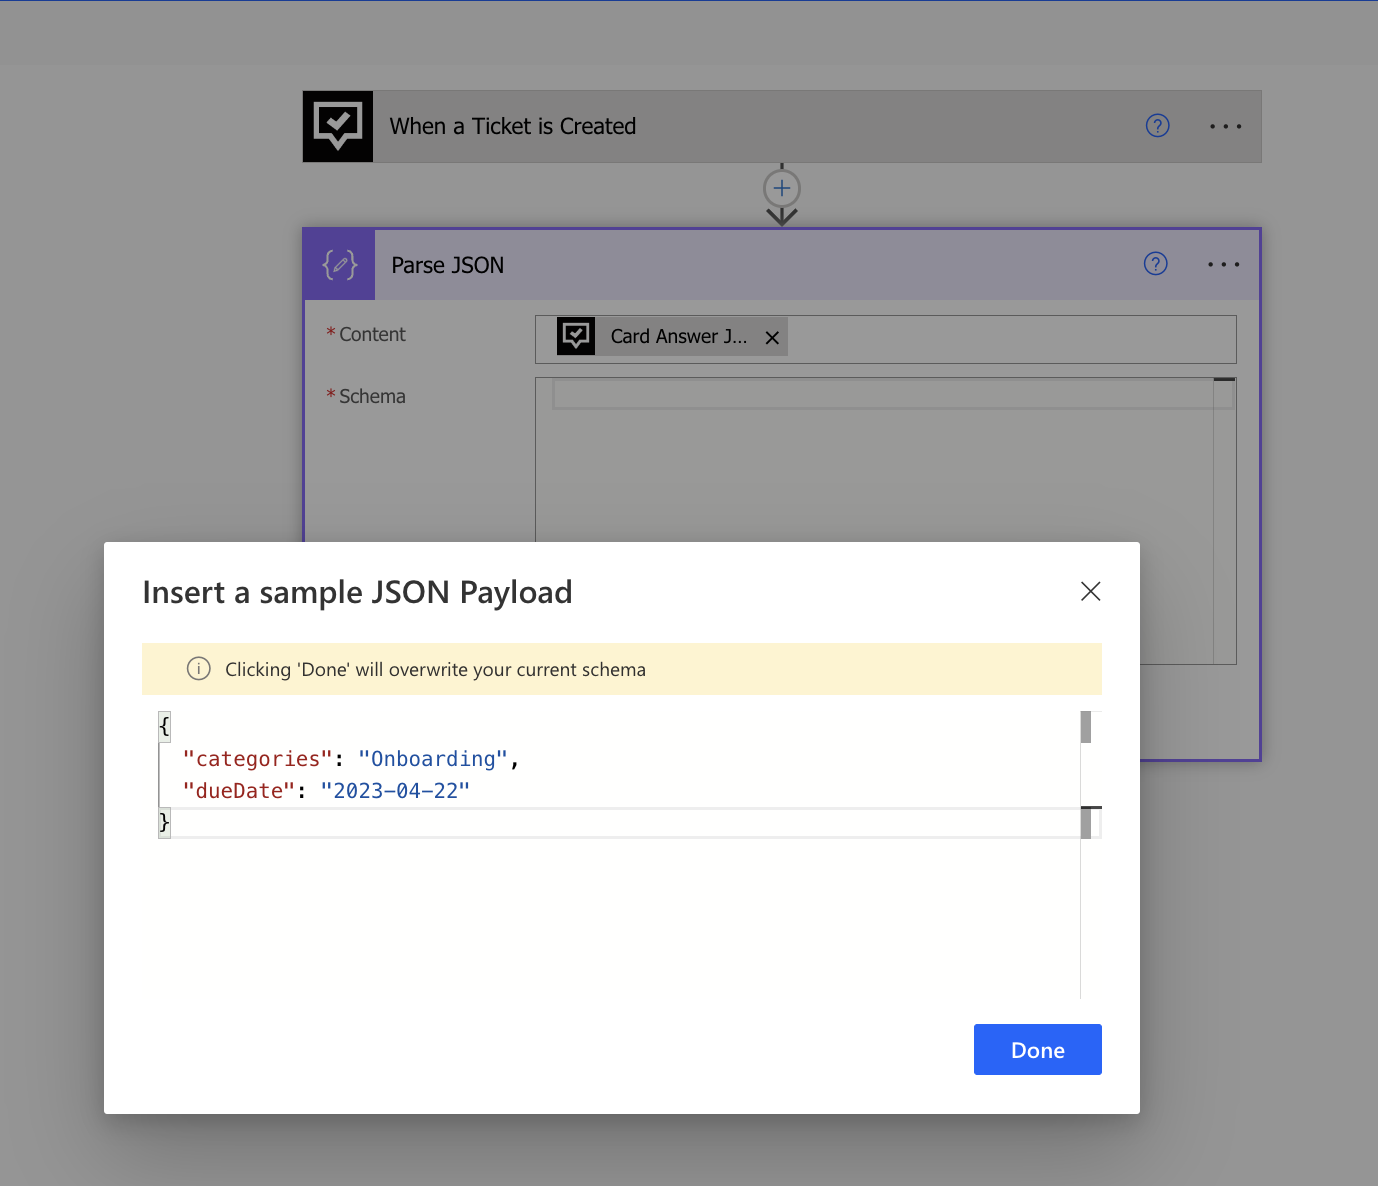
We will now open up the Parse JSON action, and select Generate from sample to copy the Outputs – Body into the Insert a sample JSON Payload modal.
Select Done once completed.
You can see now that the Schema is populated with the JSON body for your Custom Form and you can now use the Properties to map your Custom Form properties to your Ticket properties.
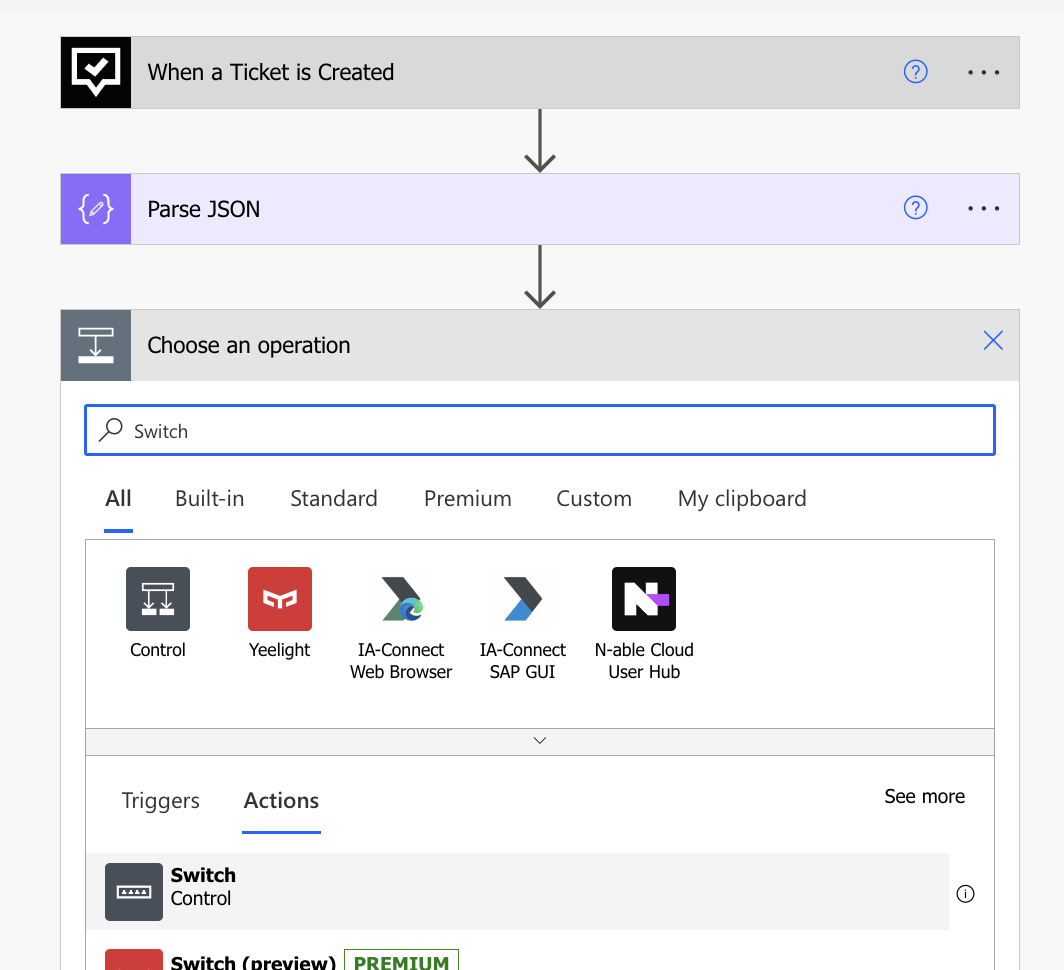
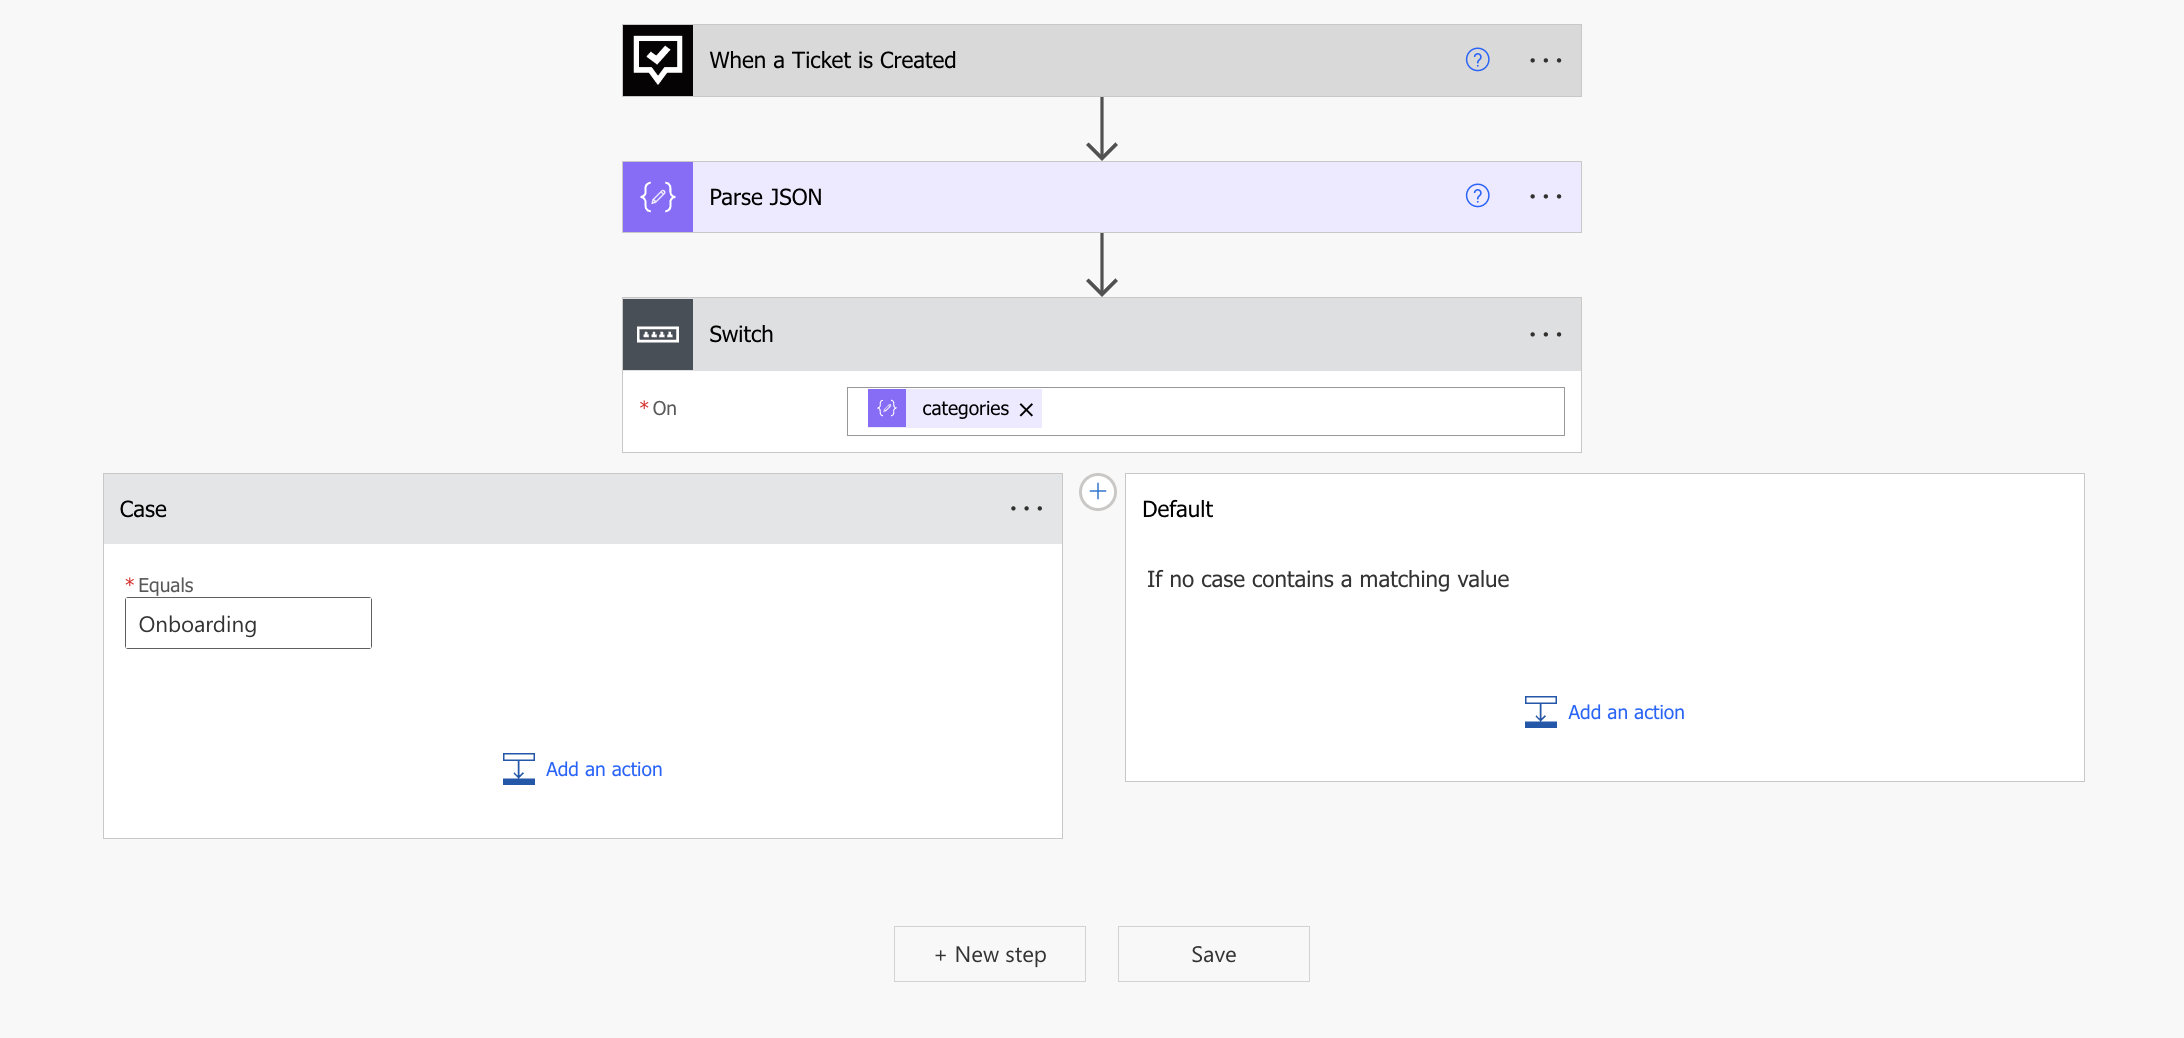
Now that we can evaluate the Custom Form answers, and Category and Due Date are available to the Power Automate flow, we will use these properties to map them back to a Ticket. We will do this by using a Power Automate Control – Switch Action to evaluate the Custom Form properties and then set the appropriate Ticket properties.
We will select + New Step, search for Switch and select Switch Control.
In the Switch action, for the On property select Parse JSON – categories. This will give us the ability to evaluate the Custom Form Category selected.
We will want to evaluate if the Category selected in the Custom Form is Onboarding, so we will be using the Case statement to interpret the property and if it = Onboarding then update the respective Ticket Category property to Onboarding.
In the Case statement for the Equals property, type Onboarding.
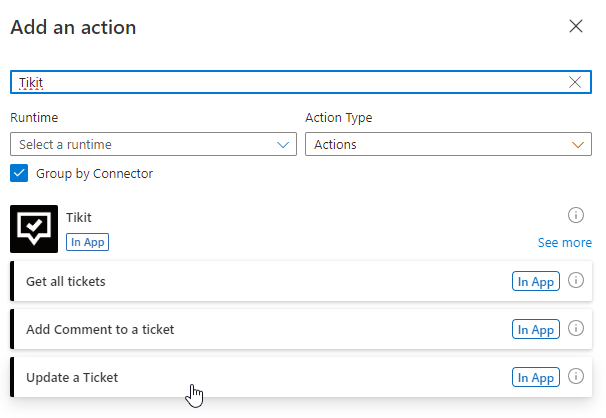
We will now update the Ticket Category to Onboarding and the Due Date for the Ticket that triggered this PA flow.
Select Add an action, search for Tikit and select Update a Ticket.
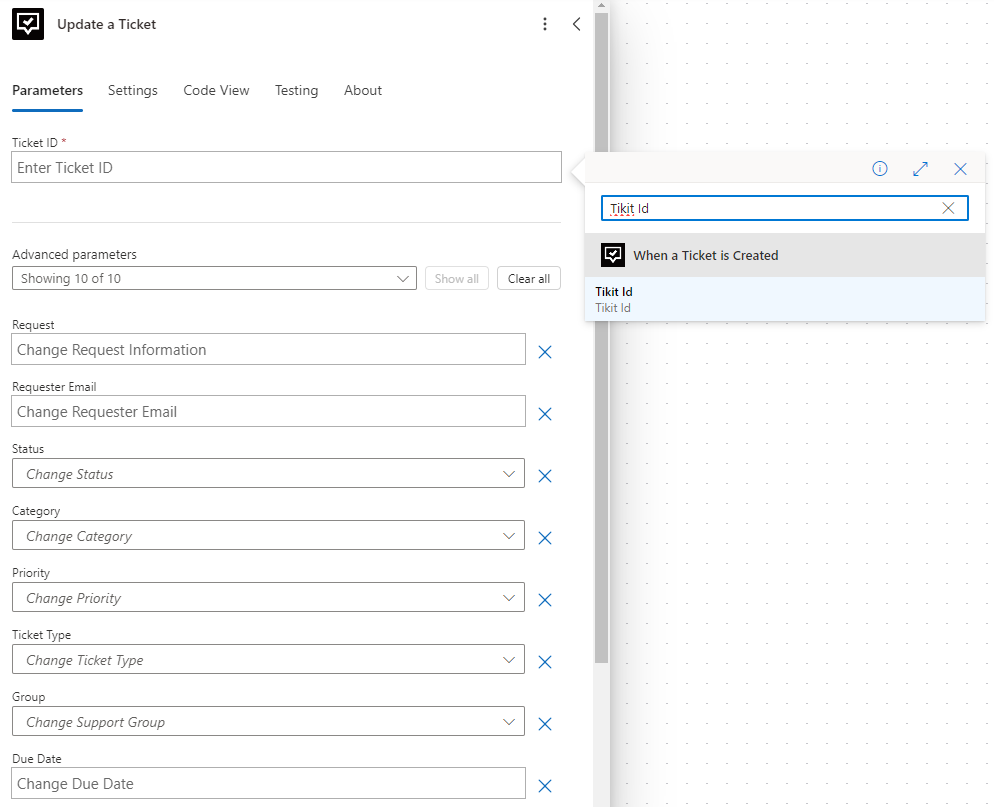
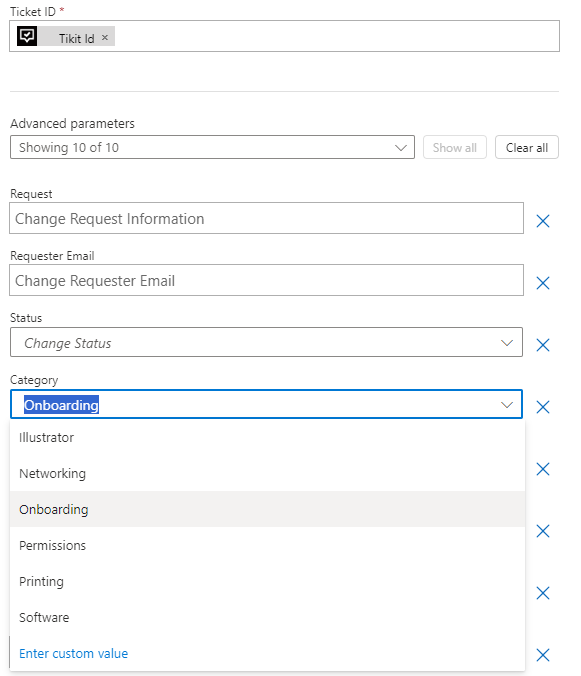
We will set the the following properties for the Update a ticket action:
Ticket ID: When a Ticket is Created – Tikit ID
Category: Onboarding
Due Date: Parse JSON – due Date
If you want to map other selected Custom Form Categories or a Due Date to a Ticket, you can add another Case statement and repeat the steps outlined in the section Map Category and Due Date.
Map Tikit Id
Map Category to Onboarding
Map Due Date
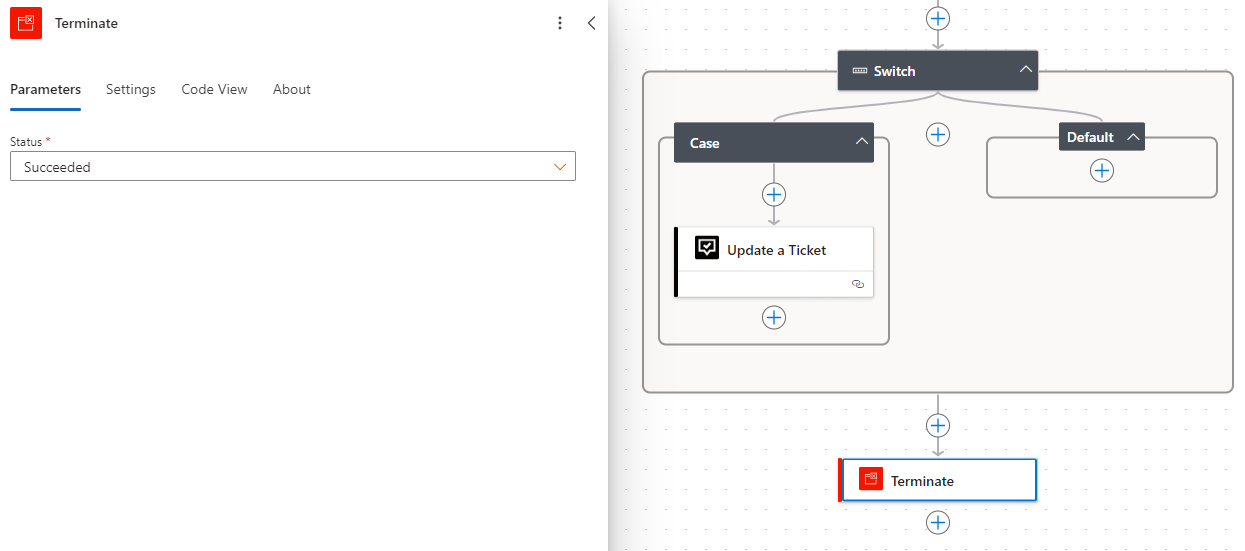
We will want to add a Control – Terminate – Success action to the Default case as well to properly terminate the flow if the Case statement(s) did not find a match.
Select Save to save the Power Automate flow.
Your Power Automate Flow has now been setup, and when you create future tickets that have the Ticket Mapping – Category and Due Date template selected the appropriate Ticket Category and Due Date property will be updated.