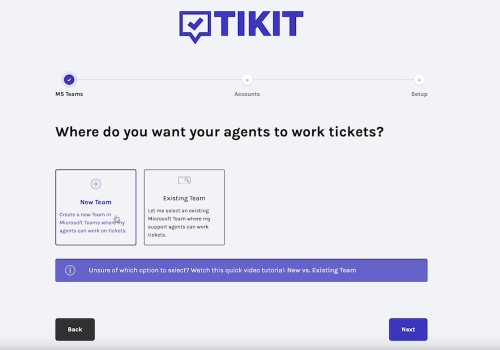
The Tikit Setup Series is a step-by-step video guide for any customer to work through the installation, setup and configuration of Tikit. As you travel through this guide, each section is meant to build on top of the previous section’s setup steps however you can choose to skip ahead to a certain section of interest at any time.
We hope you have fun installing and setting up Tikit! 😀
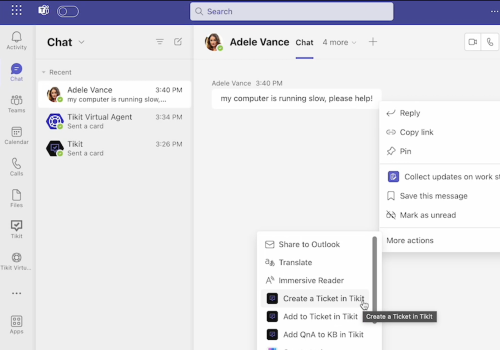
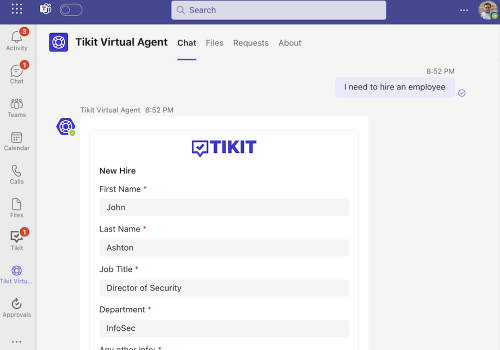
Now that you have Tikit and Tikit Virtual Agent installed, we can get down to business. In the Teams area of the Tikit Setup Series we will walk you through how to create a ticket from a message, how agents and end users will interact in Teams and how end users can self-serve within Tikit Virtual Agent.
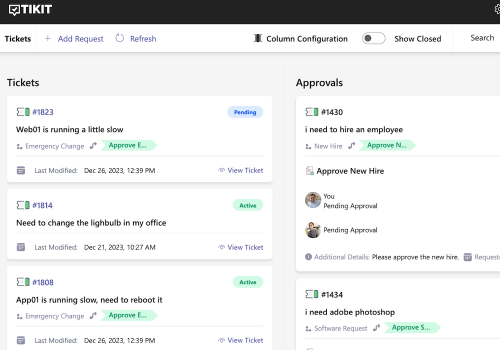
End users cannot only easily create tickets in Teams, but can also create tickets in the Tikit End User Portal aka Request Portal. The Request Portal is a beautiful an intuitive web experience where end users can create new tickets, review currently opened tickets and action any approvals that are assigned to them.
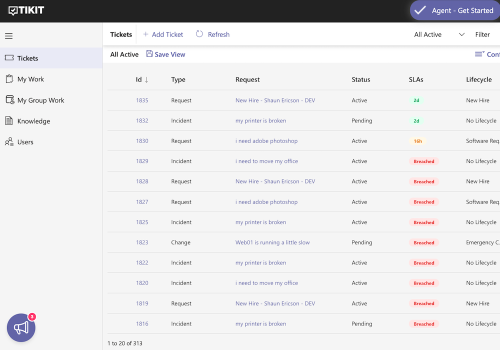
Just like end users, Agents also have the ability to work within in Tikit Agent Portal. The Tikit Agent Portal is a beautiful responsive web experience where Agents can create and work Incidents, Service Requests, Change Requests, etc… across any device at any time.
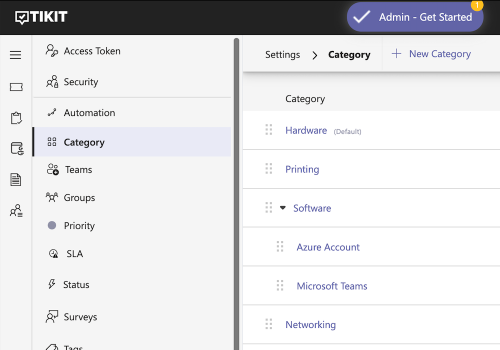
Tikit Administrators will do most of the setup and configuration of Tikit within the settings area of the Tikit Agent Portal. Some common day to day administration tasks include managing categories, giving access to other agents, integrating Tikit into other M365 features and setting up the email connector.
Tikit Knowledge allows for you to deliver an AI-Powered Service Catalog across your business. End users can naturally search for solutions across your knowledge base and easily kick off any business process (templates & custom forms) to include Software Requests, New Hires and New Hardware Requests. Agents can also initiate any Service Request or Change Request directly from the Tikit Agent Portal.
In this area of knowledge, we’ll walk you through deploying OpenAI on Microsoft Azure to extend your Knowledge Base even further by enabling Tikit Virtual Agent to provide generative AI responses based on your own documentation.
You can also reference the following Tikit Azure AI Help article for step-by-step instructions on how to connect Tikit with OpenAI on Azure.
Tikit Lifecycles elevate your Service Desk by introducing business workflows for any of your internal processes. With Lifecycles, any Incident, Service Request or Change Request can have one or multiple phases that control the sequence of steps required to fulfill that request. Examples of Tikit Lifecycle business processes include Software Requests, New Hires, Hardware Requests and Standard Change Requests.
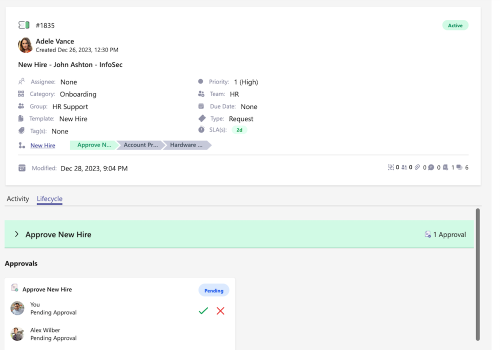
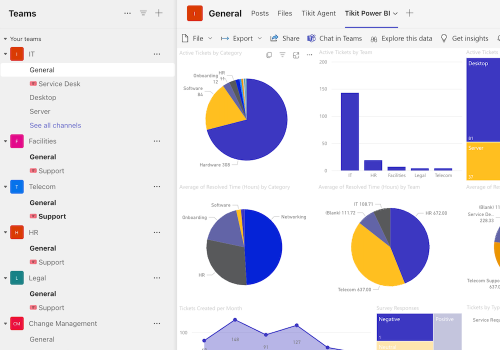
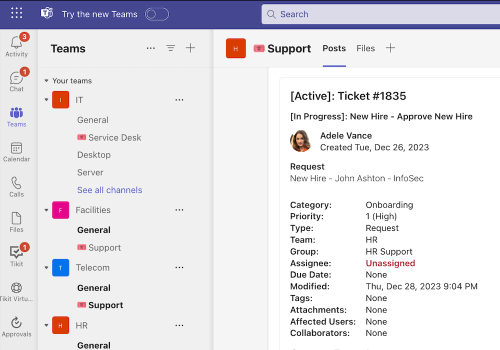
Tikit supports a multi-department experience allowing IT, Facilities, Telecom, HR, Legal, Finance or any other support organization in your business to receive and manage requests from the business. Through its native integration with Microsoft Teams, Tikit easily deploys to any Team across your infrastructure, allowing for agents to work on tickets right next to their day to day collaboration within their department.
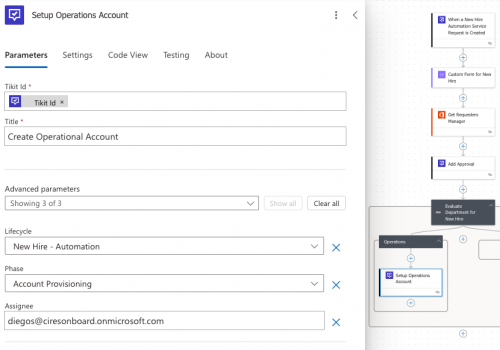
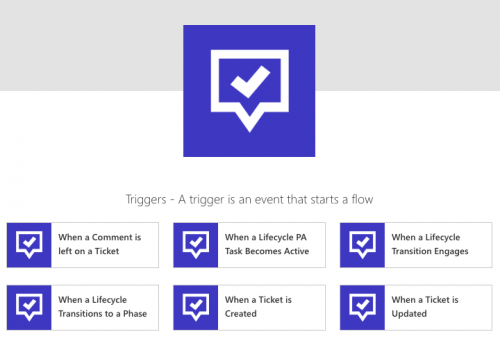
Tikit natively integrates with Microsoft Power Automate, allowing Tikit to manage the business processes in your Service Desk while leveraging Power Automate to automate repetitive manual tasks. Some powerful examples of this integration include provisioning all the accounts for an employee during a New Hire process or creating new Microsoft Teams based upon a business approval. With the Tikit Power Automate integration, your automation options are limitless.
The following is an overview and a walkthrough of the pre-reqs on how to setup Tikit to work with Power Automate.
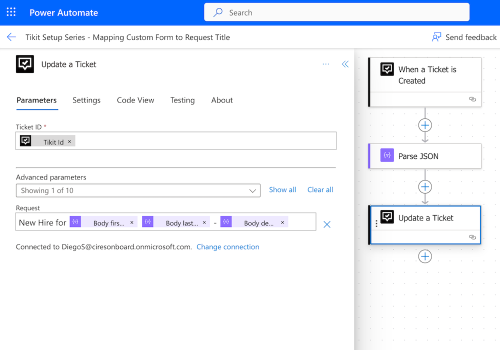
In this example of our Power Automate integration, we will highlight how we can consume the custom form properties of a new hire service request, and adjust the request title of a new hire ticket to better inform your agents as they are reviewing lists of tickets.
- Map Custom Form Overview
- Part I – Setup Power Automate Flow
- Part II – Setup Power Automate Flow
- Interacting with Power Automate Flow
You can also reference the following Tikit Map Custom Form Answers to Ticket Properties Help article for step-by-step instructions.
In this example of our Power Automate integration, we will highlight how we can add a requester’s manager out of Microsoft Entra as an approver to a new hire service request. With this type of approval adaptability, your business can now dynamically shift any business process approval within Tikit.
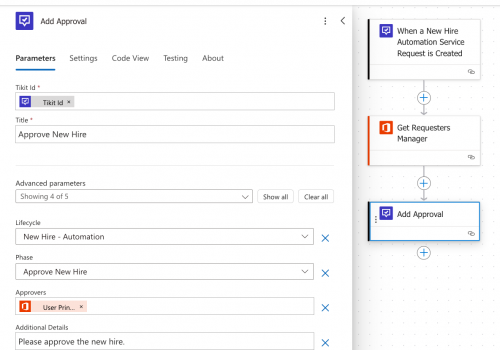
In this example of our Power Automate integration, we will highlight how we can add tasks dynamically to a new hire service request based upon the selected department of the new employee. With this type of task adaptability, your business can now dynamically shift any business process within Tikit.
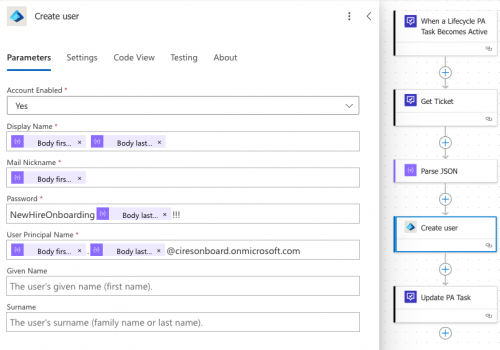
In this example of our Power Automate integration, we will highlight how a new hire process can send a task up to Power Automate to automatically create a Microsoft Entra account. With these types of integrations, your business can now manage the people process of any business request with Tikit lifecycles but can also automate any manual task such as creating an Entra account, setting up a mailbox, assigning licenses, governing the creation and access to Teams resources, etc…
Tikit provides native and enterprise ready reporting capabilities across the Service Desk. With TIkit, you can report through 4 different methods: Export to CSV, Reports KPI Dashboard, Power BI Advanced Reporting and Real Time Excel Sync. No matter if you need to quickly data-mine information through a CSV export, or provide beautiful dashboard experiences with Power BI, Tikit enables your business to report how and where you want across the business.
