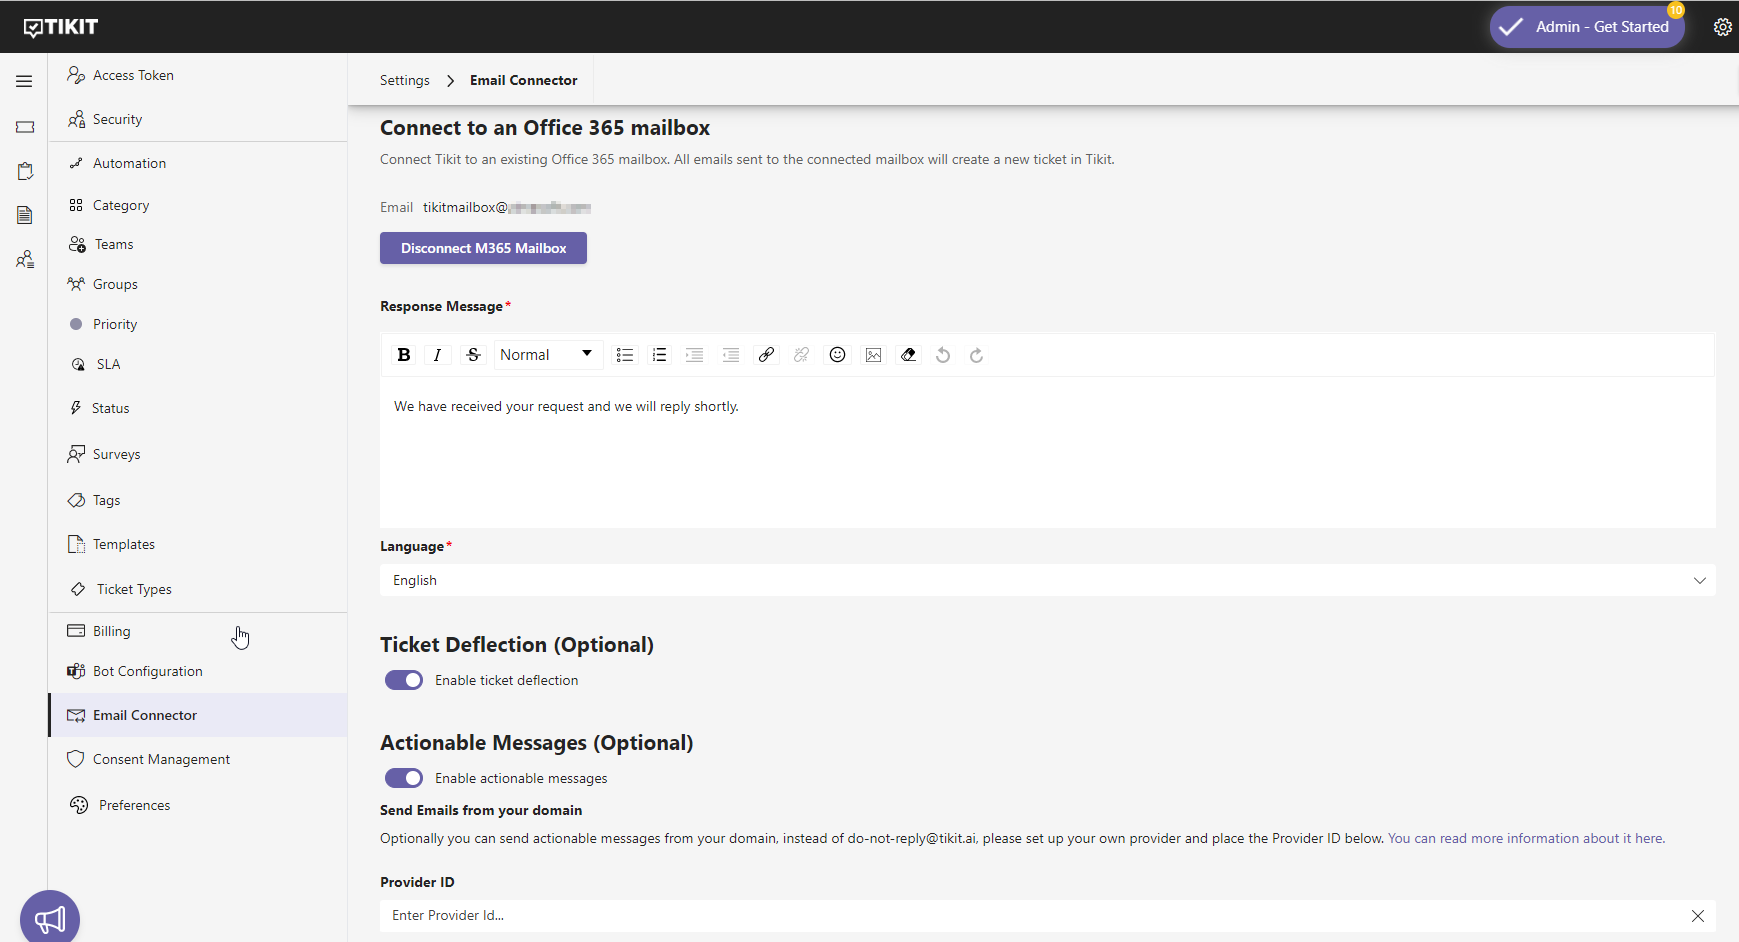
Connect Tikit to an M365 mailbox. All emails sent to the connected mailbox will automatically open new tickets in Tikit. Note that connecting a shared mailbox is supported to avoid having to use an additional M365 license.
How to view Email Connector setting
Connect each Team to a mailbox within the Teams section of Tikit. All emails sent to the connected mailbox will automatically open new tickets in Tikit. Note that connecting a shared mailbox is supported to avoid having to use an additional M365 license.
To view and update email connector settings in the Tikit web app:
Once in the Tikit web app, select the settings gear in the header, then select Teams.
The email connector will attempt to determine the sender’s language preferences based on the internet header of the message. If the connector cannot determine the language, the language specified in the Language option will be used as the default. This affects basic message properties including buttons, and actionable message cards.
Note: The email connector sends notifications with a ticket number in the message subject using the format: #123. To reply to a ticket and create a comment on the ticket, the number must be included in the subject line of the email being sent.
Exclude Footer
Removes the link to the ticket in the portal from the bottom of the email message.
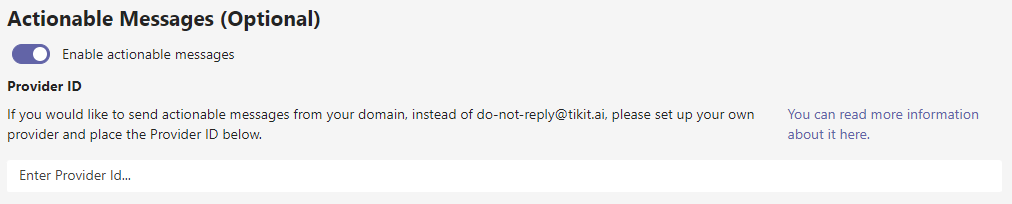
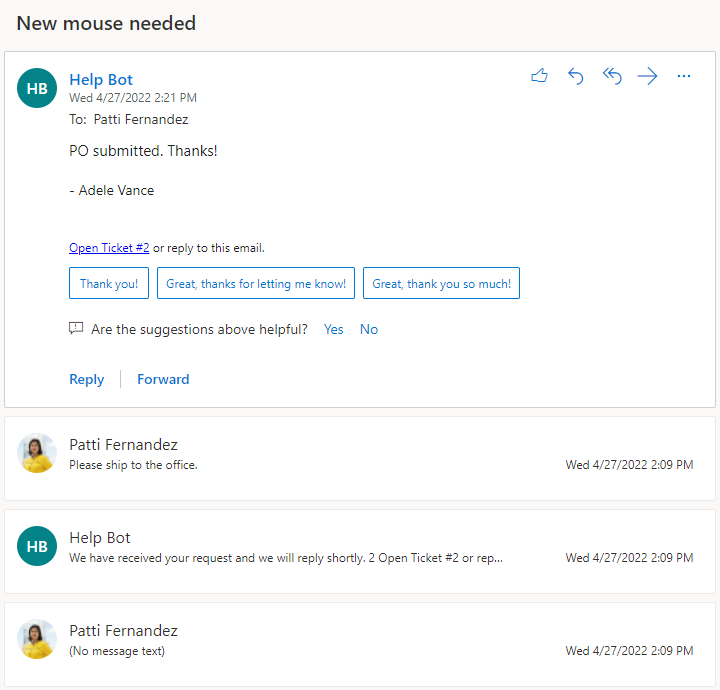
When a user submits a request via the email connector, Tikit responds with a customizable response message. Actionable messages takes this one step further by providing an immediate view of the user’s request to see ticket details, replies, and even add new replies without leaving Outlook.
To enable actionable messages:
In Settings > Email Connector, select Enable actionable messages to enable the feature.
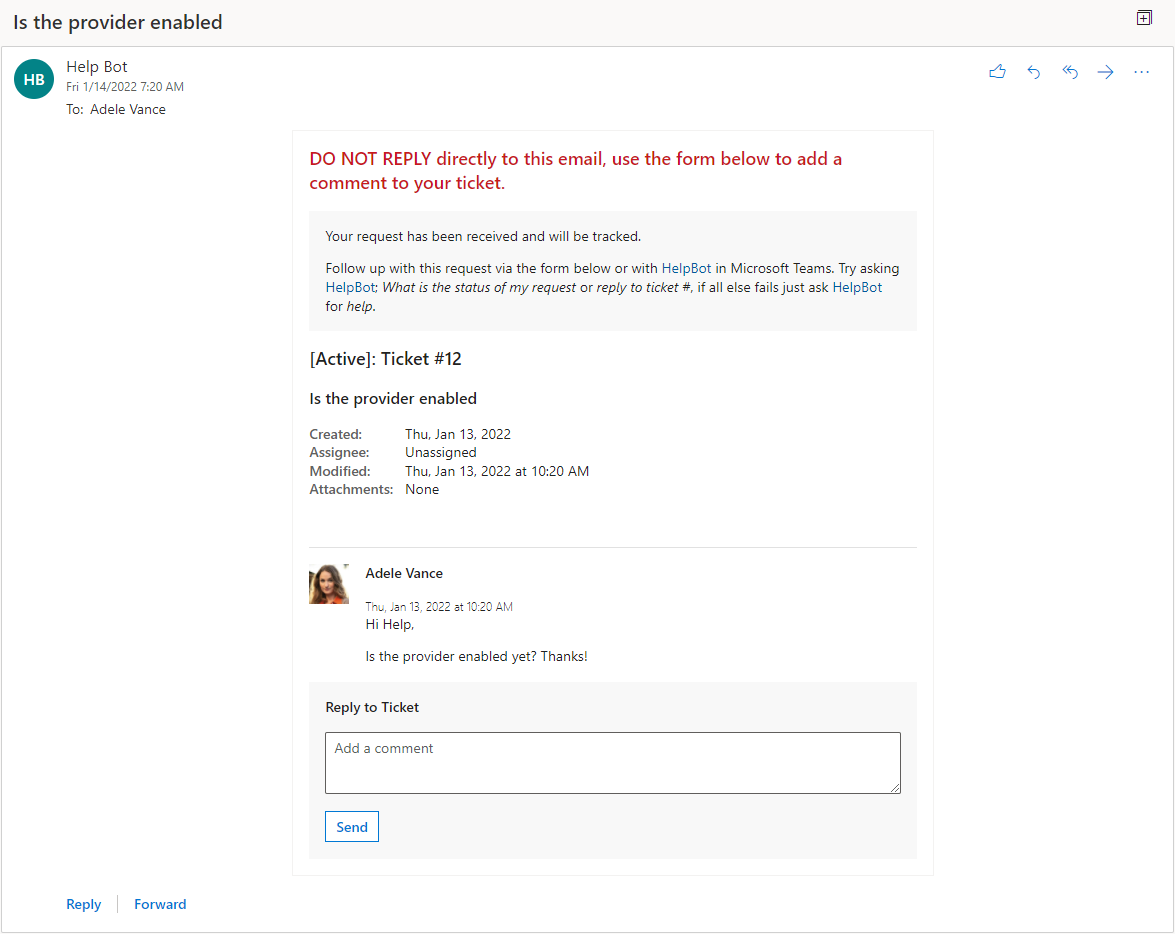
Here’s an example of the response message with actionable messages enabled. Enter a comment in the Reply to Ticket field and select Send to add it.
Notice that the sender is Do Not Reply <do-not-reply@tikit.ai>. By default, actionable messages will be sent by do-not-reply@tikit.ai. If you’d like to change the sender email to one from your domain then you will need to create a Service Provider and enter the Id in the Provider ID field. Check out How do I send actionable messages from my domain instead of do-not-reply@tikit.ai? for more details.
Here’s an example of the response message with actionable messages enabled and a custom provider.
As a fallback if the user’s client doesn’t support actionable messages or they are not in the scope of your custom provider, they will see just the see response message.
To add a reply to a ticket with the email connector:
A note on adding replies and actionable messagesIf actionable messages are enabled, use the Reply to Ticket field to add a reply instead of replying via email.
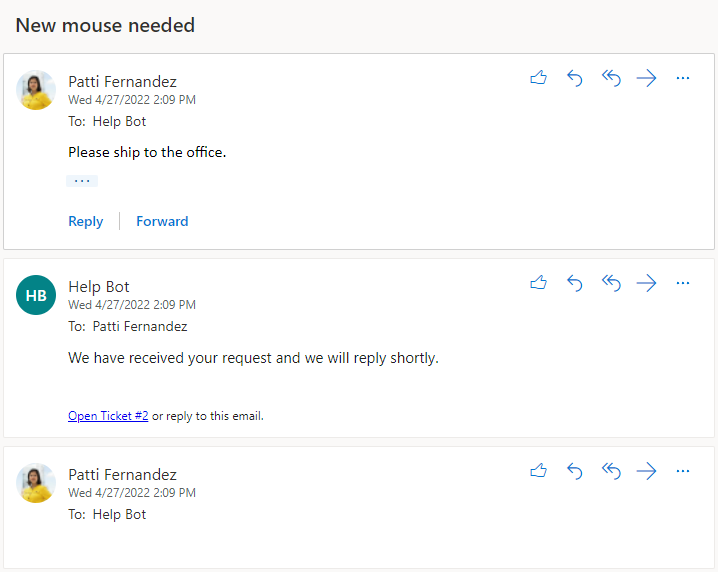
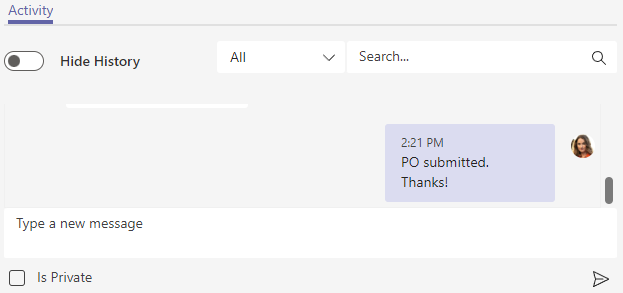
Requesters can add replies to their requests by simply replying to Tikit emails. In this example, Patti wants to add a quick reply to their ticket so they reply to the email notification from the connected mailbox.
Once on the edit ticket page, Patti’s reply can be seen in the activity feed. For more on details on using the ticket dashboard to view ticket activity, check out How to view ticket activity.