Problem
Given a user with any app role in Tikit
And the user is not an admin in your AAD tenant
When the user logs into the Tikit web app at https://web.tikit.ai
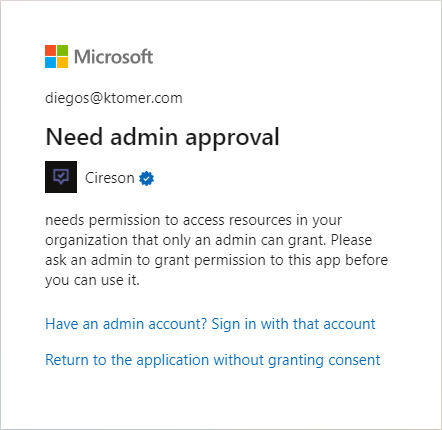
Then the analyst sees the following message from Microsoft:
“Need admin approval”
Solution
The Tikit web app may have new permissions that need to be approved by an admin.
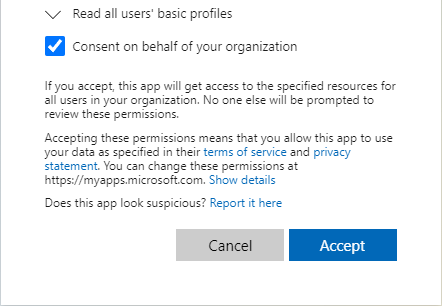
Approve the Tikit permissions on behalf of your organization by logging into https://web.tikit.ai as an AAD admin and checking Consent on behalf of your organization.
If not prompted, the permissions may have been previously consented to for the logged in admin only and not on behalf of the organization. That can be resolved by either revoking the permissions for Tikit and consenting fresh (steps 1-3) or by consenting on behalf of your organization with a separate AAD admin account (step 3 only).
Warning that users may have issues accessing Tikit during the time permissions are removed, but this should only be for a very short period as the very next steps are to reconsent.
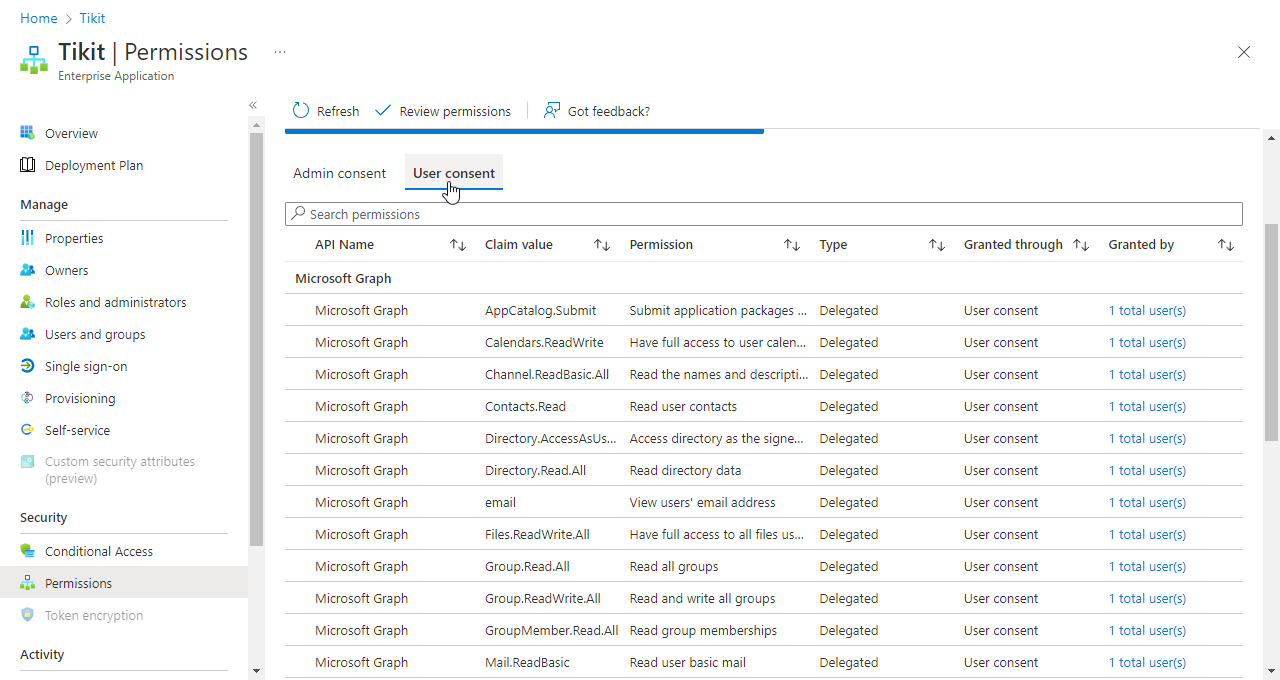
- Check for User Consent entries in the Azure Active Directory > Enterprise Applications > Tikit:
- Login to the Azure portal, then open Azure Active Directory > Enterprise Applications.
- Once in Enterprise Applications, select Manage > All applications, then search for and select Tikit.
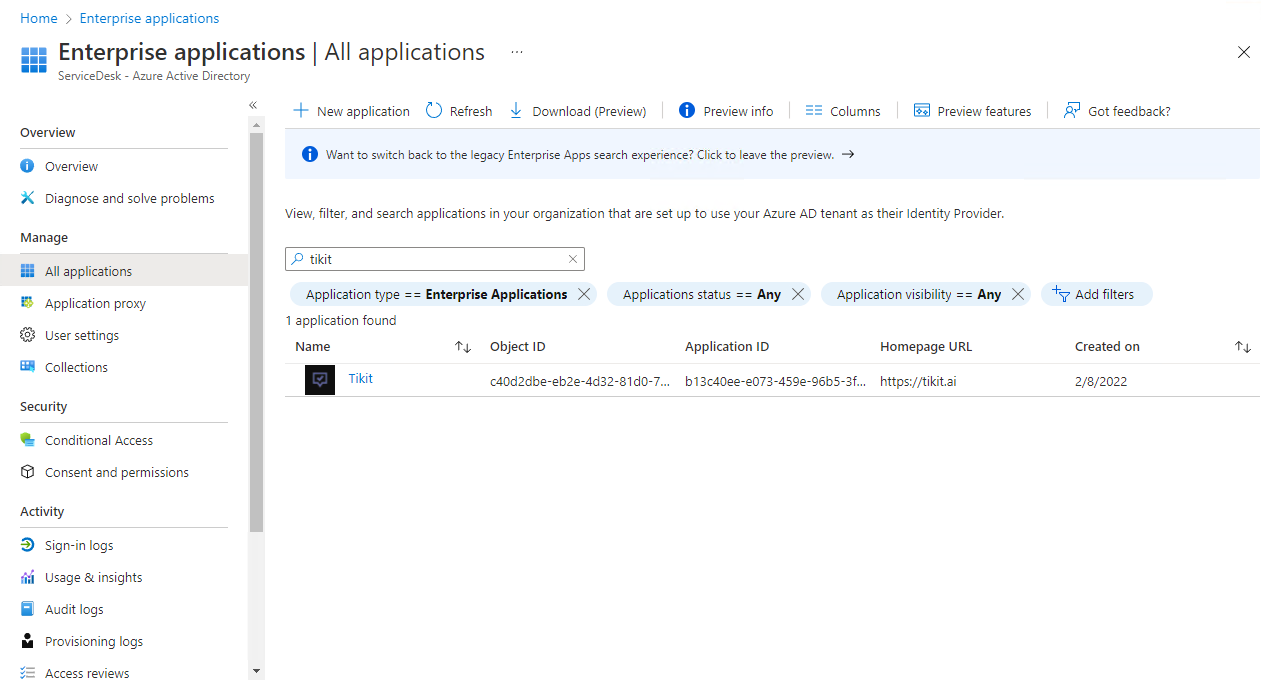
- Once in the Tikit Enterprise Application page, select Security > Permissions on the left, then select the User Consent tab and confirm that there are entries for a specific user. This is most likely the admin you’d like to grant permissions.
- At this point, if there are User consent entries, you can either skip to step 3 to consent with another admin account and select on behalf of organization, or continue to step 2A revoke all permissions and consent fresh.
- (Step 2A) Using PowerShell, revoke all permissions for Tikit.
Note there is an Alternative Step 2B below if you do not want to use PowerShell to revoke permissions. Step 2B will completely remove the Tikit Enterprise Application entry and then re-add it.
Warning that users may have issues accessing Tikit during the time permissions are removed, but this should only be for a very short period as the very next steps are to reconsent.
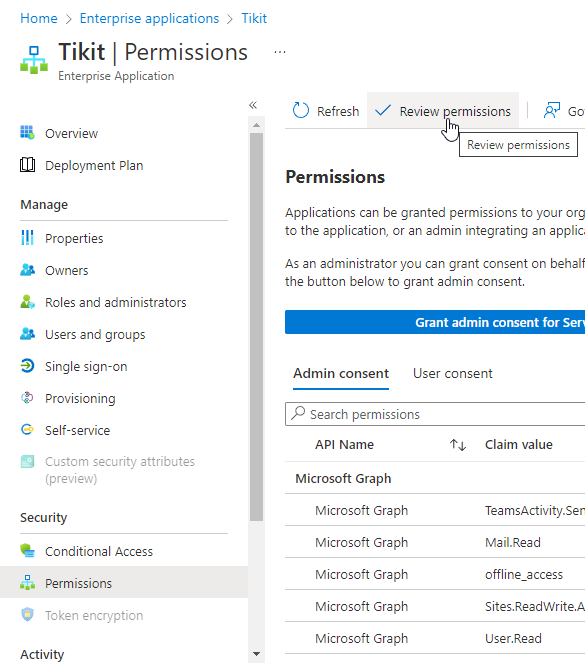
- From the Security > Permissions page, select Review Permissions.
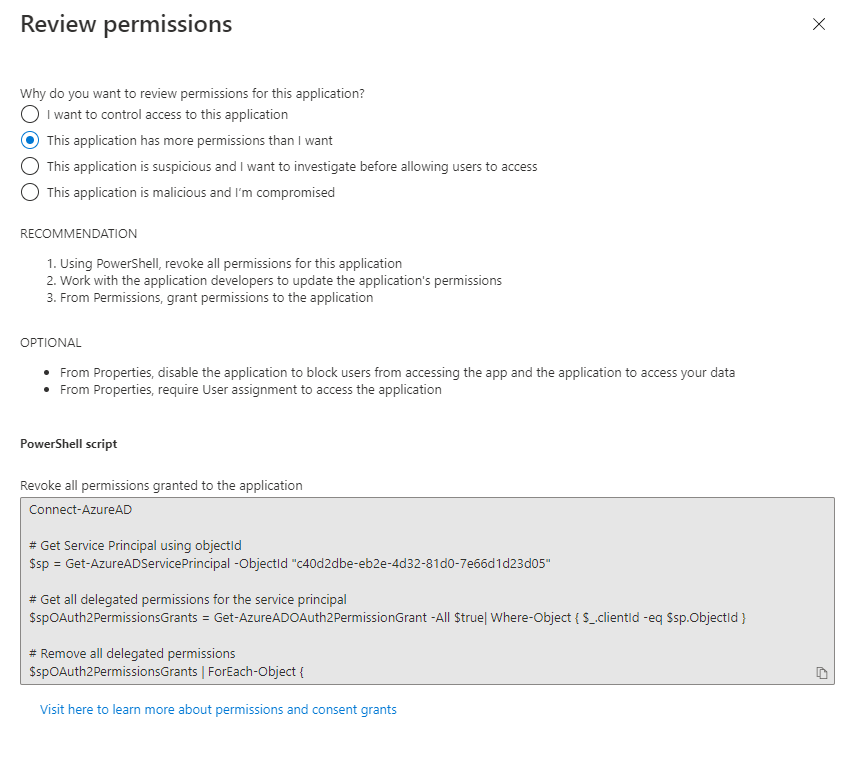
- Once the Review permissions flyout is open, select This application has more permissions than I want, then use the provided Azure Active Directory PowerShell script to revoke all permissions for Tikit.
If you haven’t installed the Azure AD Module in PowerShell yet, check out Install Azure Active Directory PowerShell for Graph.
- Once the permissions are revoked, refresh Tikit Enterprise Application permissions and confirm that the User consent tab no longer has any entries.
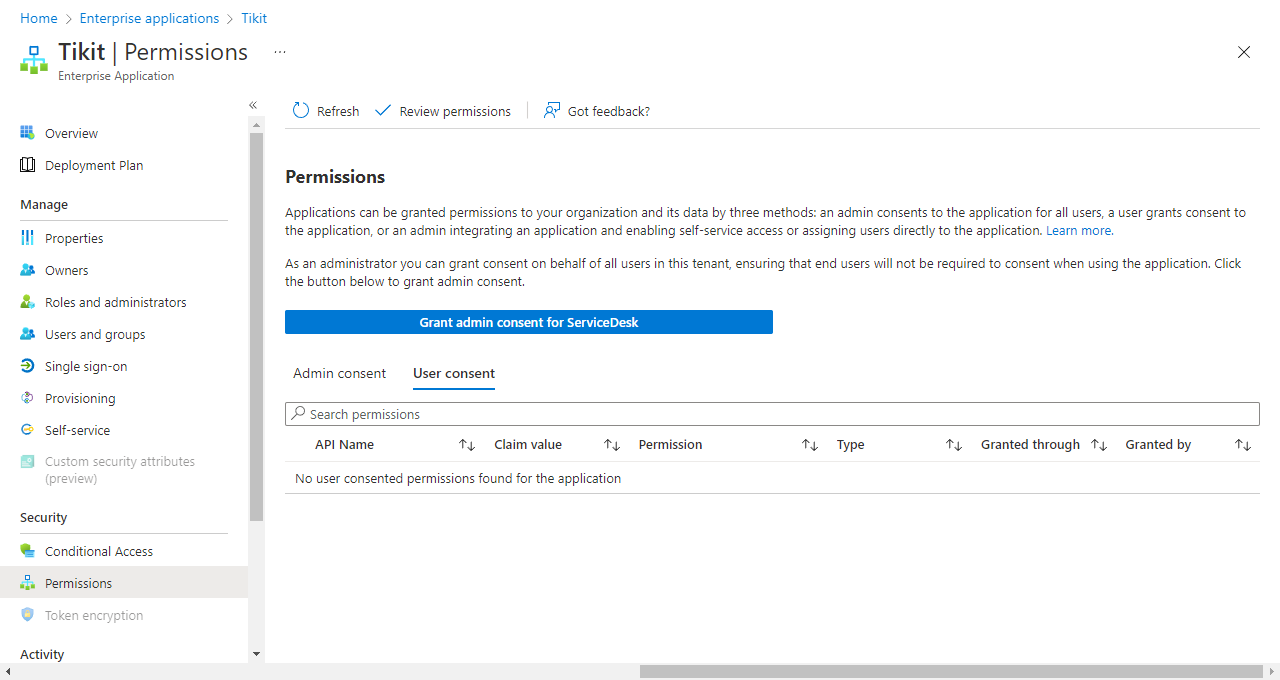
- Select Grant admin consent to consent to the Tikit application permissions.
- Once consented, continue to step 3 to consent to the Tikit web app’s permissions on behalf of your organization.
- From the Security > Permissions page, select Review Permissions.
- As an AAD admin, login to https://web.tikit.ai and when prompted to consent to application permissions, make sure that Consent on behalf of your organization is checked then select Accept.
Alternative Step 2B
Step 2B. Removing the Tikit Enterprise Applications entry and re-adding admin consent.
This alternative step avoids the use of the Azure Active Directory PowerShell Module and can be done entirely from a browser and the Azure portal.
Once completed, you can continue on to the original Step 3 above.
- Login to the Azure portal, then open Azure Active Directory and locate your Tenant ID to use later (e.g, ef6ac50c-97c8-4da9-b2c9-206b54f68cce).
- Once you have your Tenant ID, open Manage > Enterprise Applications.
- Once in Enterprise Applications, select Manage > All applications, then search for and select Tikit.
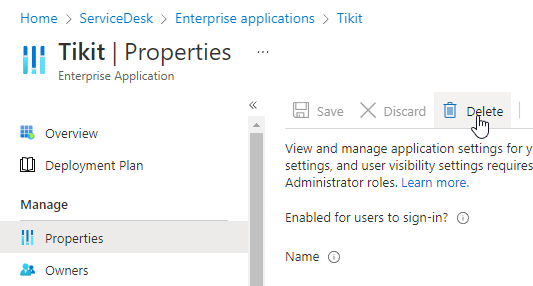
- Once in the Tikit Enterprise Application page, select Manage > Properties on the left, then select Delete.
Warning that users may have issues accessing Tikit during the time permissions are removed, but this should only be for a very short period as the very next steps are to reconsent.
- Open the following URL to provide admin consent for Tikit, replacing the {tenant-id} with your Tenant ID from step 1.
Want to learn more about what this URL does? Check out Construct the URL for granting tenant-wide admin consent.https://login.microsoftonline.com/{tenant-id}/adminconsent?client_id=b13c40ee-e073-459e-96b5-3f3cca046a37&redirect_uri=https://app.tikit.ai/teams/consented
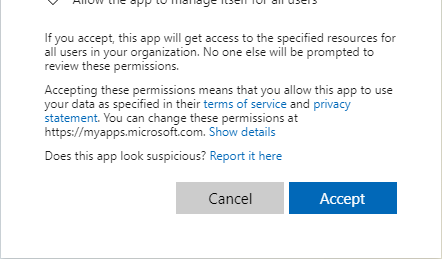
- A window will open from the Azure portal to prompt for tenant-wide admin consent for Tikit. Select Accept to grant consent and re-add Tikit back to Enterprise Application in AAD.
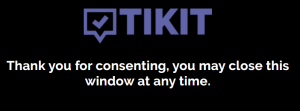
- After consenting, you will be redirected to the consent completed page. At this point you may continue on to Step 3 to approve permissions from the Tikit web app.