Category

Manage category picker values from the Category settings page, including updating category names, reordering and nesting values, and (un)archiving values.

To access and manage Category settings:

  1. Open the Tikit web app at https://web.tikit.ai.
  2. Once in the Tikit web app, select the settings gear in the header, then select Category.
1 
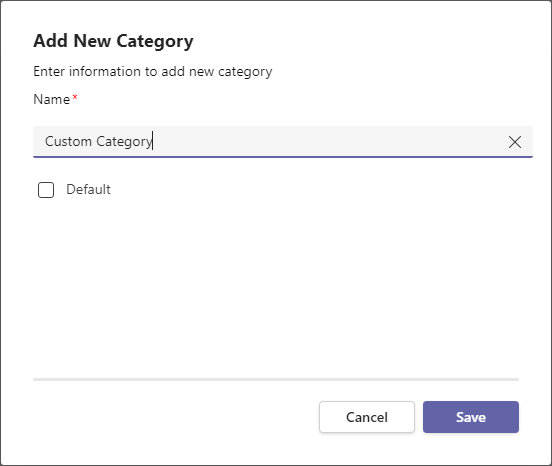
Add a new category. 1 of 6 2 
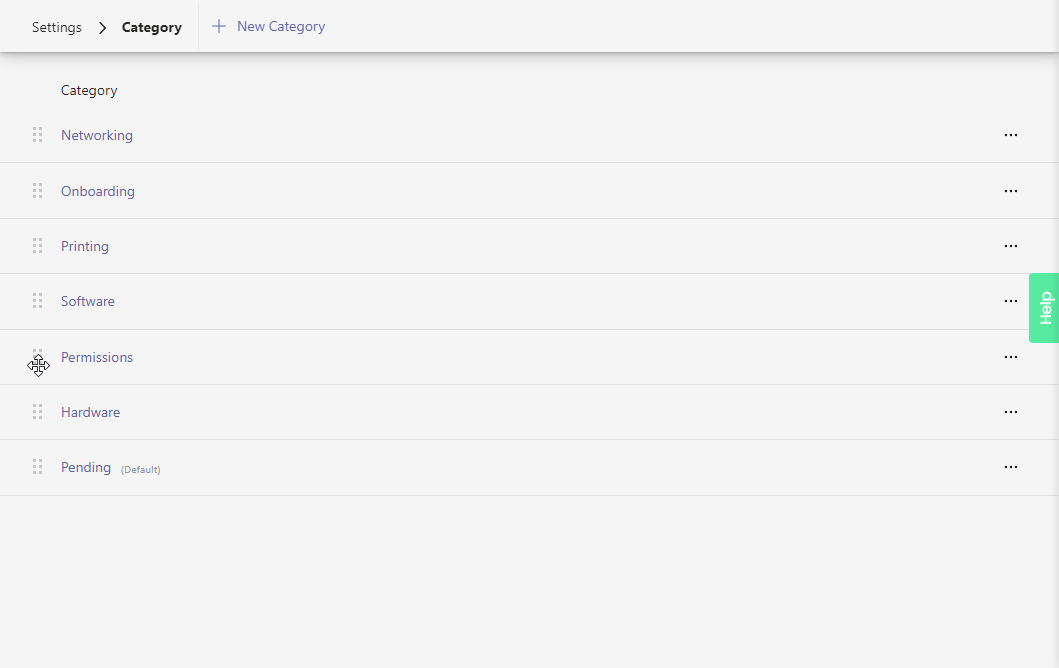
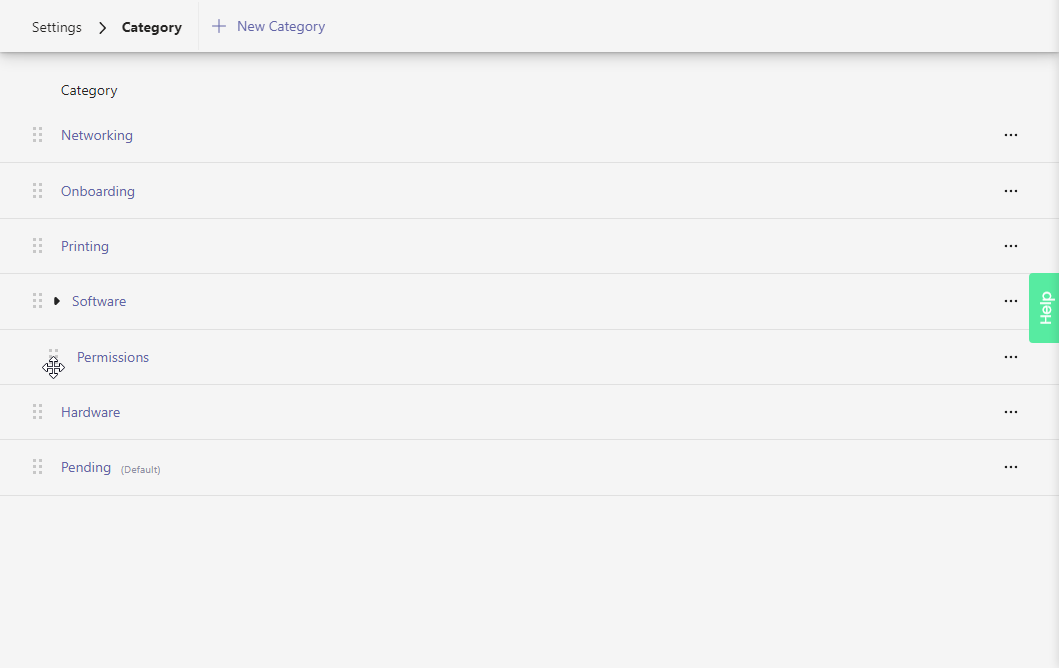
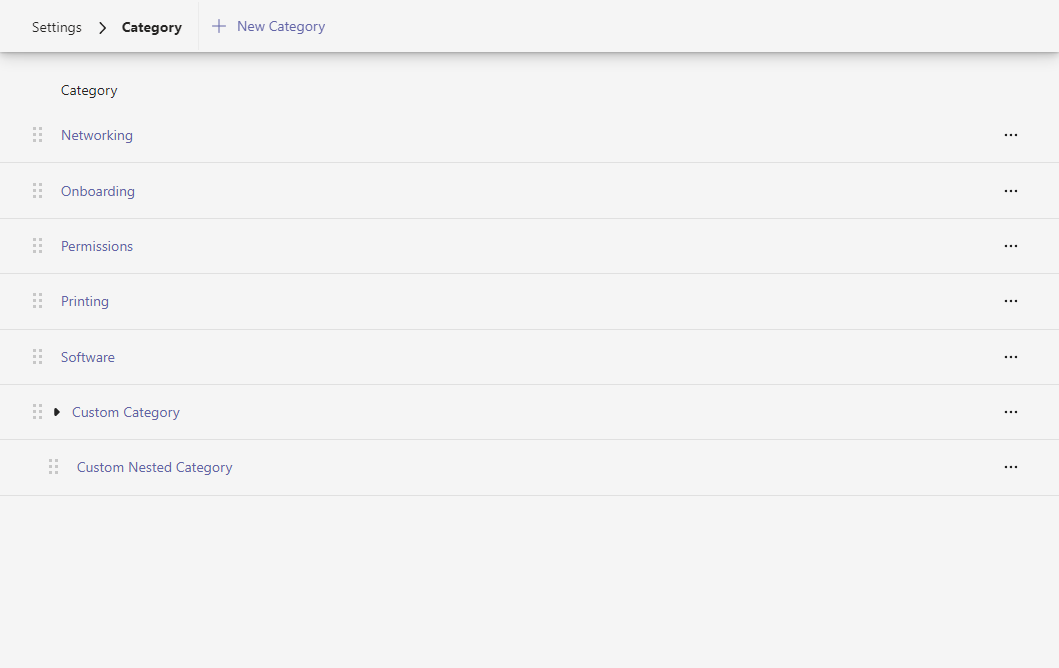
Drag and drop values to change their order or drop onto another value to nest. 2 of 6 3 Available actions like Edit, Archive, and Un-Archive. 3 of 6 4 Picker value. Select a value to edit. 4 of 6 5 Default value. When new tickets are created, this value will be used by default. 5 of 6 6 Expand/Collapse nested values. 6 of 6
  1. New Category Add a new category.
  2. Sort Drag and drop values to change their order or drop onto another value to nest.
  3. Actions Available actions like Edit, Archive, or Un-Archive.
  4. Value Select a value to edit.
  5. Default flag When new tickets are created, this value will be used by default.
  6. Expand/Collapse Expand/Collapse nested values.

To add a new category:

  1. In Settings > Category, select + New Category to open the Add New Category form.
  1. Enter a new category Name. Optionally, check Default to make this category the default value for new tickets.
  2. Select Save to add the category.

To edit an existing category:

  1. In Settings > Category, select a name to open the edit form.
  1. Update the category Name. Optionally, check Default to make this category the default value for new tickets.
  2. Select Update to save your changes.

To archive an existing category:

  1. In Settings > Category, find the category to archive then select > Archive.
  1. Select Archive to confirm.

The archived category will now show (Archived) next to its name.

To un-archive an archived category:

  1. In Settings > Category, find the category to un-archive then select > Un-Archive.
  1. Select Un-Archive to confirm.

The un-archived category will no longer show (Archived) next to its name.

Picker values like Status, Priority, and Category can be manually sorted and nested by dragging and dropping values to rearrange them.

To sort a category:

  1. In Settings > Category, find the value to sort, then click and drag by its handle on the left.
  1. Drag the category to a new position in the list.

Release the category to save its new position and keep dragging and dropping to sort the list.

To nest a category:

  1. In Settings > Category, find the value to nest underneath another category, then click and drag by its handle on the left.
  1. Drag the category and drop it onto another category to nest it.

Release the category to finish nesting it and save the change. Feel free to drag a nested category onto another parent or any other position in the list to sort.

Search
In this article