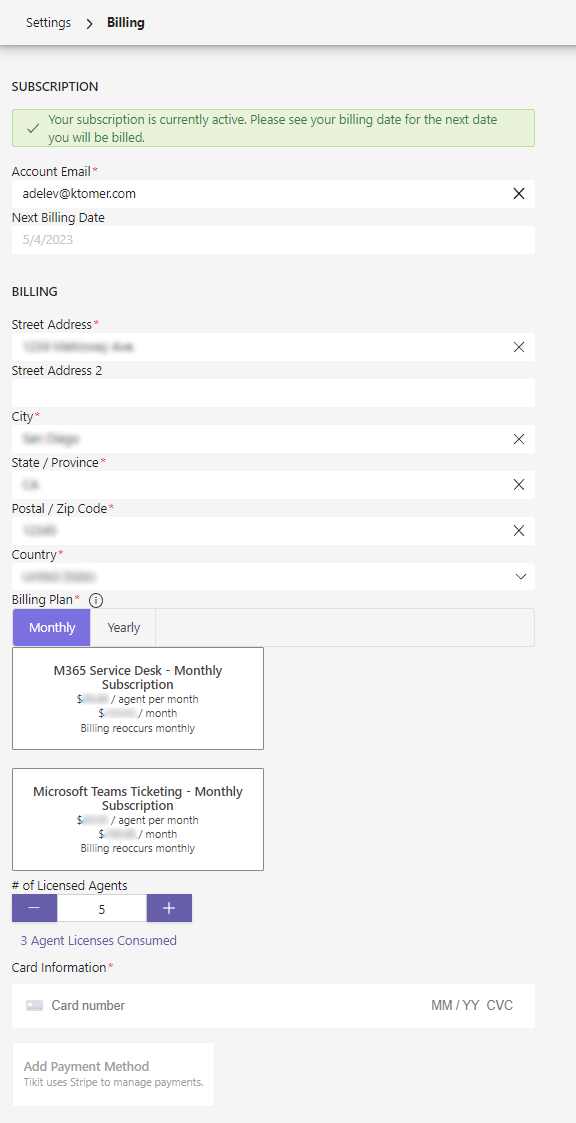
View and update your subscription plan, change license allocation, payment method, billing information, and view previous invoices from the Billing settings page.
Table of Contents
Add a header to begin generating the table of contents
To update which agent(s) have a license within Tikit:
In Settings > Billing, you can either:
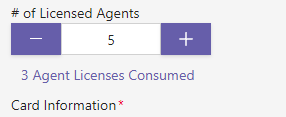
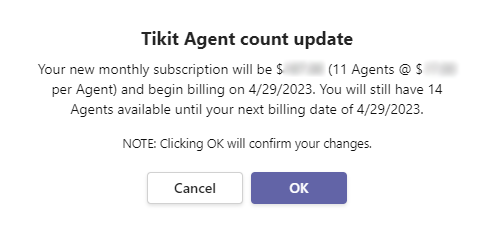
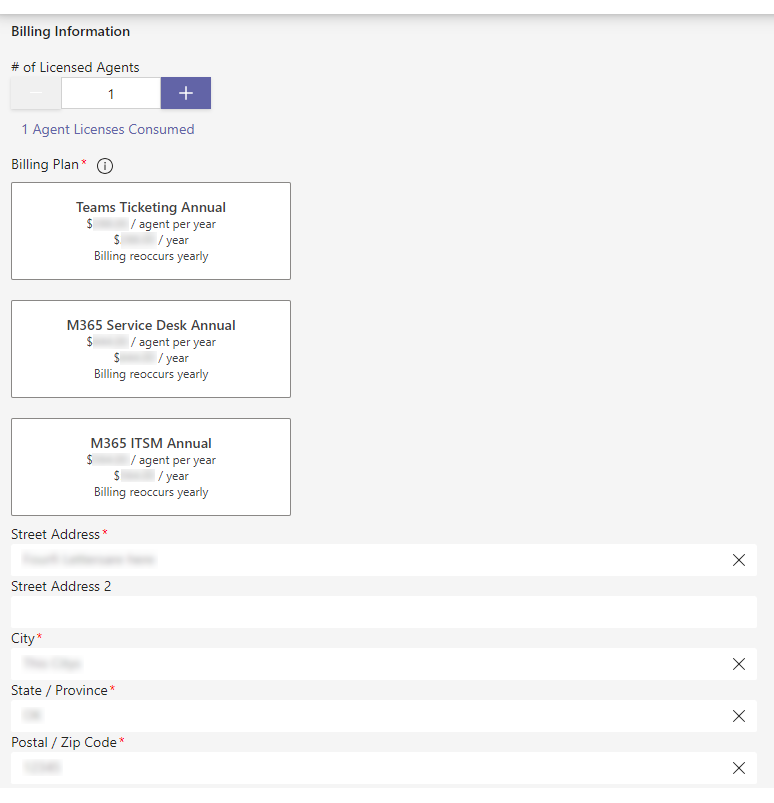
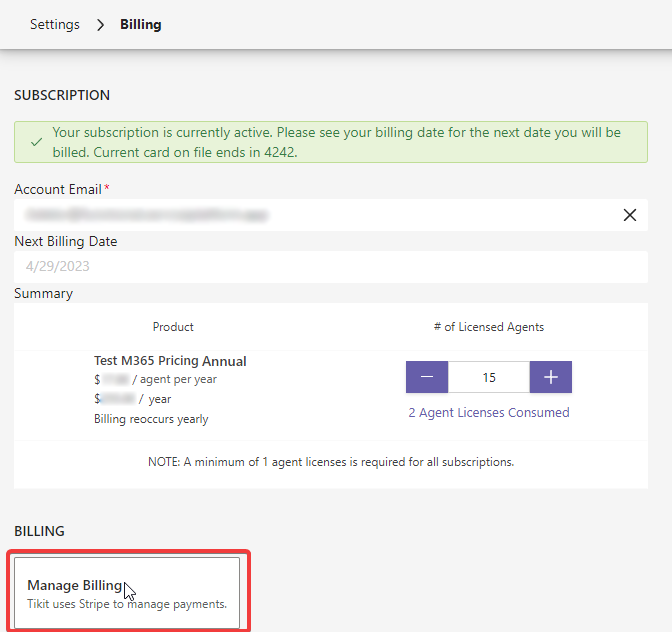
Decrease (-) or increase (+) the number of licenses you have purchased for your subscription. To confirm your change, click Save in the top right.
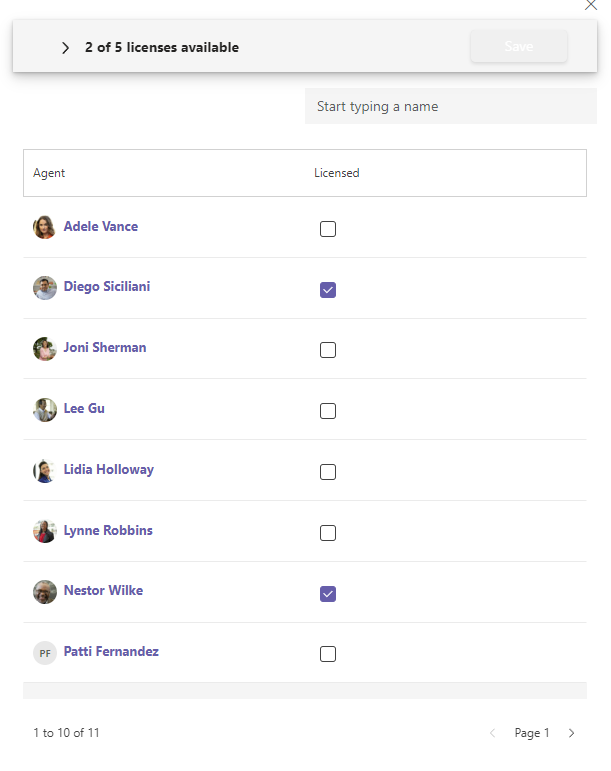
Click Agent Licenses Consumed and choose who you wish to license/unlicense as an Agent* given your current license count. To confirm your change, click Save
If you need to license users beyond your current purchased license count. First, increase your license count and click Save. When the page refreshes, you will be able to assign your new licenses when you click on Agent Licenses Consumed.
*An agent license is required for any user that needs to work and manage tickets such as updating the category, reassigning, relating tickets, etc.
When entering in your billing information for the first time with Tikit (welcome aboard!) you will be prompted for your billing information and a payment method. Once a payment method has been added, then any further updates and managing of your billing info can be done directly through Stripe. For more details, check How to manage billing below.
To update your billing information:
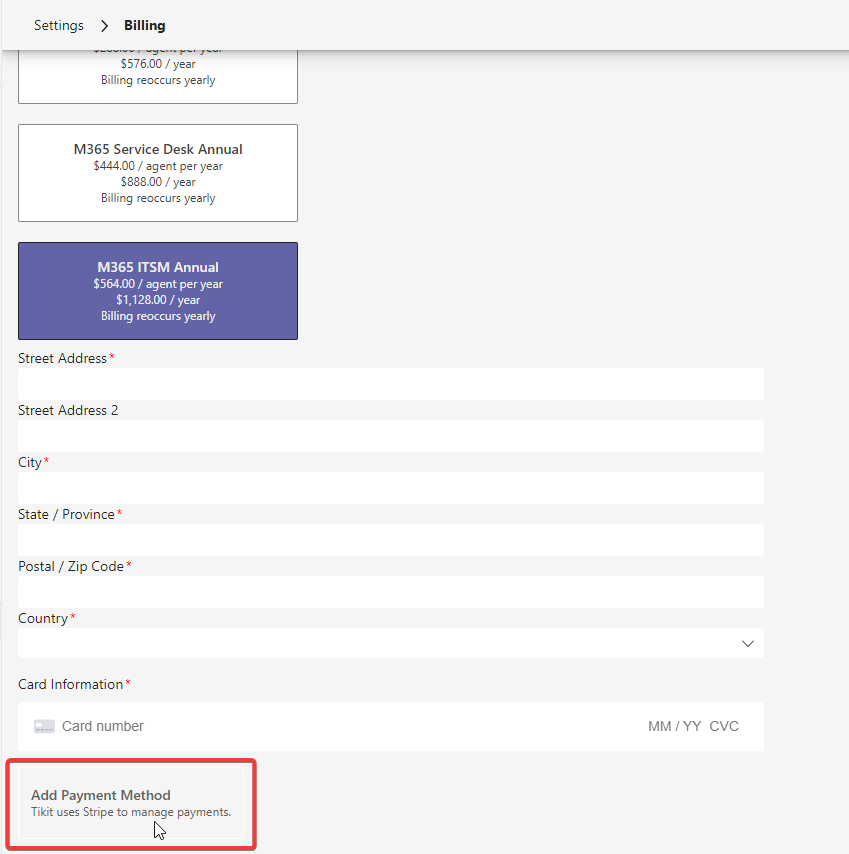
In Settings > Billing, enter your billing information, select a plan*, enter card info, then select Add Payment Method.
This will setup your subscription with the payment method entered. Don’t worry if you’re still trialing when entering payment info, we won’t charge the payment method on file until your trial is over.
For more information on plans and pricing, check out Tikit Pricing.
Tikit uses Stripe to manage payments. With Stripe you can view and update your subscription plan, payment method, billing information, and view previous invoices.
To manage billing in Stripe:
In Settings > Billing, select Add Payment Method to manage your billing information with Stripe.
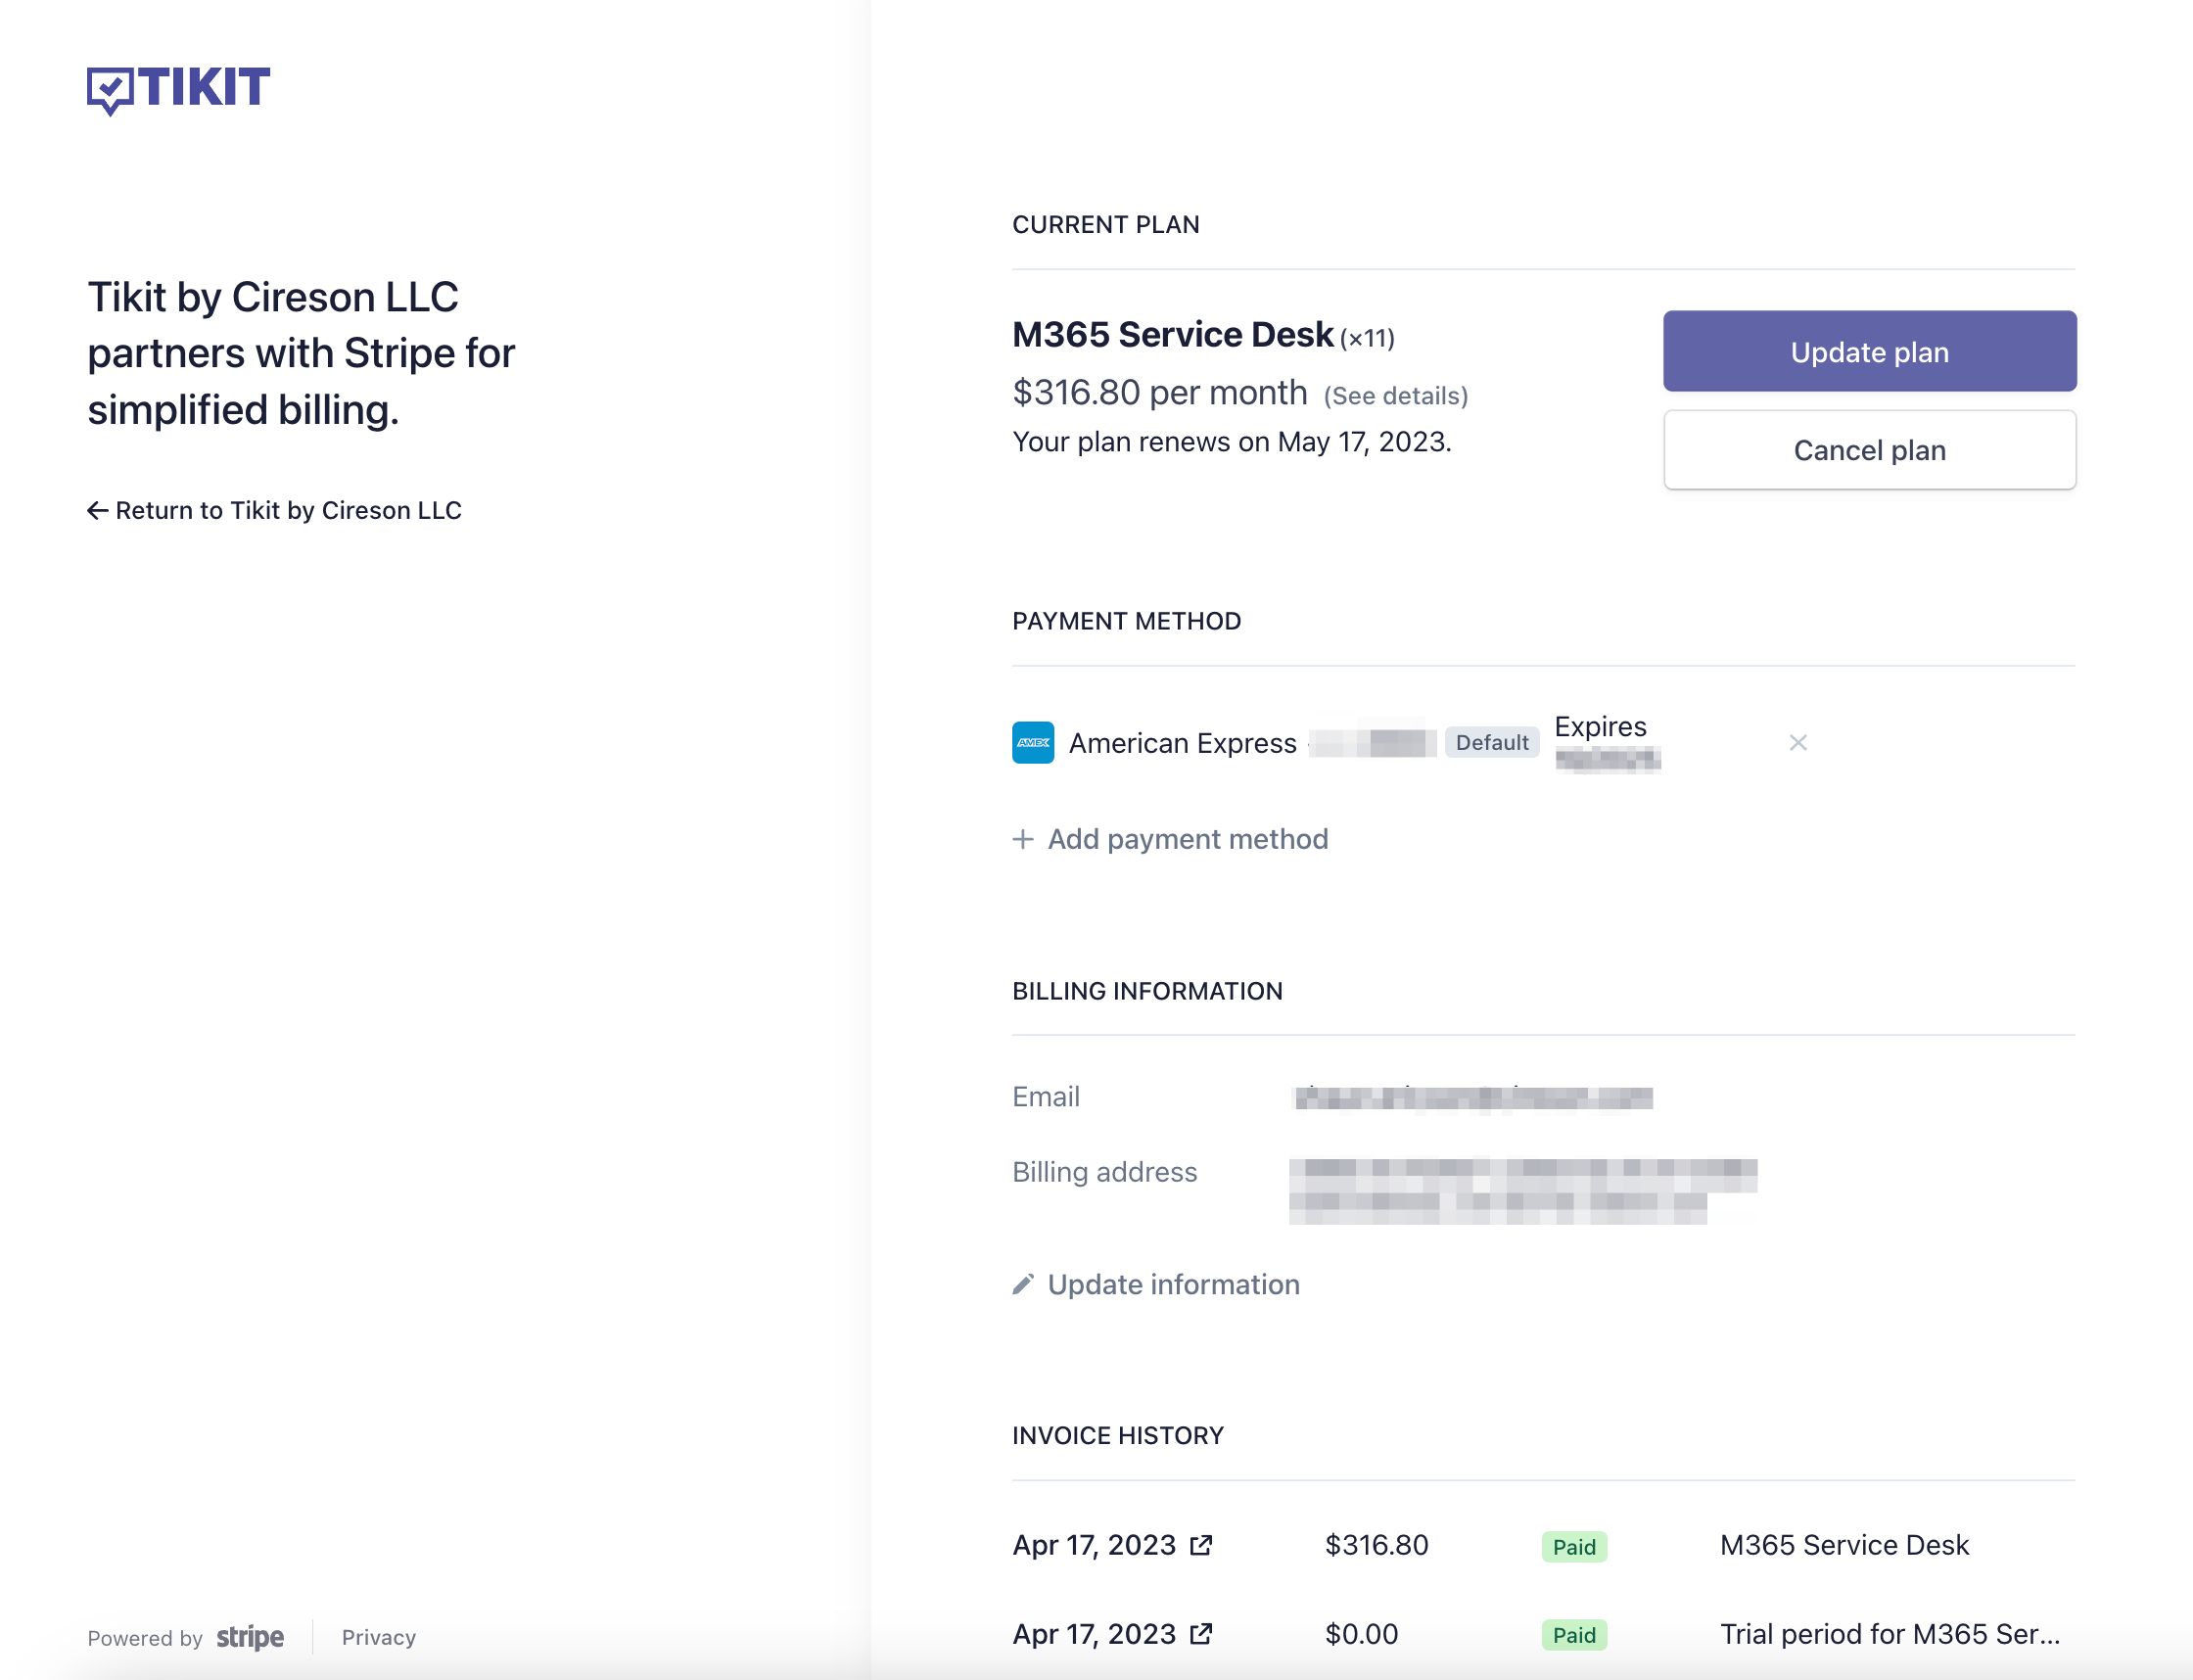
Once on the Stripe customer portal, you can view and update payment method, billing information, and view previous invoices.
To return to Tikit settings, select Return to Tikit on the left.
Once you’re in the Stripe customer portal, you can update your billing information, including account email, billing address, payment method, and plans.
To update your billing info in Stripe:
In Settings > Billing, select Manage Billing to manage your billing information with Stripe.
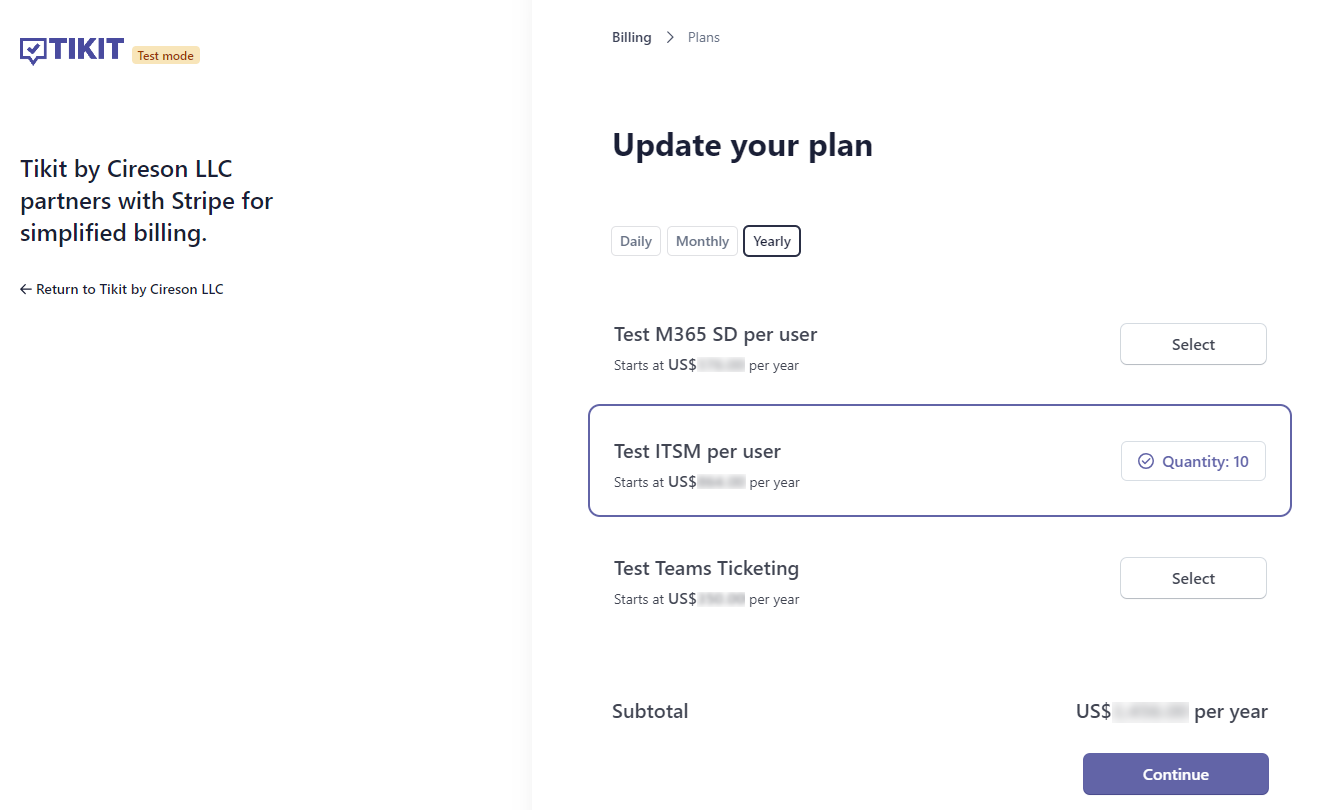
Change Subscription Plan:
Once in the Stripe customer portal, you can change your subscription plan by selecting Update plan andselecting your new subscription plan for Tikit.
Manage Billing
Change Subscription
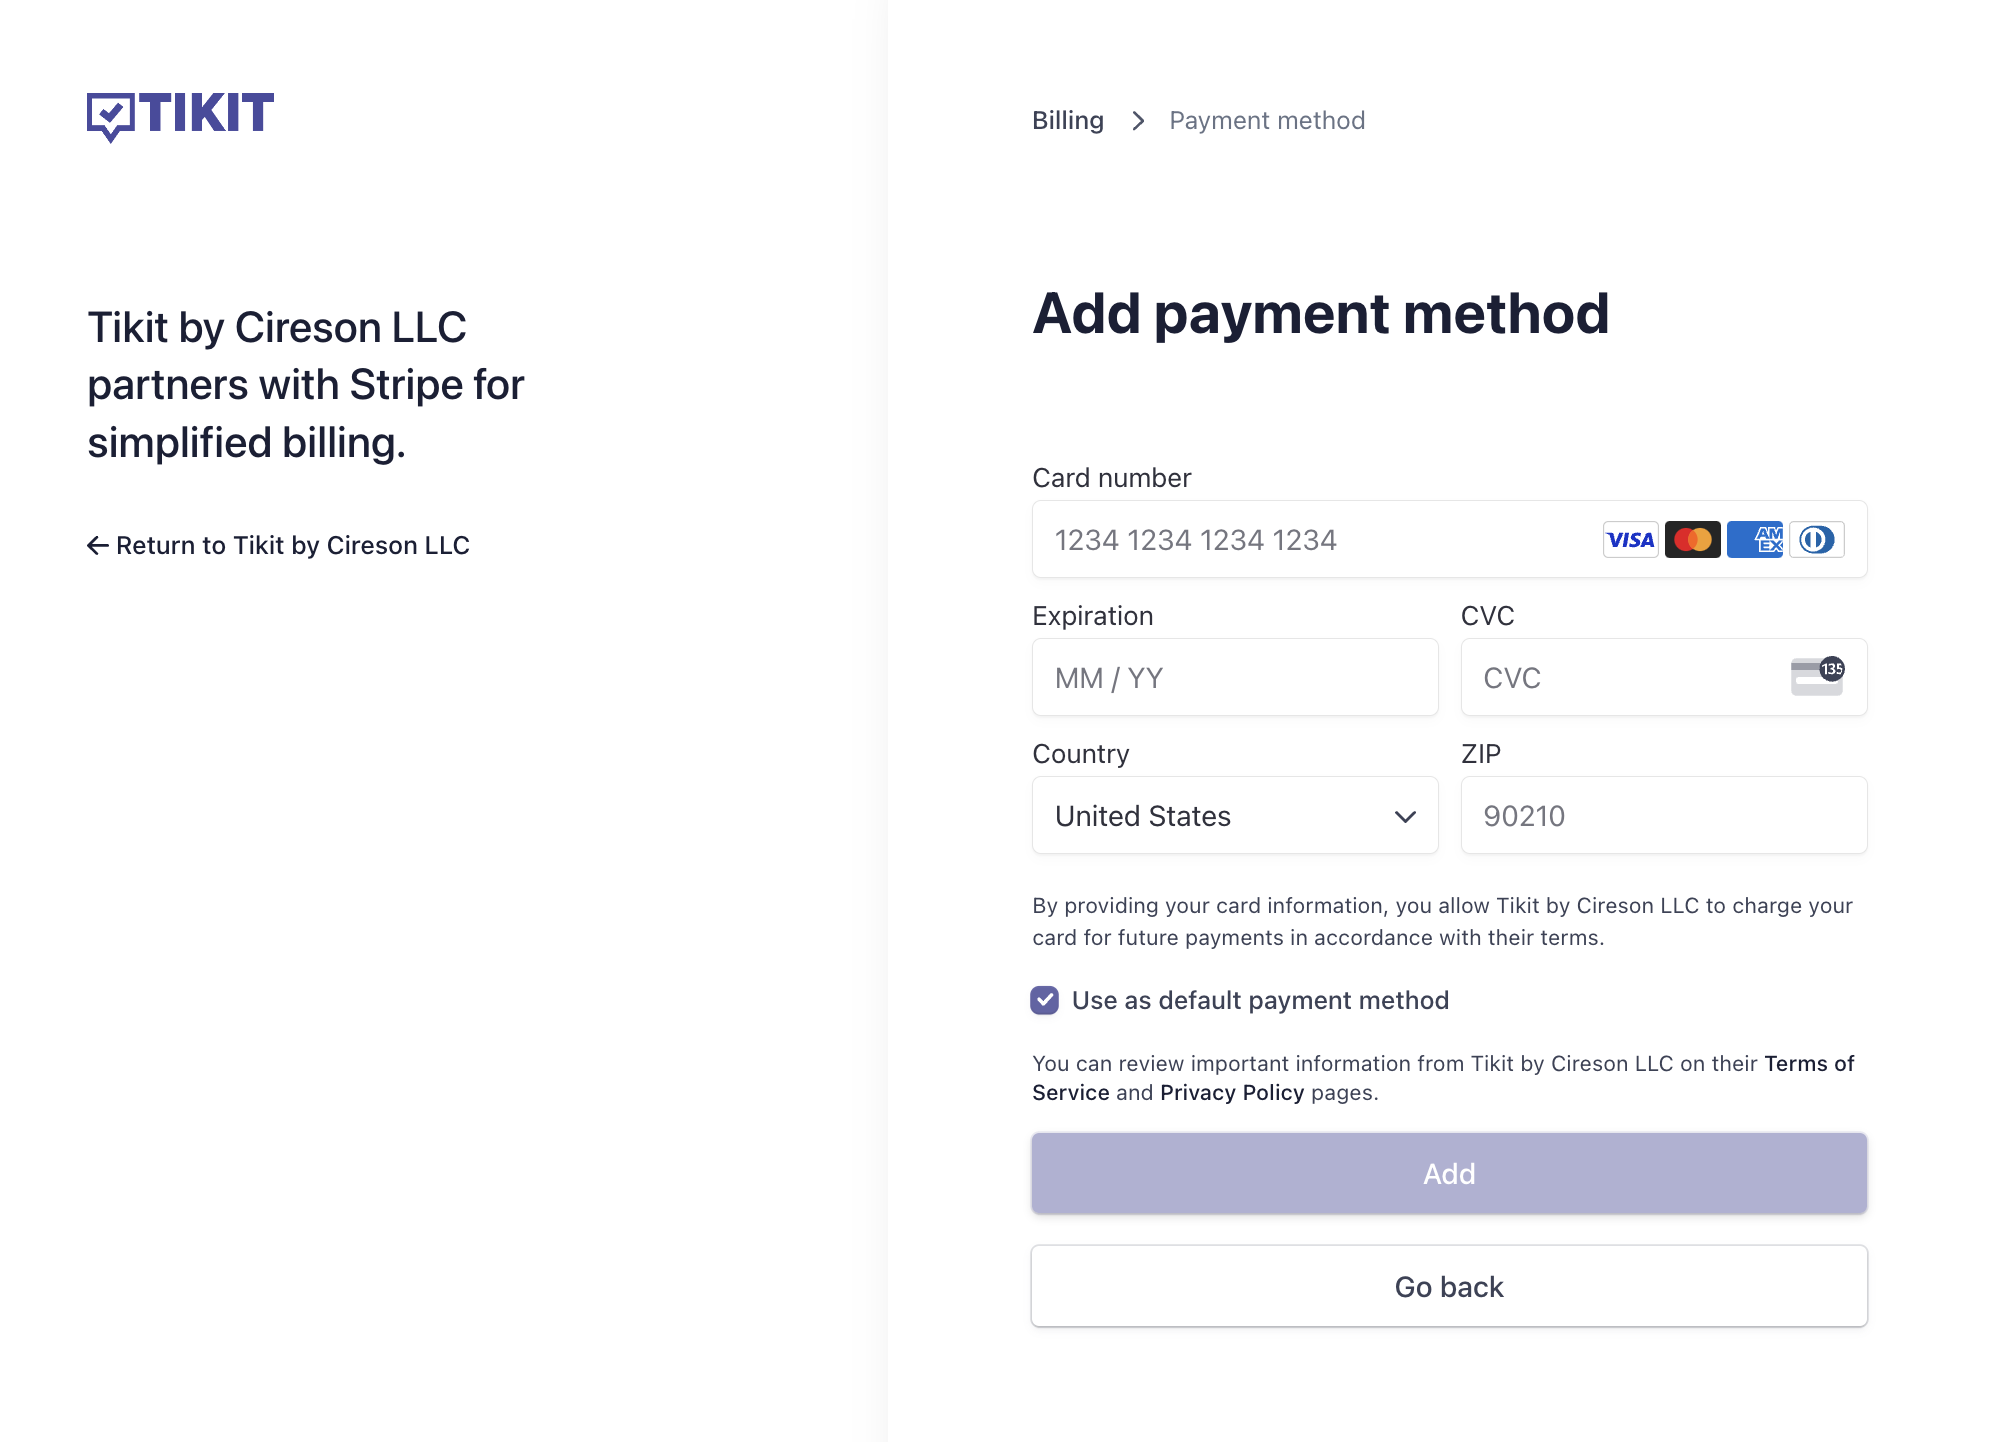
Update Payment Method:
You are also able to update your payment method by selecting + Add payment method to add your new CC information.
You can also remove a payment method by selecting the X next to the CC you would like to remove.
Manage Billing
Add Payment Method
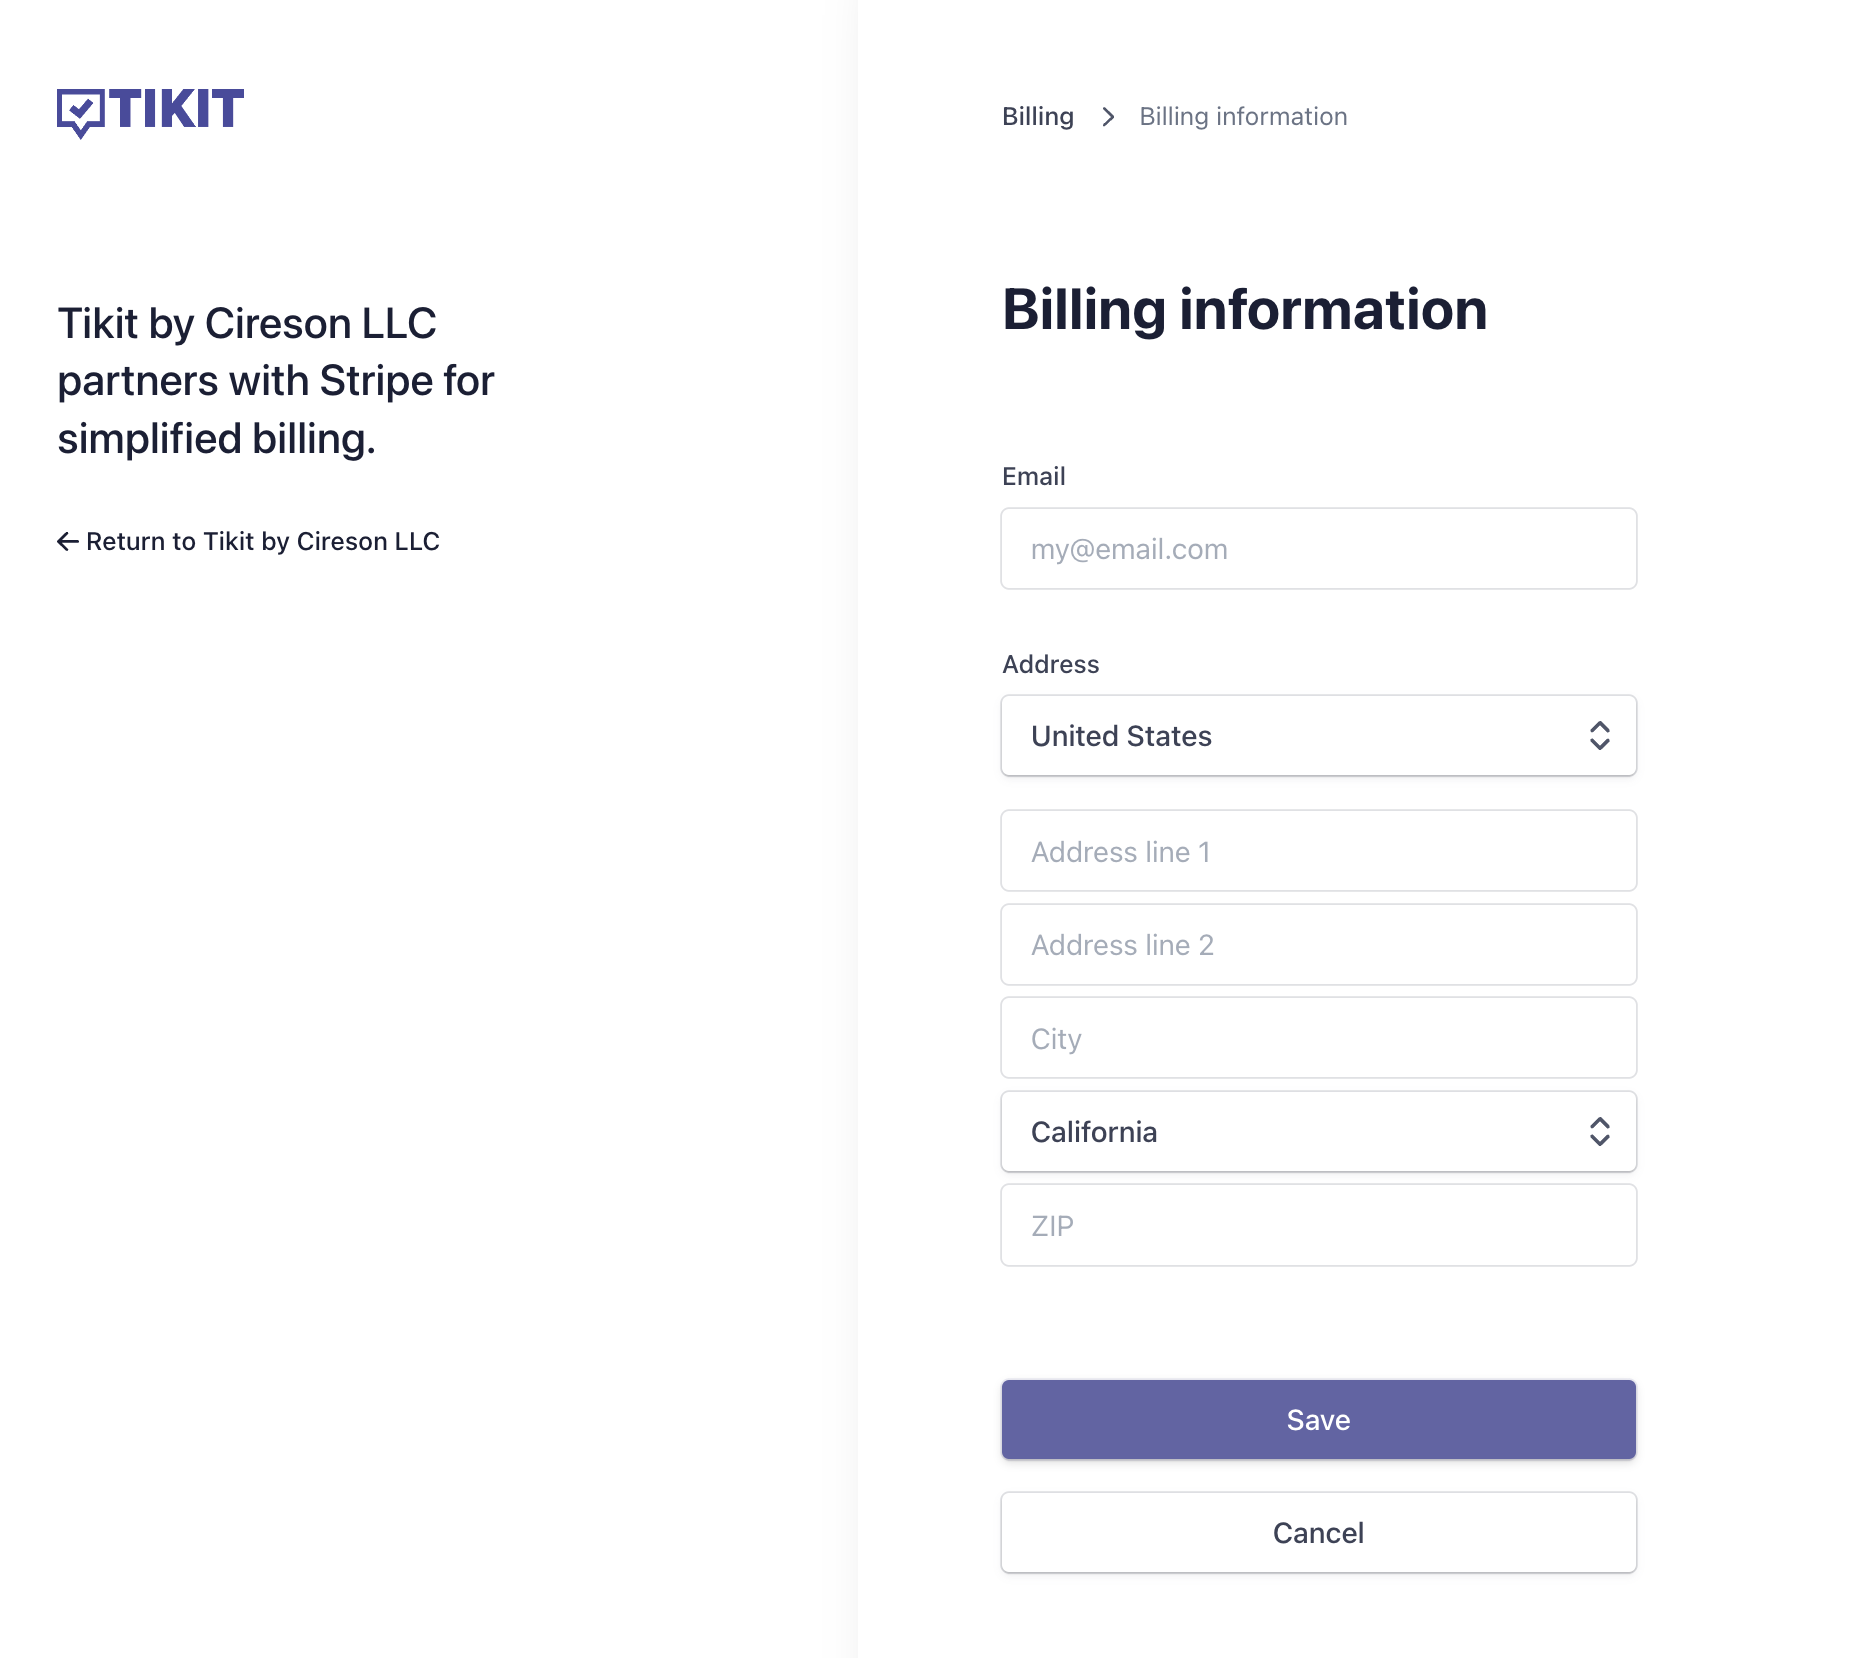
Update Billing Info:
You are also able to update your billing info by by selectingUpdate Information and then enter a new email address and any additional billing information.
Select Save then Return to Tikit to head back to Tikit.
To return to Tikit settings, select Return to Tikit on the left.